Free Crochet Gloves with Fingers Pattern
This post may contain affiliate links, meaning that I may earn a small commission if you make a purchase. See our disclosure policy for more information.
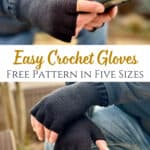

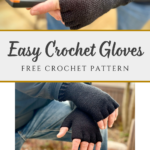
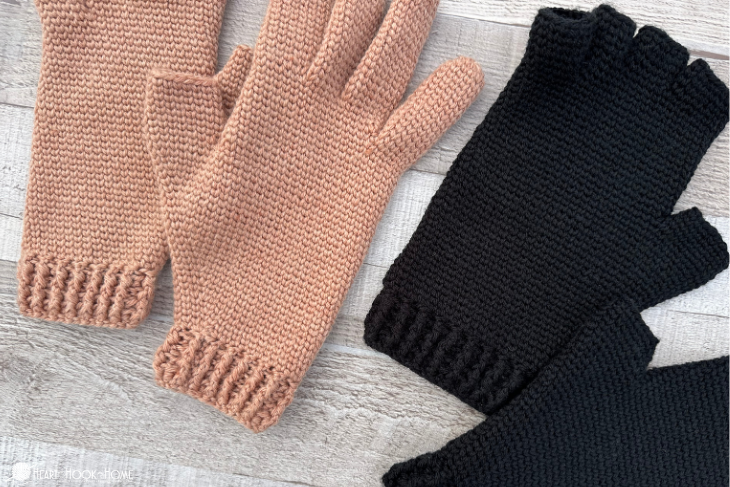
If you’ve been looking for the perfect pattern for crochet gloves, this is it! When designing gloves with fingers I wanted them to span multiple sizes, I wanted to use beginner-friendly stitches, and I wanted them to have a sleek, simple design. I am SO pleased with how these crochet gloves turned out. I know you’ll love them as much as I do! Let’s crochet some gloves with this free pattern!
Crochet Gloves with Fingers Free Pattern
I walk every morning, and I crochet during my walks. Lately it’s been too cold to walk outside, even with gloves on, but when the temperature is in that sweet spot where walking outdoors is bearable, yet my fingers get super cold, gloves are a must-have. So, instead of using the cheap pair from Walmart that I cut the thumbs off of, I decided to crochet a pair of gloves for myself to wear while I walk and crochet on other things. How poetic is that?
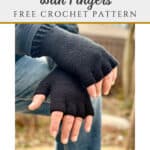
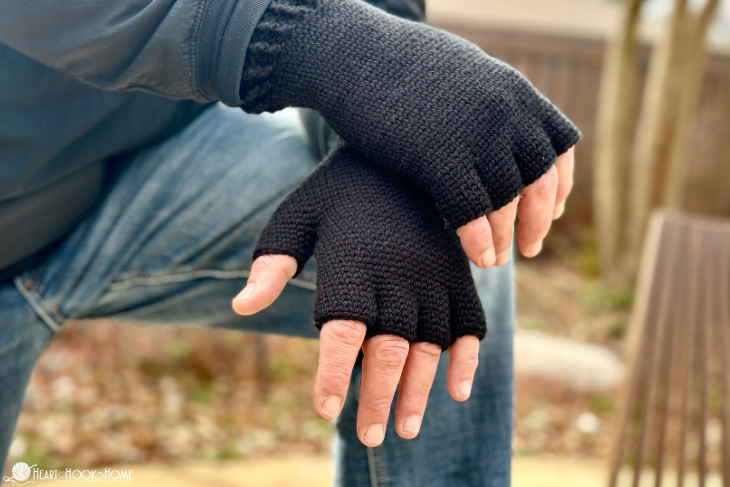
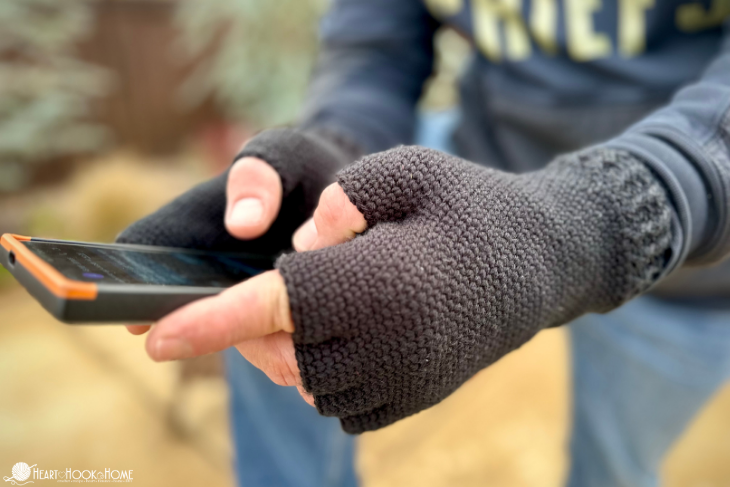
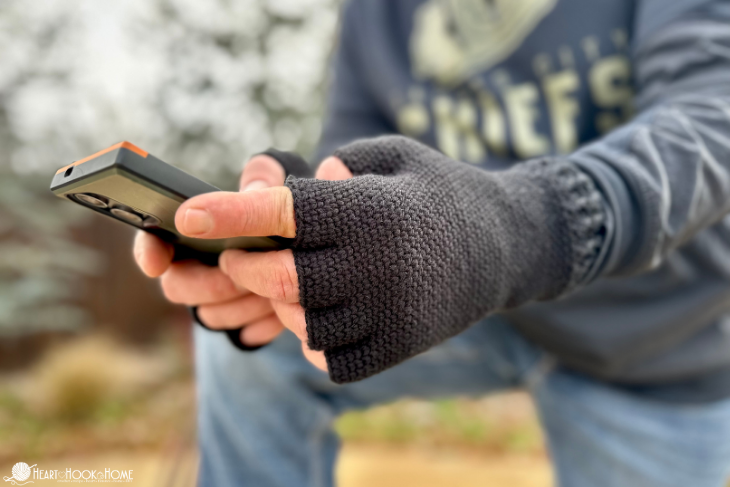
For folks that work in an office setting where the thermostat is always set way too cold, gloves are sometimes not a luxury one can afford while also being able to type. Leave all of the fingers just halfway up and your hands will be warm while also allowing you to type, use a calculator, use the telephone, etc. Awesome!
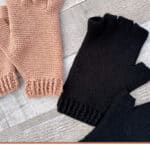
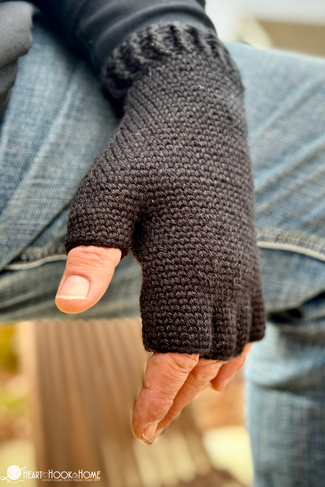
I chose to only go up halfway up the thumb on my walking gloves. I do think I may remove the ends of the index fingers as well, but that will be an easy change if I decide to chop them off. Of course, you could do all half fingers as I have done in the black pair.
You can choose whether to go halfway on each finger, or go all the way up and close each finger off. I love that these are almost texting gloves when even just a couple of the fingers are stopped halfway up. Love how customizable they are!
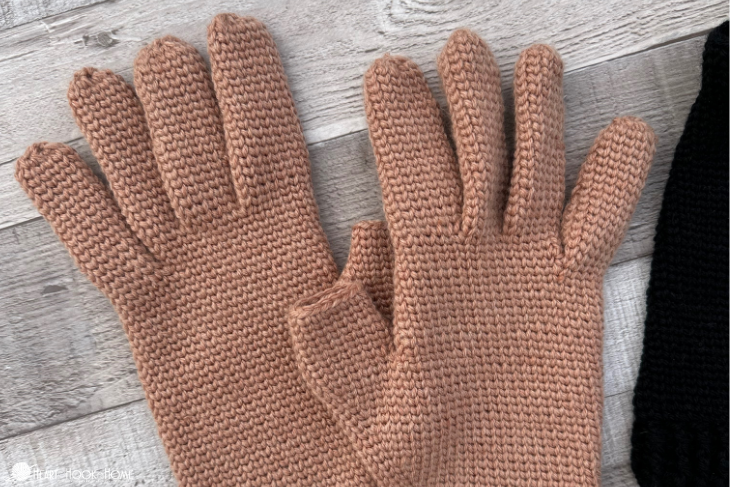
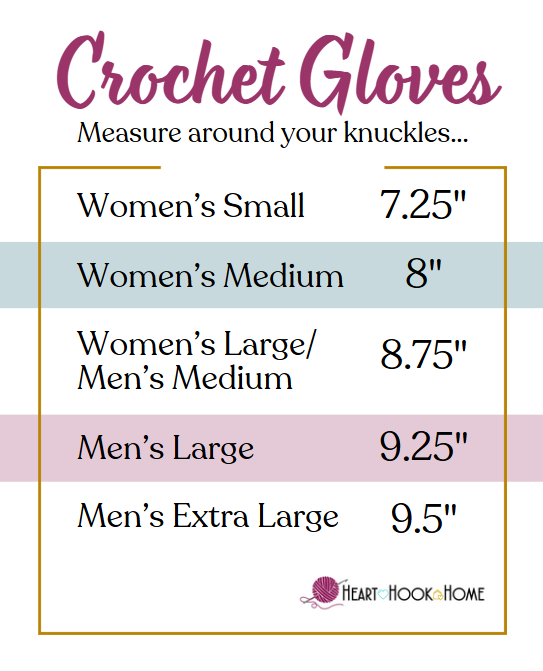
This crochet gloves with fingers pattern spans FIVE sizes from women’s small to men’s x-large. As you’re making the gloves, if you try them on, they should be tight. This is good! The stitches will relax a bit over time and we want the gloves to be nice and fitted even with wear.
Frequently Asked Questions About Crocheted Gloves:
Is it better to knit or crochet gloves? Handmade gloves are many times knitted because of how nice and tight the knit stitches are. They are short stitches which makes a dense fabric. There is a specific crochet stitch, the Waistcoat Stitch, that is short and dense, that works similarly to knitting and makes for excellent crocheted gloves.
What size hook do you need to crochet gloves? Since these gloves are crocheted using a sport weight yarn (size 2) and we want the stitches to be nice and tight, we use a 3.5mm hook. Of course, you’ll want to measure your gauge against the pattern to make sure that your gloves come out the correct size.
How do I know what size gloves to make? To determine the size of gloves you need to make, first you’ll measure the palm of your hand around your knuckles at the widest point. If you fall in between two sizes, go with the larger of the two. Better to be a bit roomy than too tight!
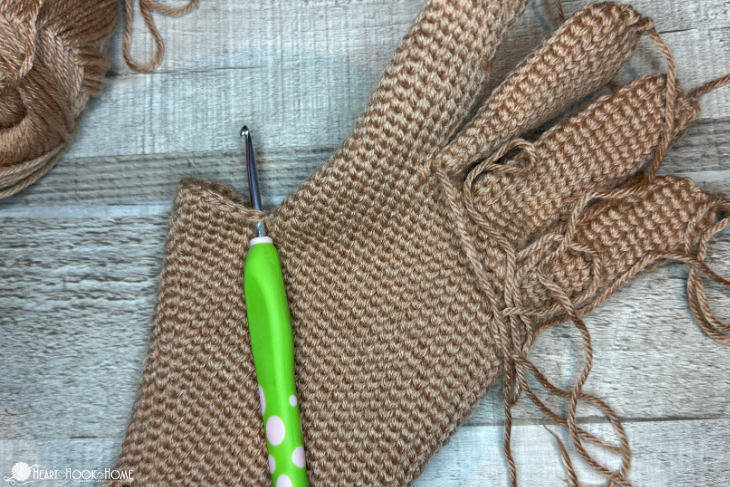
This simple crochet gloves pattern uses a beginner stitch which is a simple variation of the single crochet. Instead of going into the top of the stitch, we’re going into the center of the stitch. The Waistcoat Stitch looks knit and creates an excellent fabric. See a full tutorial for the Waistcoat Stitch here.
Other great yarn choices would be size 2/sock weight yarns such as Mary Maxim Baby’s Best, Bernat Softee Baby yarn, Premier Basix DK, Herrschners Afghan yarn, Premier Colorfusion DK, Hobbii’s Amigo, or any 100% acrylic yarn in a size 2 or thinner size 3.
Let’s make some crocheted gloves!
Grab the ad-free, printable version of this pattern on Ravelry, Etsy, or right here in the Heart Hook Home Blog Shop. Thank you!
If you need help reading a crochet pattern, make sure you head over here and check out this detailed post.
Materials:
Brava Sport (size 2 acrylic yarn – other suggestions listed above)
-approx. (320, 340, 360, 380, 400) yards per pair with full fingers
Crochet hook in size 3.5mm or size needed to obtain gauge
Gauge: 22 sts in 4” and 34 rows in 4” using Waistcoat Stitch
Pattern Notes:
Pattern written using US terms.
For the cuff we are working in rounds, joined and turned.
For the main body we are using continuous rounds with no joining or turning.
It helps to stay looser on the Waistcoat stitches.
BLO = Back Loop Only
Fdc = Foundation Double Crochet
Fpdc/Bpdc = Front Post Double crochet/Back Post Double Crochet
Sizing: (Women’s Small, Women’s Medium, Women’s Large/Men’s Small, Men’s Medium, Men’s Large)
Pattern:
Round 1: Fdc-(31, 33, 35, 37, 39) (or Ch-(33, 35, 37, 39, 41), dc in 3rd ch from hook and in each to end). Join to first st without twisting. (31, 33, 35, 37, 39)
Round 2: Ch-2, do not turn, Fpdc around next, * Bpdc around next, Fpdc around next * repeat between * * around. Join to top of first st. (31, 33, 35, 37, 39)
Round 3: Ch-2, turn, Bpdc around next, * Fpdc around next, Bpdc around next * repeat between * * around. Join to top of first st. (31, 33, 35, 37, 39)
Round 4: Ch-2, turn, Fpdc around next, * Bpdc around next, Fpdc around next * repeat between * * around. Join to top of first st. (31, 33, 35, 37, 39)
Round 5: repeat round 3 (31, 33, 35, 37, 39)
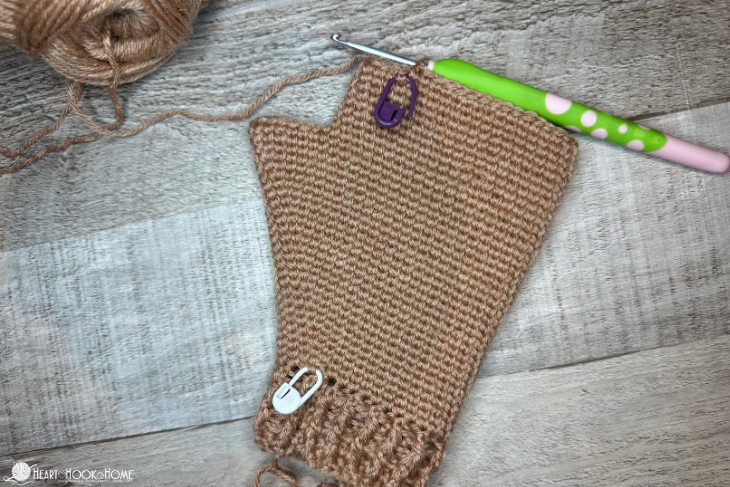
Mark the first stitch of each round from here on out with a stitch marker.
Round 6: Ch-1, turn, 2sc in first st, sc in each st around. Do not join, will work in a spiral for the remainder of pattern. (32, 34, 36, 38, 40)
Round 7: 2wc in first st, wc in next 3 sts, 2wc in next, wc in remaining each remaining st. (34, 36, 38, 40, 42)
Round 8: Wc in each st around. (34, 36, 38, 40, 42)
Round 9: Wc in first st, 2wc in next, wc in next 3 sts, 2wc in next st, wc in remaining each remaining st. (36, 38, 40, 42, 44)
Round 10: repeat round 8 (36, 38, 40, 42, 44)
Round 11: Wc in first 2 sts, 2wc in next, wc in next 3 sts, 2wc in next st, wc in remaining each remaining st. (38, 40, 42, 44, 46)
Round 12: repeat round 8 (38, 40, 42, 44, 46)
Round 13: Wc in first 3 sts, 2wc in next, wc in next 3 sts, 2wc in next st, wc in remaining each remaining st. (40, 42, 44, 46, 48)
Round 14: repeat round 8 (40, 42, 44, 46, 48)
Round 15: Wc in first 4 sts, 2wc in next, wc in next 3 sts, 2wc in next st, wc in remaining each remaining st. (42, 44, 46, 48, 50)
Round 16: repeat round 8 (42, 44, 46, 48, 50)
Round 17: Wc in first 5 sts, 2wc in next, wc in next 3 sts, 2wc in next st, wc in remaining each remaining st. (44, 46, 48, 50, 52)
Round 18: repeat round 8 (44, 46, 48, 50, 52)
Round 19: Wc in first 6 sts, 2wc in next, wc in next 3 sts, 2wc in next st, wc in remaining each remaining st. (46, 48, 50, 52, 54)
Round 20: repeat round 8 (46, 48, 50, 52, 54)
Round 21: Wc in first 7 sts, 2wc in next, wc in next 3 sts, 2wc in next st, wc in remaining each remaining st. (48, 50, 52, 54, 56)
Round 22: repeat round 8 (48, 50, 52, 54, 56)
Round 23: Wc in first 8 sts, 2wc in next, wc in next 3 sts, 2wc in next st, wc in remaining each remaining st. (50, 52, 54, 56, 58)
Round 24: repeat round 8 (50, 52, 54, 56, 58)
Round 25: Wc in first 9 sts, 2wc in next, wc in next 3 sts, 2wc in next st, wc in remaining each remaining st. (52, 54, 56, 58, 60)
Round 26: repeat round 8 (52, 54, 56, 58, 60)
Round 27: Wc in first 10 sts, 2wc in next, wc in next 3 sts, 2wc in next st, wc in remaining each remaining st. (54, 56, 58, 60, 62)
Round 28: repeat round 8 (54, 56, 58, 60, 62)
Round 29: Wc in first 11 sts, 2wc in next, wc in next 3 sts, 2wc in next st, wc in remaining each remaining st. (56, 58, 60, 62, 64)
Round 30: repeat round 8 (56, 58, 60, 62, 64)
Round 31: Wc in first 12 sts, 2wc in next, wc in next 3 sts, 2wc in next st, wc in remaining each remaining st. (58, 60, 62, 64, 66)
Round 32: repeat round 8 (58, 60, 62, 64, 66)
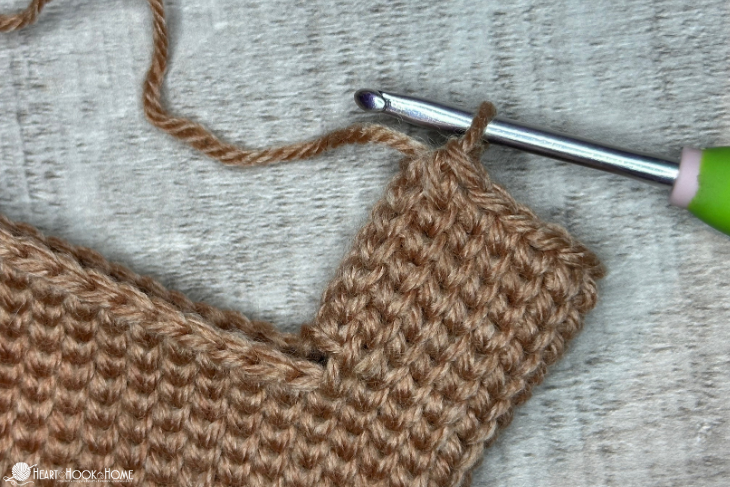
Thumb Hole:
Round 33: Wc in first 7 sts, Ch-1, sk-17 sts, Wc in remaining sts around. (42, 44, 46, 48, 50) sts and a thumbhole.

Round 34: Wc in first 7 sts, sc in BLO of ch, Wc in each remaining st around. (42, 44, 46, 48, 50)
Rounds 35 through (41, 41, 43, 43, 45): Wc in each st around. (42, 44, 46, 48, 50)
Pinky Finger:
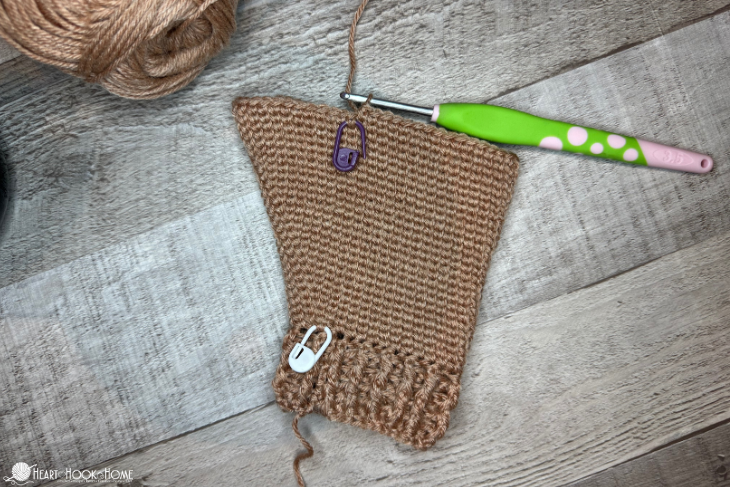
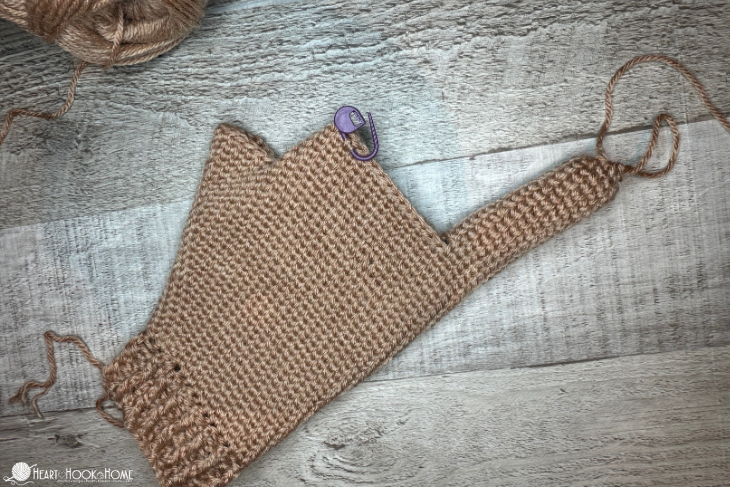
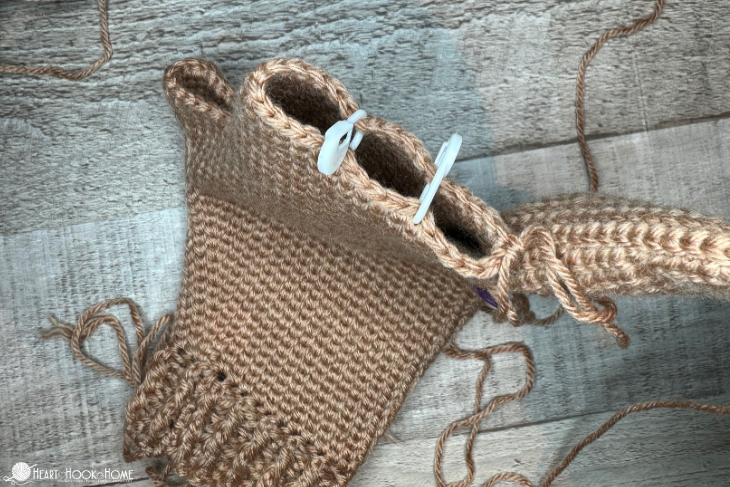
Wc in (30, 31, 32, 34, 35) sts, ch-(2, 2, 2, 3, 3) (should get you about ¾ of the way around, and land on a good spot to start a pinky, see photo).
Wanna save this for later?
Round 1: Count backward so that the pinky will take up 12 sts of the hand. Wc in each of those 12 sts, sc in BLO of each of the chains. (14, 14, 14, 15, 15)
Rounds 2 through 7: Wc in each st around, working in a spiral. (14, 14, 14, 15, 15)
Round 8: Wc in all but last 2 sts, Wc2tog. (13, 13, 13, 14, 14)
Rounds 9 through 12: repeat round 2 (13, 13, 13, 14, 14)
Round 13: repeat round 8 (12, 12, 12, 13, 13)
Rounds 14 through 17: repeat round 2 (12, 12, 12, 13, 13)
Round 18: Wc2tog around. (6, 6, 6, 7, 7)
Fasten off leaving long enough tail for cinching and weaving in ends.
Hand:
Attach in same st as Pinky Finger ended…
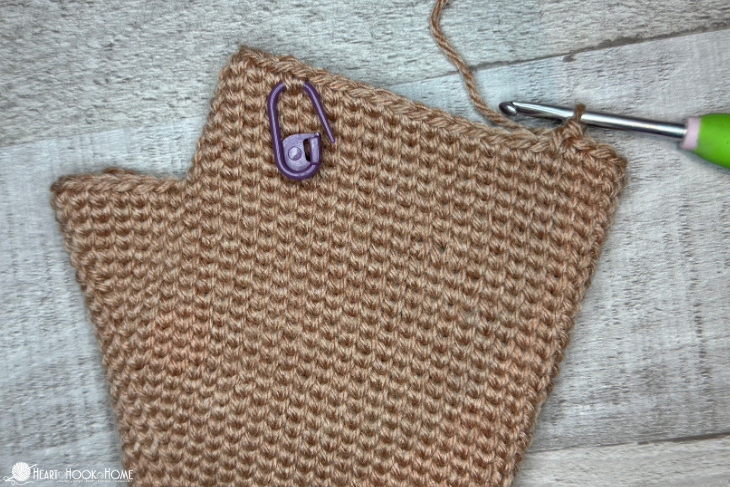
Round (42, 42, 44, 44, 46): Ch-1 (counts as st), Wc in each wc st around, Wc in the side of the pinky on the opposite side (see photo), BLO of each of the chs from the inside of the pinky finger. (34, 36, 38, 41, 43)
Rounds (43, 43, 45, 45, 47) through (45, 45, 47, 47, 49): Wc in each st around. (34, 36, 38, 41, 43)
Plot out the other three fingers using stitch markers:
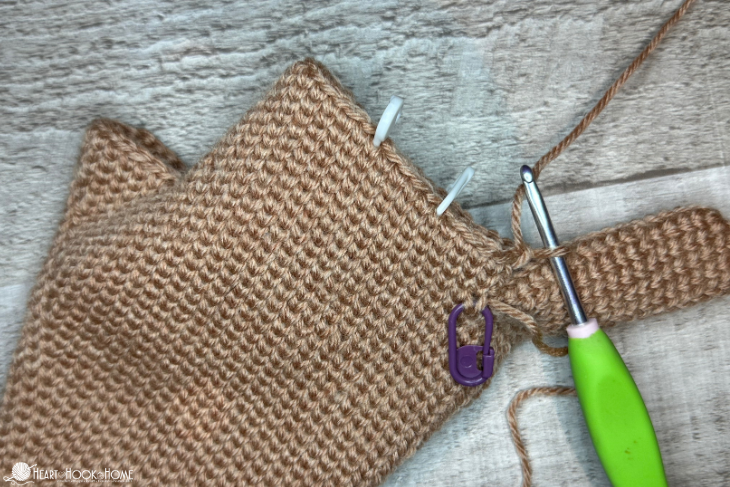
(12, 12, 14, 15, 15) sts for the Ring Finger
(10, 10, 10, 12, 14) sts for the Middle Finger
(12, 14, 14, 14, 14) sts for the Index Finger
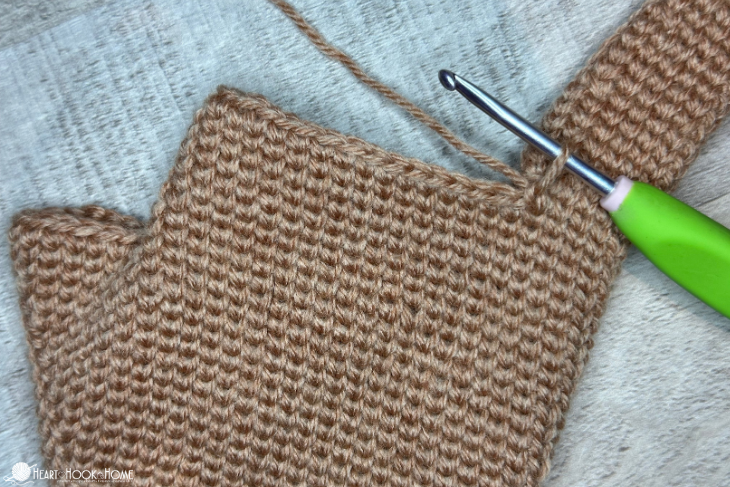
Ring Finger:
Where still attached…
Round 1: Wc in each st to marker, Ch-(2, 2, 2, 3, 3), jump across and Wc in each of the designated sts. (14, 14, 16, 18, 18)
Round 2: Wc in each Wc, sc in BLO of each of the chains, Wc in each remaining st around. (14, 14, 16, 18, 18)

Rounds 3 through 9: Wc in each st around. (14, 14, 16, 18, 18)
Round 10: Wc in all but last 2 sts, Wc2tog. (13, 13, 15, 17, 17)
Rounds 11 through 15: repeat round 3 (13, 13, 15, 17, 17)
Round 16: repeat round 10 (12, 12, 14, 16, 16)
Rounds 17 through 19: repeat round 3 (12, 12, 14, 16, 16)
Round 20: Wc2tog around. Wc in extra st for largest two sizes. (6, 6, 7, 7, 7)
Fasten off leaving a long enough tail for cinching and weaving in ends.
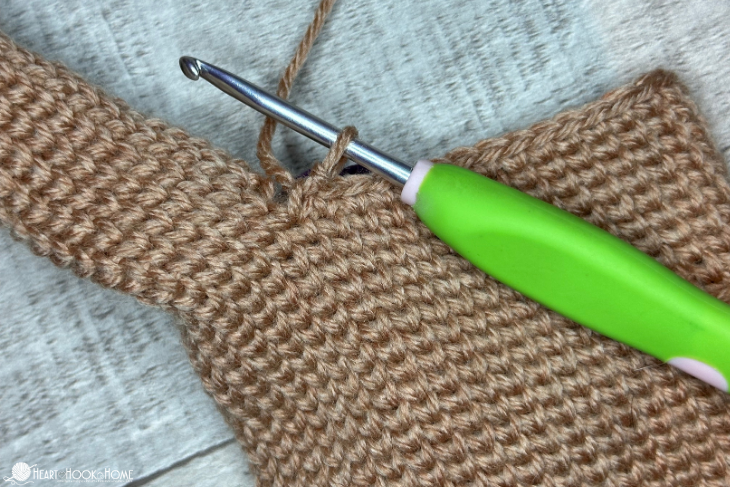
Middle Finger:
Attach in same as Ring Finger ended (base of that final ring finger st).
Round 1: Ch-1 (counts as st), Wc in each st to marker, Ch-(2, 2, 2, 3, 3), jump across and Wc in each of the designated sts, Wc in same as Ring Finger st, sc in BLO of each of the next two sts. Do not join. (16, 16, 16, 20, 22)
Round 2: Wc in each st to ch, sc in BLO of each ch st, Wc in each remaining st around. (16, 16, 16, 20, 22)
Rounds 3 through 10: Wc in each st around. (16, 16, 16, 20, 22)
Round 11: Wc in all but last 2 sts, Wc2tog. (15, 15, 15, 19, 21)
Rounds 12 through 18: repeat round 3 (15, 15, 15, 19, 21)
Round 19: repeat round 11 (14, 14, 14, 18, 20)
Round 20: repeat round 3 (14, 14, 14, 18, 20)
Round 21: Wc2tog around. (7, 7, 7, 9, 10)
Fasten off leaving a long enough tail for cinching and weaving in ends.
Index Finger:
Attach in the same as Middle Finger ended (side of final st).
Round 1: Ch-1 (counts as st), Wc in each st around, Wc in side of Middle Finger st, sc in BLO of each of the ch sts. (16, 18, 18, 19, 19)
Rounds 2 through 9: Wc in each st around. (16, 18, 18, 19, 19)
Round 10: Wc in all but last 2 sts, Wc2tog. (15, 17, 17, 18, 18)
Rounds 11 through 16: repeat round 2 (15, 17, 17, 18, 18)
Round 17: repeat round 10 (14, 16, 16, 17, 17)
Rounds 18 through 20: repeat round 2 (14, 16, 16, 17, 17)
Round 21: Wc2tog around. Wc in extra st for largest two sizes. (7, 8, 8, 9, 9)
Fasten off leaving long enough tail for cinching and weaving in ends.
Thumb:
Attach in same as hand ended.
Round 1: Ch-1 (counts as sc), Wc in each st around, Wc in side of thumb, Wc in the chain made. (20)
Rounds 2 through 5: Wc2tog, Wc in each remaining st. (ending with 16 sts)
Rounds 6 through 9: Wc in each st around. (16)
Round 10: repeat round 2 (15)
Rounds 11 through 16: repeat round 6 (15)
Round 17: repeat round 2 (14)
Rounds 18 through 20: repeat round 6 (14)
Round 21: Wc2tog around. (7)
Fasten off leaving long enough tail for cinching and weaving in ends.
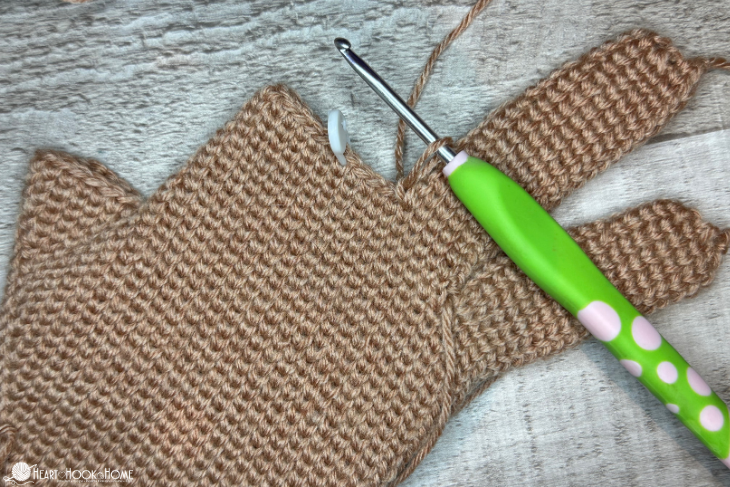
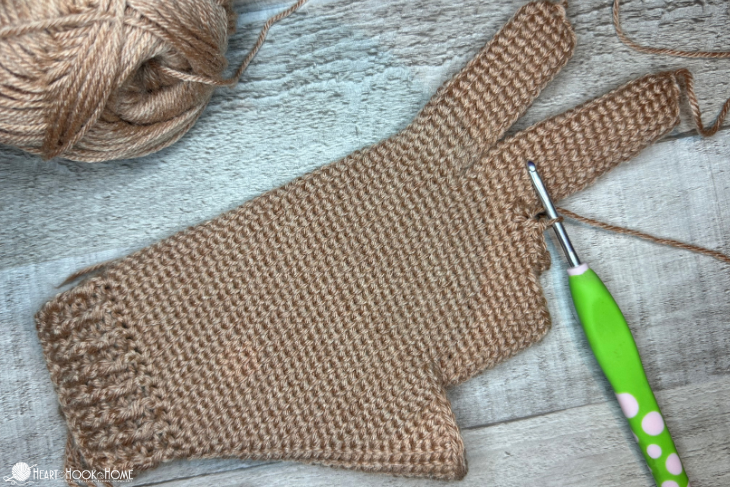
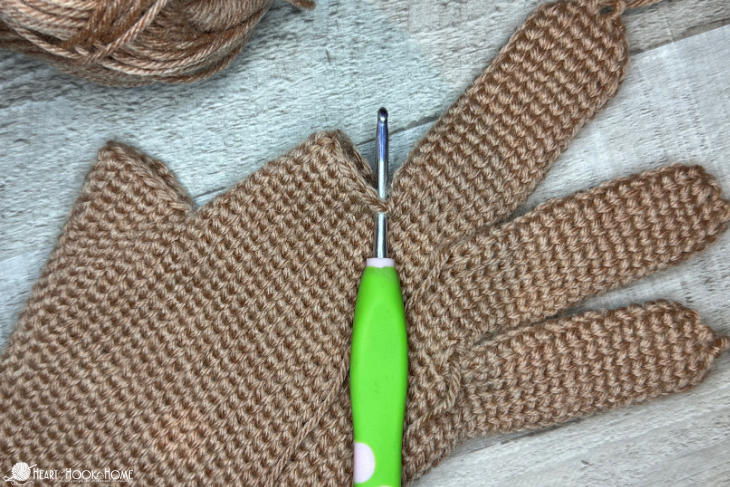
Cinch up each finger tip and weave in ends securely. You’re finished!
I can’t wait to see yours! Be sure to tag @HeartHookHome across all social media, or share in the Heart Hook Home Crochet Community on Facebook.
I hope that you love these crocheted gloves, and that you’ll make some for everyone in the family. They are a great way to show your people that you love them, and you’re sure to love them, too!
More accessories patterns:
Texting Gloves Free Crochet Pattern (3 sizes)
All In The Family Crochet Leg Warmers
Delphine Scarf with Sleeves Crochet Pattern
Betty’s Infinity Scarf: Free Granny Stitch Crochet Pattern


4 Comments