Tunisian Knitling Stitch Tutorial
This post may contain affiliate links, meaning that I may earn a small commission if you make a purchase. See our disclosure policy for more information.
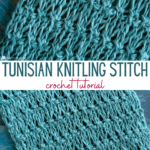
The Tunisian Knitling crochet stitch is so pretty to look at – and easier to make than it looks! Let’s take the Tunisian game up a notch with this gorgeous Tunisian stitch.

Tunisian Knitling Stitch Tutorial
This Tunisian stitch combines a few basic techniques that give a stunning effect. It definitely puts off a “knit” vibe but it is absolutely crochet!
To make the Tunisian Knitling stitch, you’ll need to know how to make the Tunisian Knit Stitch, and the Tunisian Extended Simple Stitch. We’ll go through this stitch together in the video below!

All return passes are worked as per regular Tunisian Crochet. This stitch is best explained in the video tutorial below, but written out it would look like this…
Start with an even number of chains.
Tunisian Simple Stitch the foundation row as normal.
For the next row you’ll do a row of Tunisian Knit Stitch.
This next row, the third row, is where the fun starts. 😉 Across this entire row, you’ll crochet 2TESS2tog, then on the outside stitch you’ll make one Tunisian Extended Simple Stitch.
Written in plain English this means to make (two) Tunisian Extended Simple Stitch decreases in the same two stitches. Each individual TESS2tog is worked as: insert hook under next two vertical bars and pull up a loop, then chain one.
Since we are decreasing, but doing it twice in the same two stitches, the overall stitch count remains the same. (This is covered fully in the video tutorial below!)
Wanna save this for later?
For the next TWO rows, Tunisian Knit Stitch across.
Alternate (1) 2TESS2tog row with (2) Tunisian Knit Stitch rows for the duration of the pattern.
When ready to fasten off, slip stitch across and fasten off.
Let’s go through this together in video!

More Tunisian for you:
How to Work Tunisian Crochet in the Round
Honeycomb Cardi Crochet Pattern
The Bee’s Knees Face Cloth: Free Crochet Pattern


3 Comments