Free Jewelry Saver Crochet Pattern
This post may contain affiliate links, meaning that I may earn a small commission if you make a purchase. See our disclosure policy for more information.


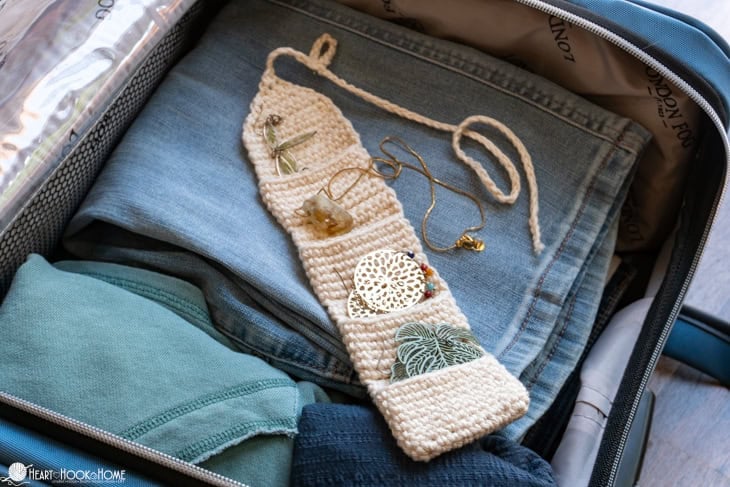
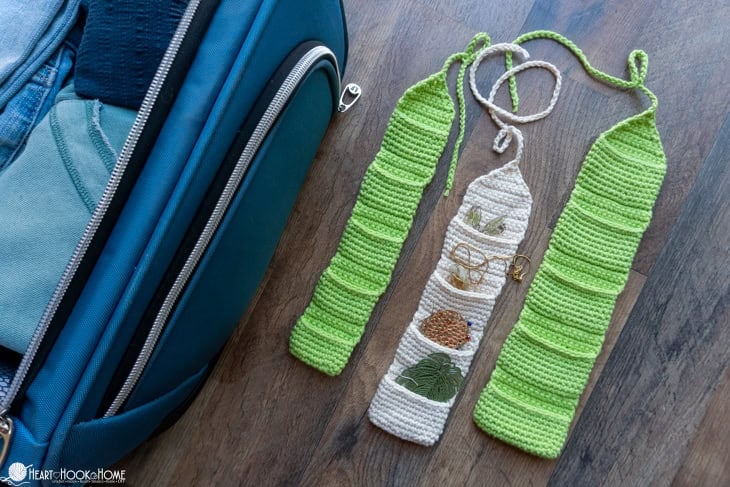
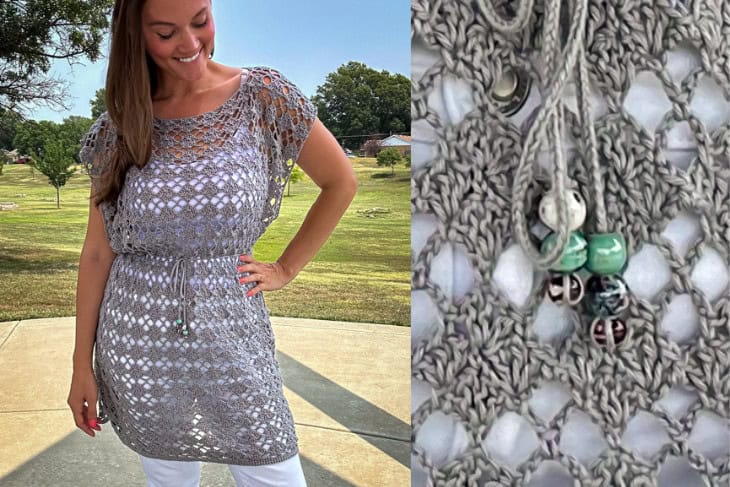
I don’t know about you, but I love to travel. I pack light (typically use a carry-on only, no matter where I’m going) and I’ve tried various things to keep my necklaces from tangling in my suitcase. Instead of separating necklaces out throughout my luggage so they’re not touching or spending a bunch of time untangling them when we arrive at our destination, I created a free crochet pattern for a jewelry saver for luggage. Grab your hook and let’s make one!
Jewelry Saver Crochet Pattern
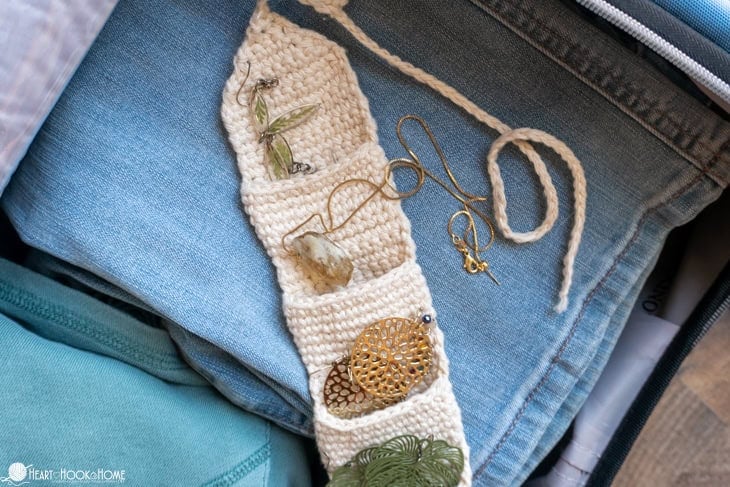
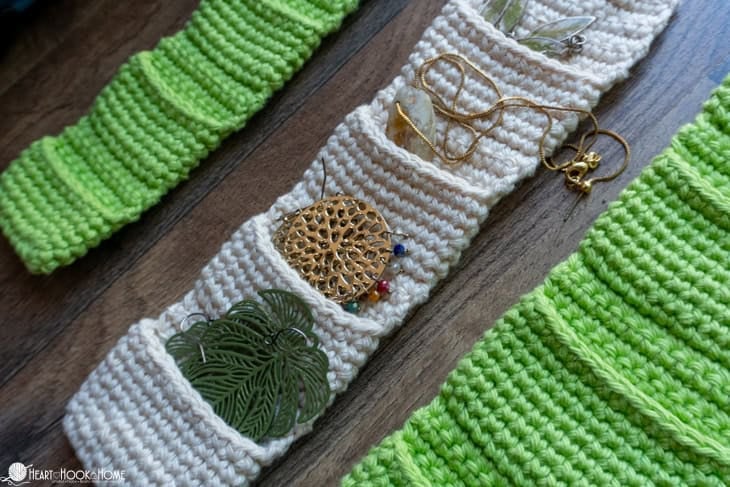
Don’t you hate when you pack jewelry in your suitcase, and the chains and necklaces get all tangled? Nothing worse than getting dressed for the first night out in your destination and having to stop to unpick your accessories before you can hit the town. Find any ol’ knob or hook in the hotel room from which to hang your saver using the chain we use as a tie closure. Brilliant!
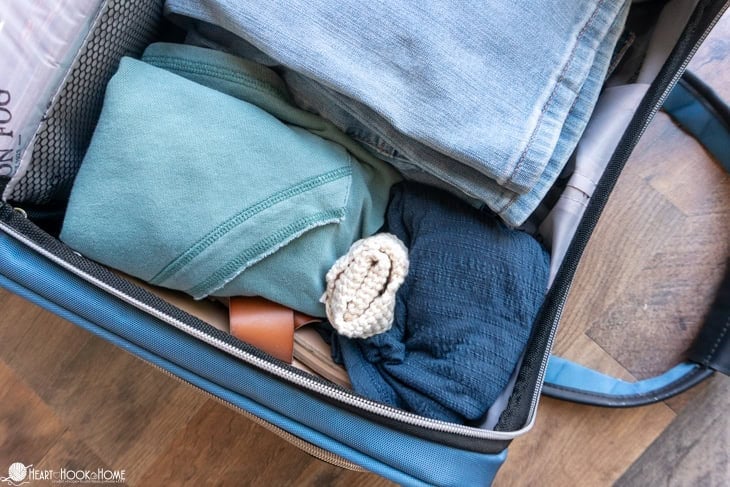
These jewelry savers are completely customizable, meaning that you can make a small, medium, or large, and add as many pockets as you need for the number of accessories you’re taking.
We want to use a worsted weight cotton for this project and I am using Craft Cotton from Herrschners. This is a beautiful cotton that works up nicely for all kinds of things. Including jewelry savers.
There are multiple sizes of this pattern and you can create as many pockets/pouches as you like. If you have big earrings, make the larger size. If you have a lot of smaller necklaces, make the smaller size and add as many pockets as needed.
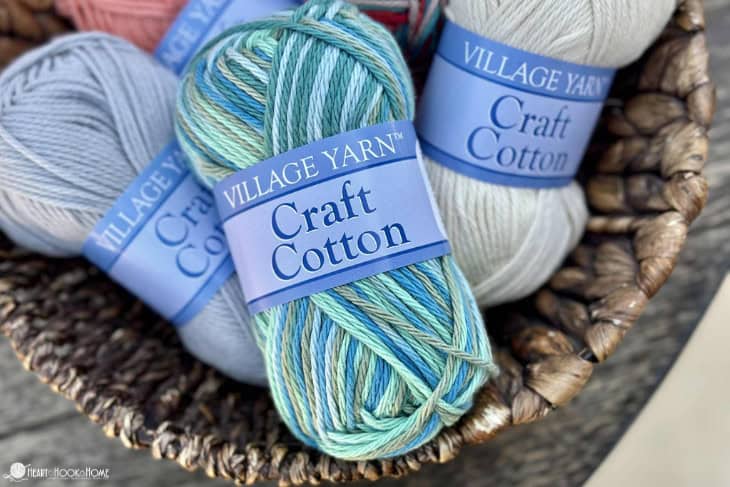
Other cottons that would work well for this project would be Dishie from WeCrochet, Herrschners Cottage Cotton, Premier Cotton Sprout, Lion Brand 24/7 Cotton, or any other worsted weight cotton or cotton blend.
Grab the ad-free, printable version of this pattern on Ravelry, Etsy, or right here in the Heart Hook Home Blog Shop. Thank you!
Materials:
Herrschners Craft Cotton (worsted weight 100% cotton)
-less than one skein per saver
Crochet hook in size G/4mm
Gauge: Not super important, but approx. 10 sts in 2” width
Pattern Notes:
Pattern written using US terms.
The chain at the beginning of the rows between pockets does NOT count as a stitch.
If you need help reading a crochet pattern, make sure you head over here and check out this detailed post.
Sizes: (small, medium, large) = (2”, 3”, 4”) width
Pattern:
Round 1: Ch-(8, 13, 18), 3sc in 2nd ch from hook, sc in (5, 10, 15) sts, 5sc in final ch, working up opposite side of chain, sc in next (5, 10, 15) sts, 2sc in same as beg sts. Do not join, work in a spiral. (20, 30, 40)
Rounds 2 through (6, 8, 10): sc in each st around. (20, 30, 40)
Sc as many sts as needed to get back to the edge. (does not affect st count)
Spacer:
Row (7, 9, 11): Ch-1, turn, sc in (10, 15, 20) sts only. (these sts should be exactly half of the total and centered on the back half).
Rows (8, 10, 12) through (10, 12, 14): Ch-1, turn, sc in (10, 15, 20) sts. (10, 15, 20)
Wanna save this for later?
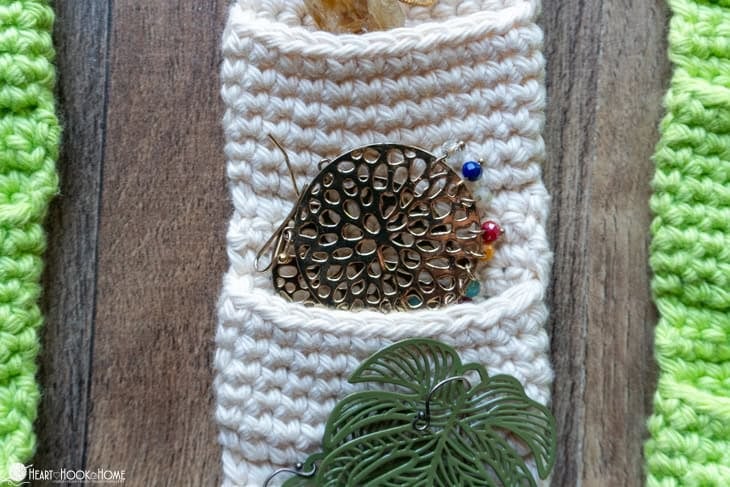
Pocket/Pouch:
Round (11, 13, 15): Ch-1, turn, sc in FLO of each st across, turn, and working in a spiral, sc in FLO of each remaining st around. Do not join. (20, 30, 40)
Rounds (12, 14, 16) through (16, 20, 24): sc in each st around. (20, 30, 40)
Sc as many sts as needed to get back to the edge. (does not affect st count)
Spacer:
Row (17, 21, 25): Ch-1, turn, sc in (10, 15, 20) sts only. (should be centered on the back half of the saver).
Rows (18, 22, 26) through (20, 24, 28): Ch-1, turn, sc in (10, 15, 20) sts. (10, 15, 20)
Pocket/Pouch:
Round (21, 25, 29): Ch-1, turn, sc in FLO of each st across, turn, and working in a spiral, sc in FLO of each remaining st around. Do not join. (20, 30, 40)
Rounds (22, 26, 30) through (26, 32, 38): sc in each st around. (20, 30, 40)
Sc as many sts as needed to get back to the edge. (does not affect st count)
Continue making as many pockets/pouches as needed.
When enough pockets have been added, time to make the hanger.
Hanger:
Sc as many sts as needed to get back to the edge. (does not affect st count)
Row 1: Ch-1, turn, sc in (10, 15, 20) sts only. (should be centered on the back half of the saver).
Row 2: Ch-1, turn, sc2tog, sc in (6, 11, 16) sts, sc2tog. (8, 13, 18)
Rows 3 through (5, 7, 10): Ch-1, turn, sc2tog, sc until 2 sts remain, sc2tog. (ending with 2, 3, 2 sts)
Row (6, 8, 11): Ch-1, turn, sctog all sts together. (1) Do not fasten off.
To finish: Ch-20, sl st in 7th ch made, ch-(40, 50, 60) (or to desired/necessary length to wrap around the saver several times)
Fasten off and weave in all ends.
I hope you love this pattern and that it gets plenty of use, and all over the place! Where will you take your jewelry saver?
More free patterns:
31 Useful Crochet Patterns for Babies
Personal Pouch: Free Crochet Pouch Pattern
Space Saving Stuffable Travel Pillow Free Crochet Pattern


4 Comments