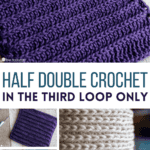
Half Double Crochet in Third Loop Only (Flat and Round)
This post may contain affiliate links, meaning that I may earn a small commission if you make a purchase. See our disclosure policy for more information.
Half double crochet is one of my favorite crochet stitches. More exciting than single crochet but without the full commitment of double crochet. 😉 If you can do the half double crochet, I have good news! You are already able to complete the third loop half double crochet. Watch the video below!
Half Double Crochet in Third Loop Only
The Half Double Crochet stitch is a staple in the crochet world. This is a basic, beginner-friendly stitch that is a favorite of all crocheters from newbies to experienced hookers. There is an aspect of the Half Double Crochet that makes it possible to create stunning ridges, or a knit-like appearance, just by changing the portion of the stitch into which we insert our hook. Sound easy? Probably because it is. Let’s learn how!

In the Half Double Crochet stitch there are three loops: the “front loop” the “back” loop” (these two are present in ALL crochet stitches), and the “third loop” that runs across the back of the stitch (or front of the stitch after you turn).
This is created when we make that yarn over before inserting our hook to create the stitch. It’s what helps give the Half Double a bit more height than the single, but without the second “yarn over pull through two” that would make the stitch a double crochet.
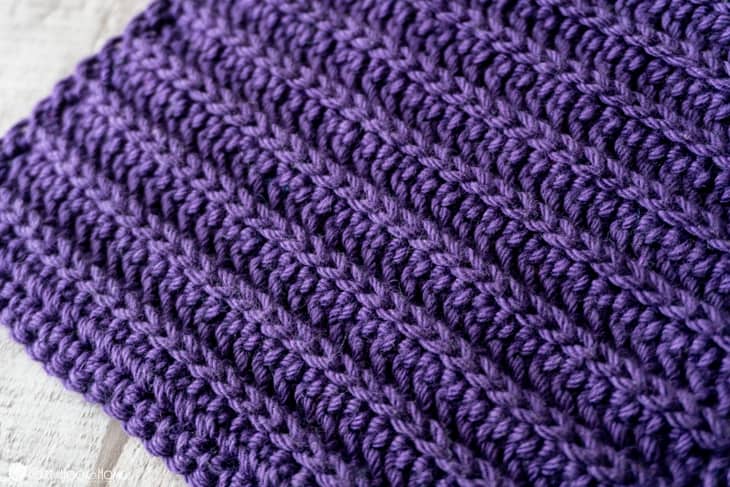
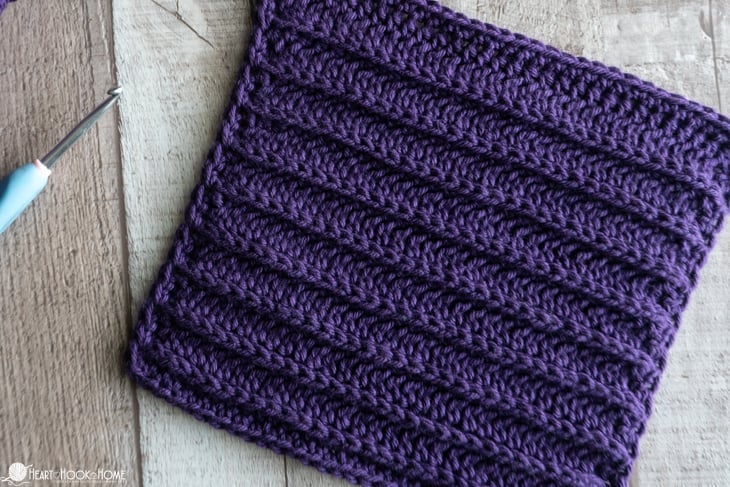
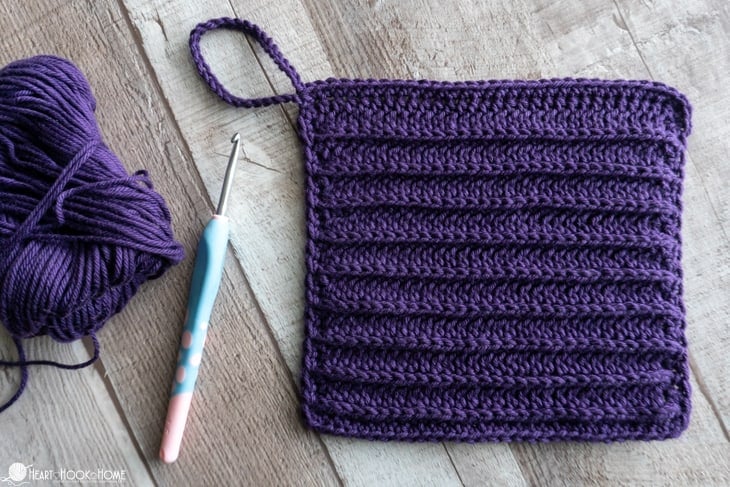
If you create subsequent rows using that third loop only, it creates this gorgeous ridged effect.
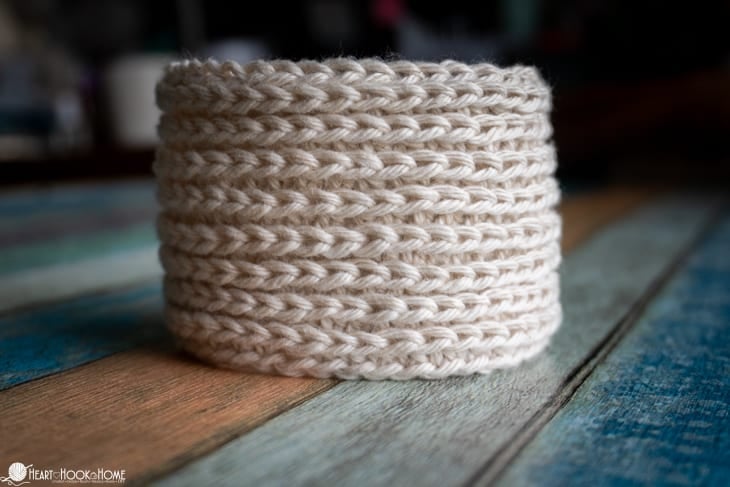
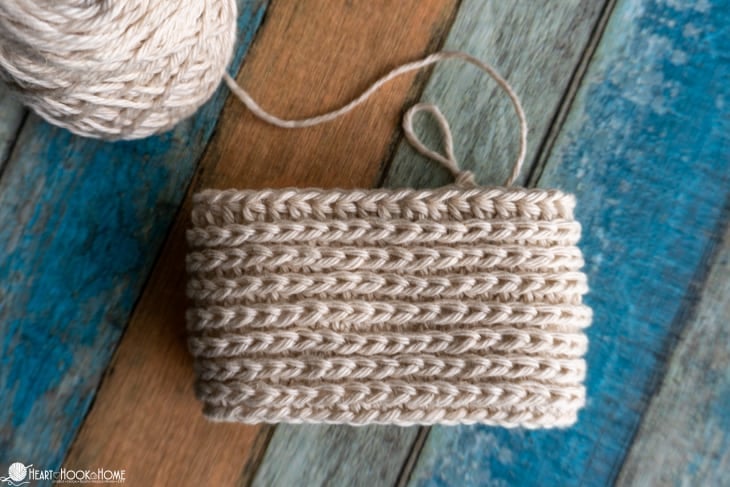
And if you work into the third loop only when crocheting in a spiral, it creates much more compact ridges that look very much like a knitted fabric. Read more on the difference below.
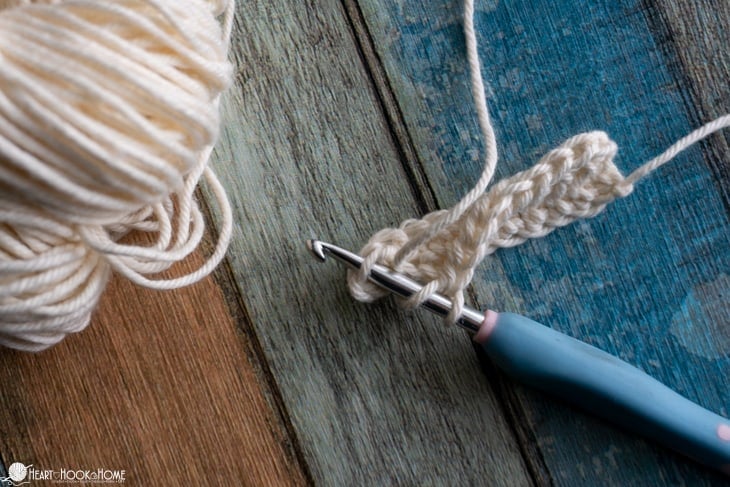
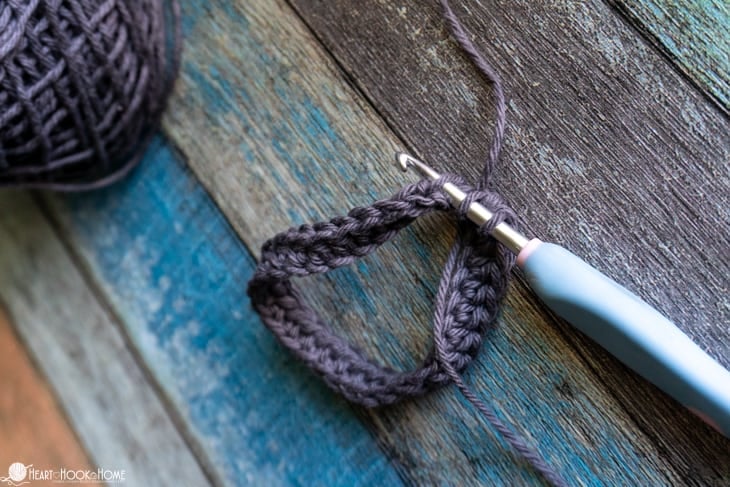
To Half Double Crochet in the third loop only FLAT:
Start with any number of chains and a foundation row of Half Double Crochet.
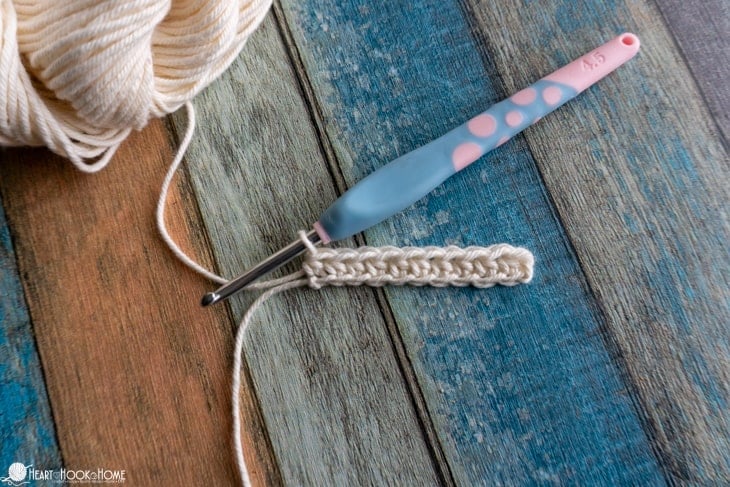
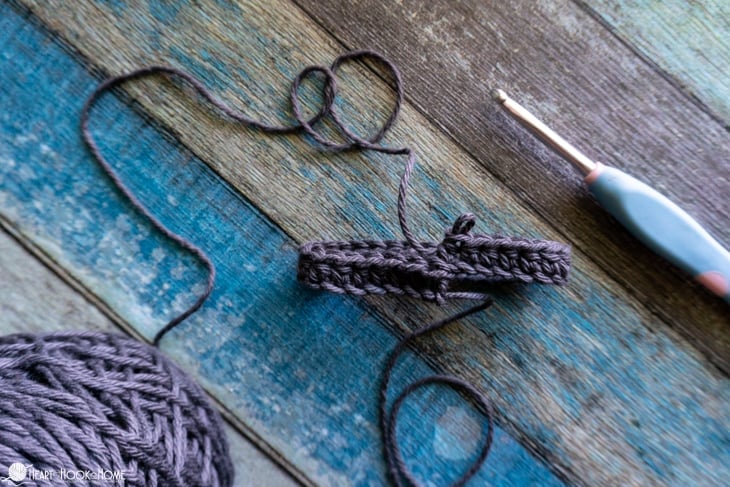
Turn your work so that you are looking at the back side. The third loop is now right on the surface.
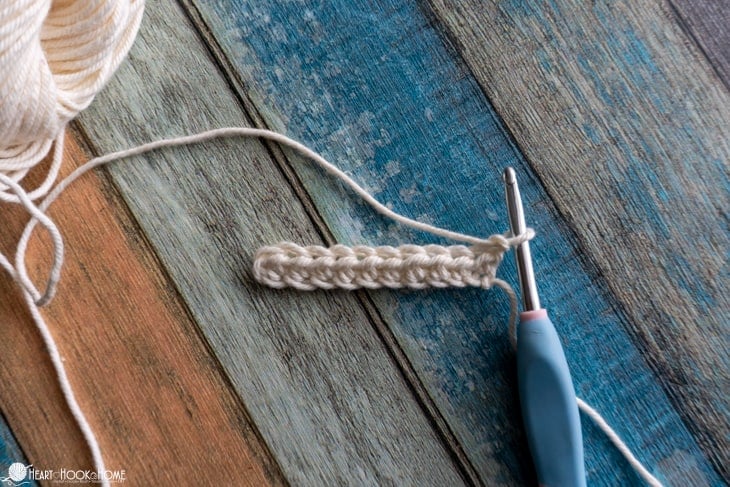
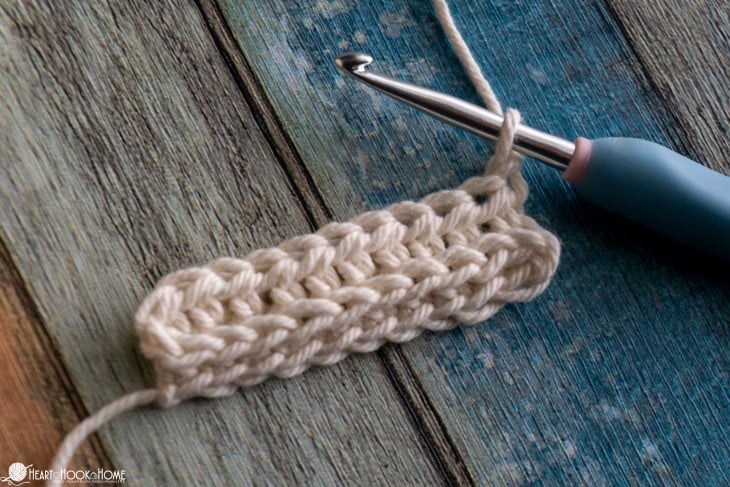
To make the third loop half double crochet, you will yarn over, insert your hook into the third loop only of the previous hdc. Pull up a loop and complete the Half Double Crochet as normal.

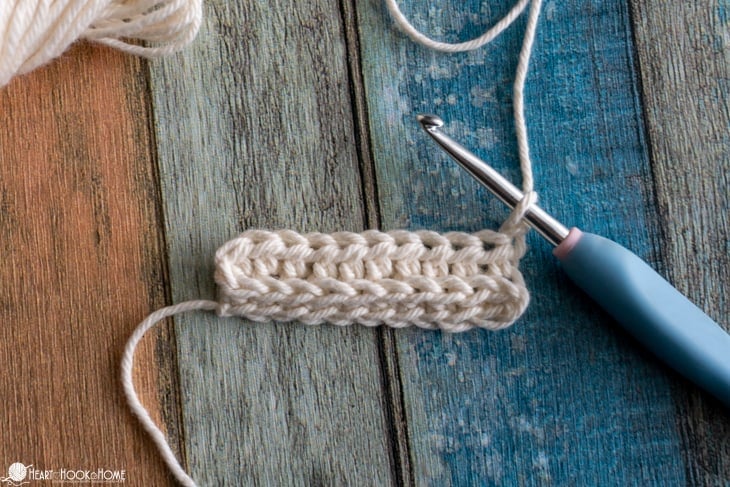
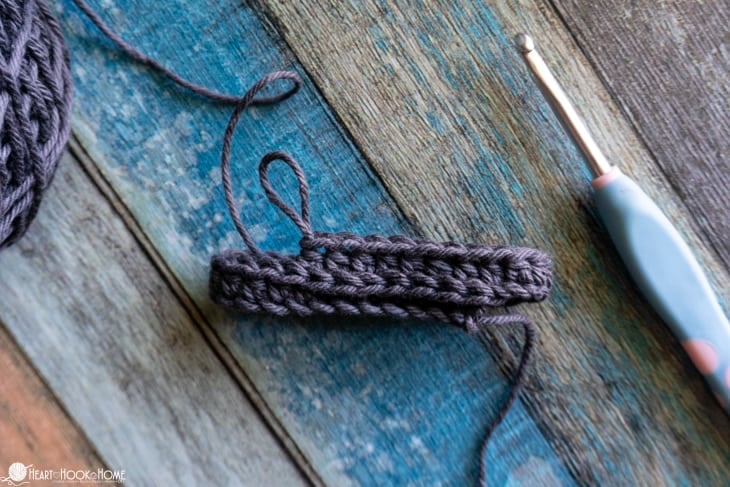
Continue making hdcs in the third loop only all the way across the row.
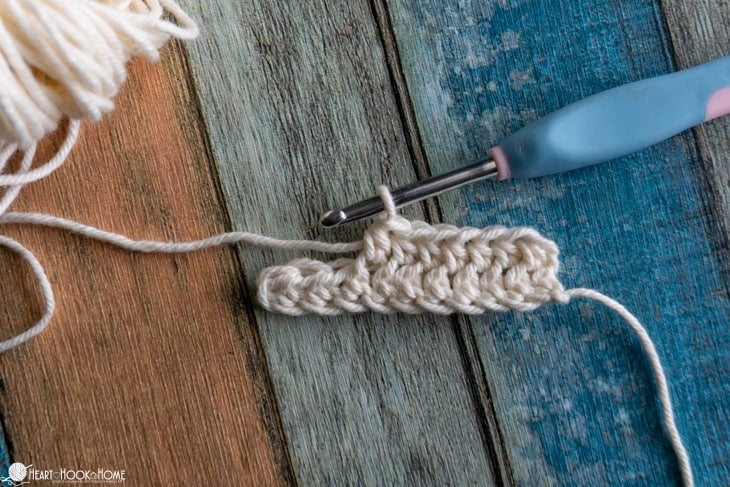
The final stitch can be a bit buried or at a slight slant. For this reason you may find it helpful to count your stitches each row or to mark them with stitch markers.
When you chain one and turn, the third loop is again presented on the surface of your work.
Wanna save this for later?
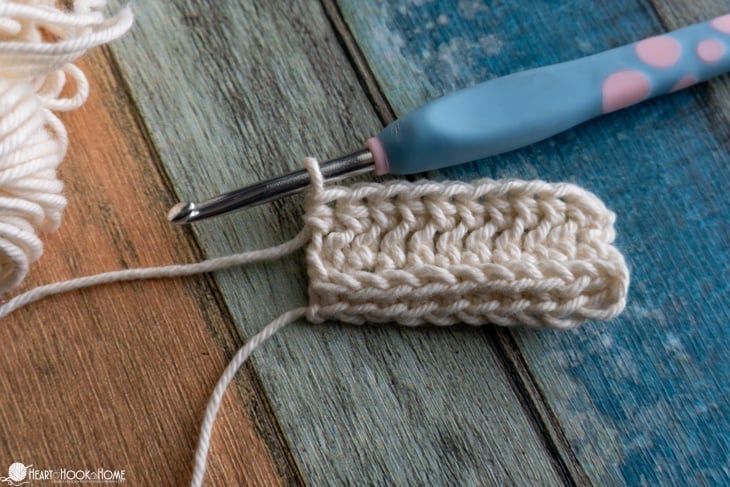
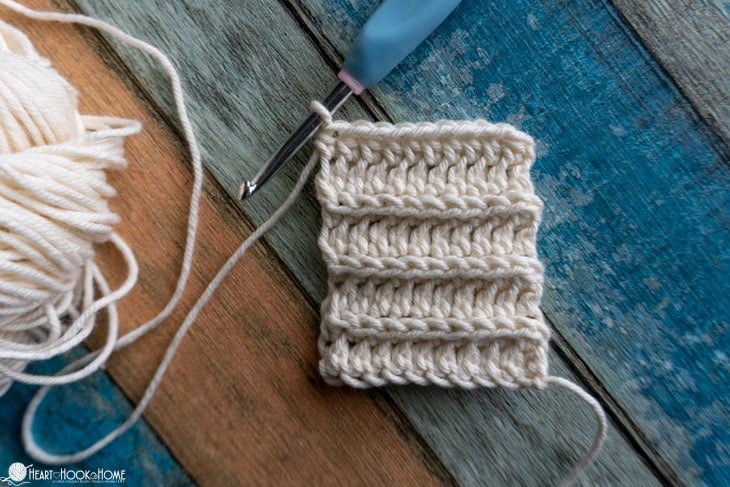
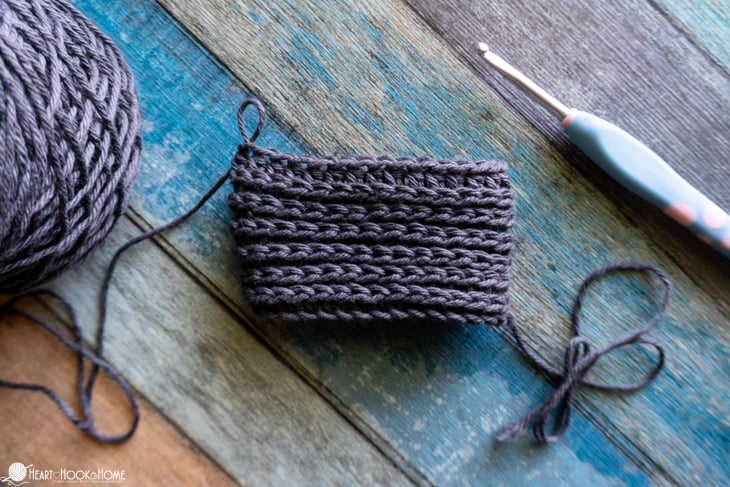
Continue adding rows in this manner until the piece is as tall as you like. How pretty are those ridges? Love it!
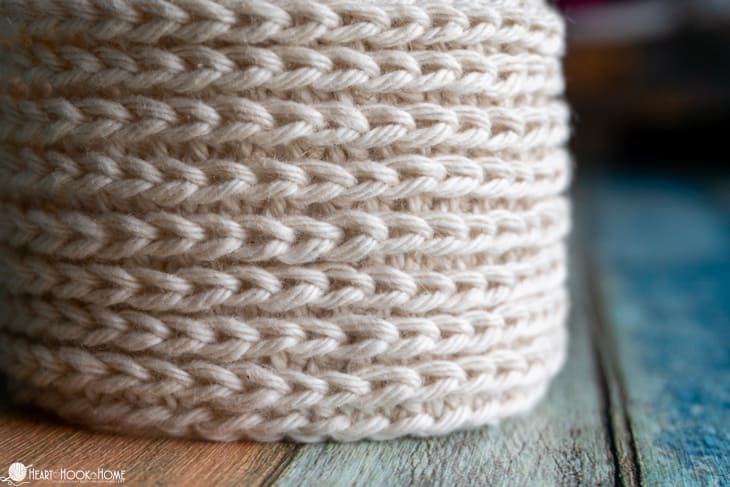
Now, there is a slight difference in appearance when you work this stitch in a spiral. The general concept is exactly the same, except that you never turn your work. This results in a much more compact fabric.
To crochet in a spiral you’ll simply start with either a normal foundation chain or a foundation row of Half Double Crochets. 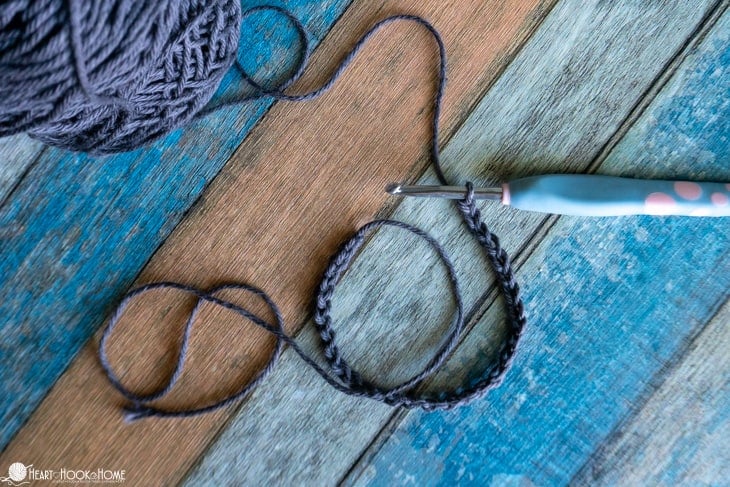
When you start the second round you’ll work directly into the third loop while still looking at the “front” of the work. It helps if you slightly rotate the top of the piece toward you so that you can easily access that loop that is nestled behind.
Simply continue with no turning or joining until you reach your desired height. When you’re ready to fasten off… I prefer to end with a round of single crochet worked into the third loop. This helps to make a mirror image of the bottom edge and a more cohesive design. When finished, slip stitch in the next two or three stitches and pull your yarn through. This helps to hide where you fastened off.
Isn’t that fun and gorgeous?! I hope you love it too. Here’s the video tutorial:
HDC Third Loop Video:
If you would rather watch this video on YouTube, you can find it on my channel here. Don’t forget to subscribe while you’re there! 😉
More crochet tutorials:
Crochet Larksfoot Stitch Tutorial
How to Crochet the Star Stitch (Step-by-Step)
How to Crochet the Uneven Berry Crochet Stitch


13 Comments