Car Vent Clip Flower Crochet Pattern
This post may contain affiliate links, meaning that I may earn a small commission if you make a purchase. See our disclosure policy for more information.


In the 2022 Car Series, we are bringing all things crochet to our vehicles. Next up: a car vent clip! Make one of these essential oil car vent clips with this free crochet flower pattern. How cute are these?!

Car Vent Clip Flower Crochet Pattern
I know that with two young men in my car on the regular, I need all the air freshening I can get. Ha! Drop some of your favorite essential oils on these flowers, pop a bobby pin through the center, and voila! Of course you could simply use them for decoration, too. 😉


These little car vent clips could be made using cotton yarn as I have done here (using remnants much less!) or virtually any scrap yarn you have on hand. The larger the yarn, the larger the flower so I would stick with a regular, worsted weight cotton (or acrylic etc) yarn so as to not obstruct too much of your vent.

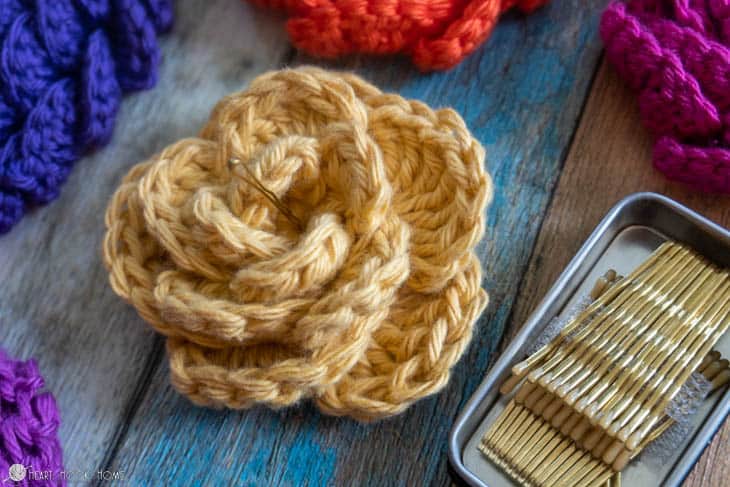
For this crochet flower pattern I combined the gorgeous reverse shell border technique with a circular pattern. What results is the cutest little crochet flower you ever did see!


Note that you could continue growing the flower if you so choose. In fact, I made some larger just to see how it would work out. I was very happy with the result!

The pattern below is for the smaller (yellow) flower. If you would like a larger flower simply continue adding petals, and more frequently per row. Once you get the hang of adding the new petals, the rest is a breeze!
This pattern is the latest installment in the 2022 Car Series (a.k.a. Stitch My Ride 🤣 – thanks for that, Sarah!). See ALL of the other patterns already published right here.
For this pattern definitely use up scrap yarn first! You won’t need much…
Materials:
Cotton or acrylic worsted weight yarn (scraps from my Rose Cardi used)
Crochet hook in size 4.5mm
Bobby Pin for attaching to car vent
Gauge: Unimportant
Pattern Notes:
Pattern written using US terms.
If you need help reading a crochet pattern, make sure you head over here and check out this detailed post.
Each petal is designed to lay behind the petal to its right (the petal just made).
This is a variation of the Reverse Shell border stitch. See a video tutorial for that here. See the VIDEO tutorial for this flower below, or on the Heart Hook Home YouTube channel!
Pattern:
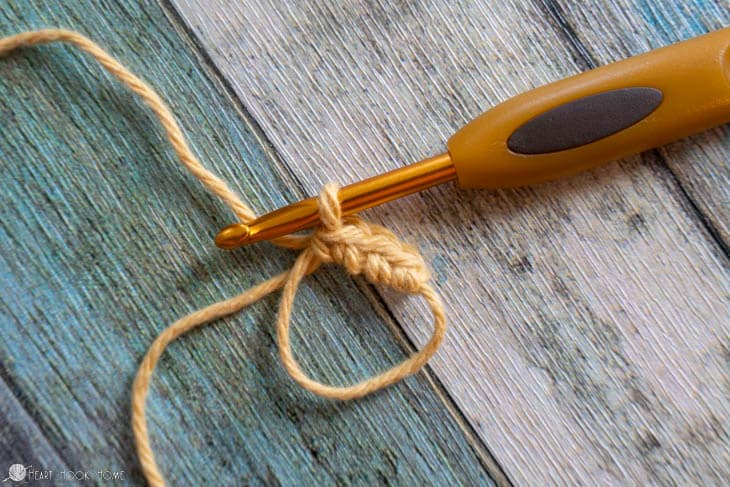
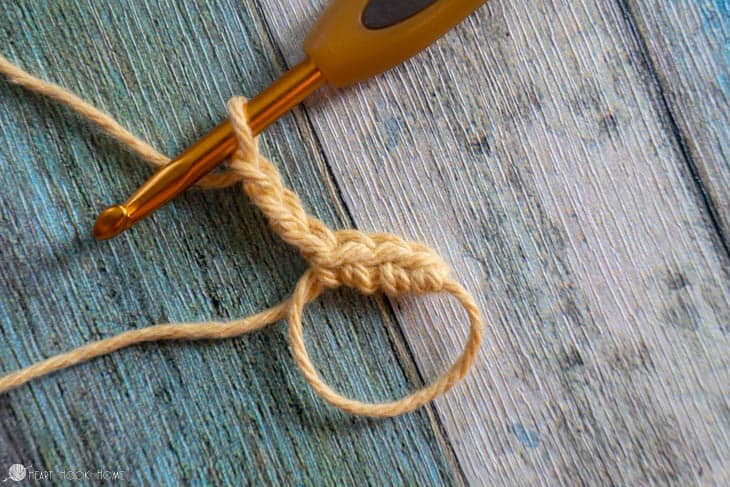
Round 1: Magic Circle. 3sc in circle, ch-3, turn. Sl st in first st made. Ch-1, turn, 5hdc around ch-sp (first petal made). * 3sc in circle, ch-3, turn, sl st around post of previous petal (as pictured). Ch-1, turn, 5hdc around ch-sp (second petal made). * repeat between * * 2 more times. (4 hdc petals).

Wanna save this for later?


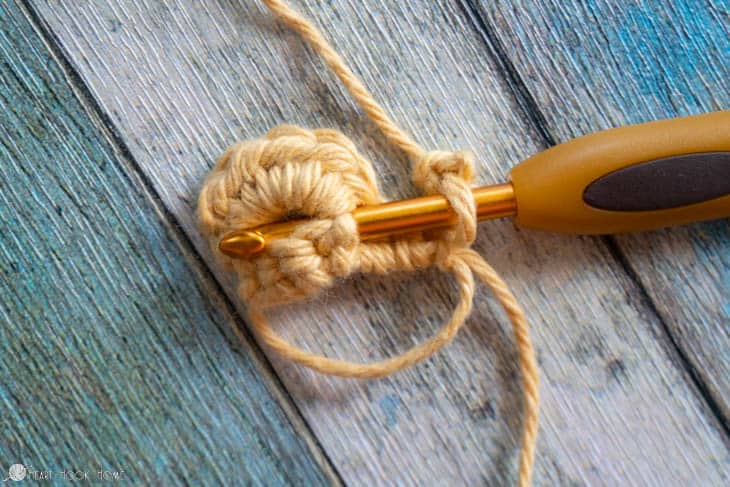

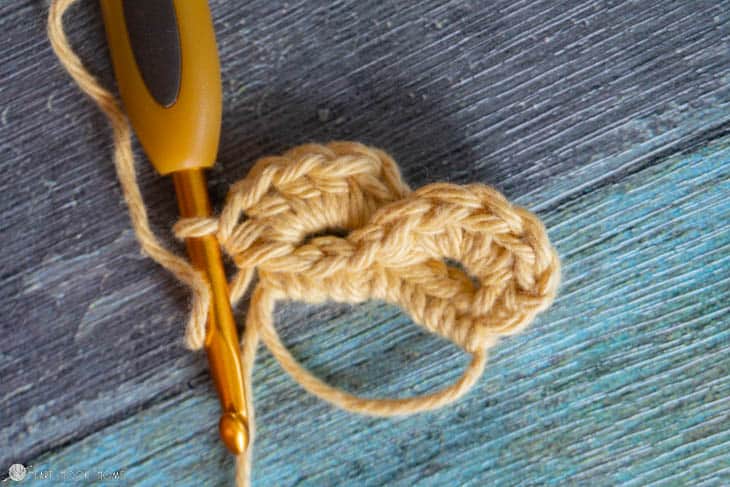

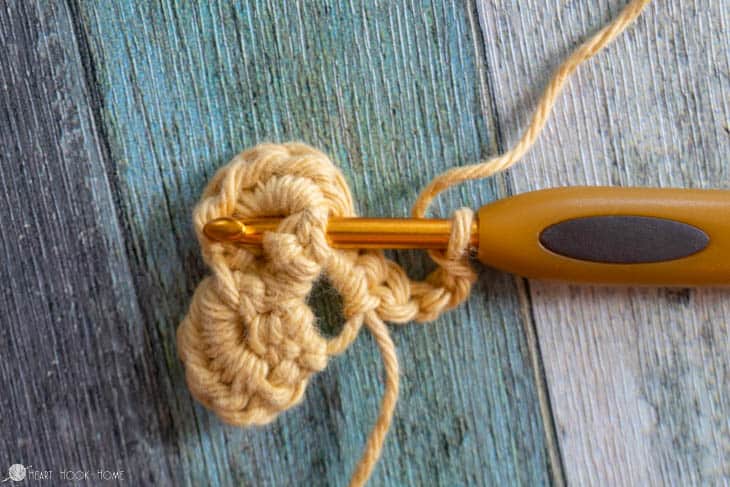

Four petals made, each nestled behind the one preceding it.
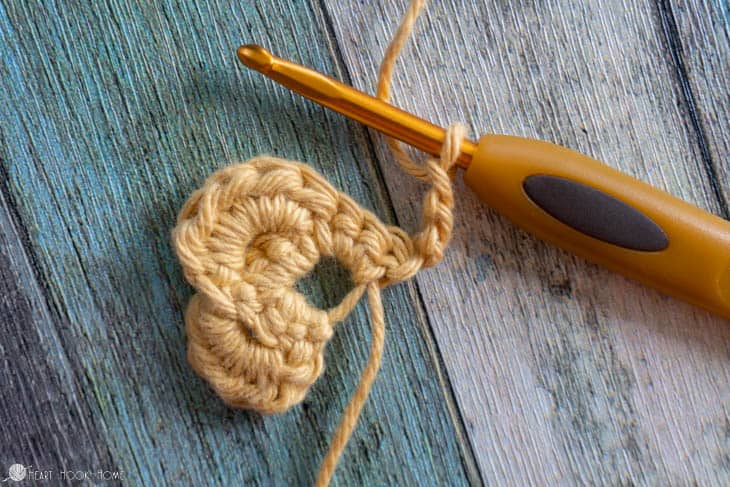
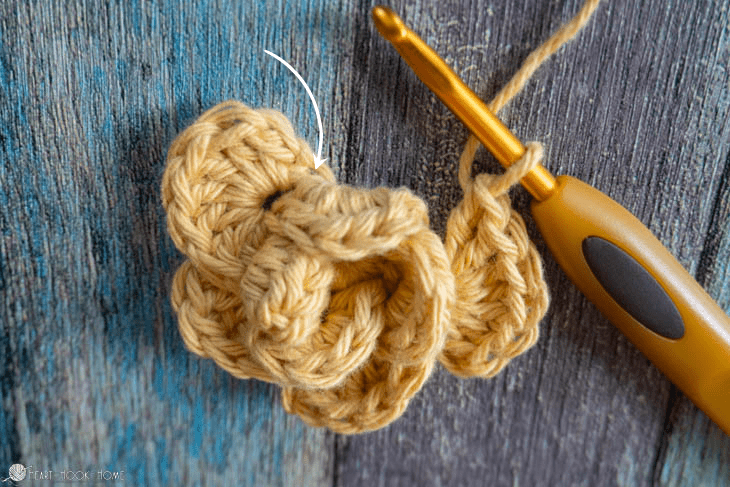
Round 2: Do NOT turn. * Working behind the petal from round 1, sc in the center sc of the base of the first petal. Ch-3, turn, sl st around the post of the previous petal. Ch-1, turn back around, 7dc around ch-sp just made. * repeat between * * 3 more times. (4 dc petals)

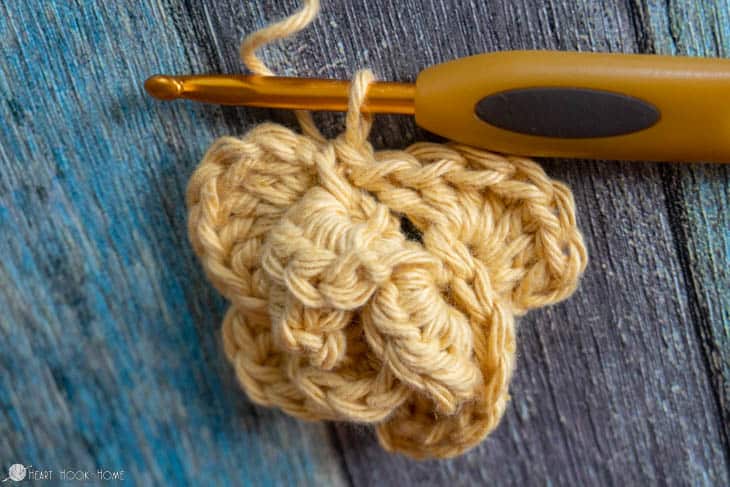
Round 3: * Working behind the petal from round 2, sc around the nearest post of the first petal (see photos). Ch-3, turn, sl st around the nearest post of previous petal. Ch-1, turn back around, and 9tr around ch-sp just made. * repeat between * * 4 more times. (5 tr petals)
Note! I find it helpful to mark the first petal of this row (and any other rows, if you choose to continue to grow your flower) with a stitch marker.


When finished adding petals, pull the yarn through and sew behind the next petal in line. Weave in all ends.
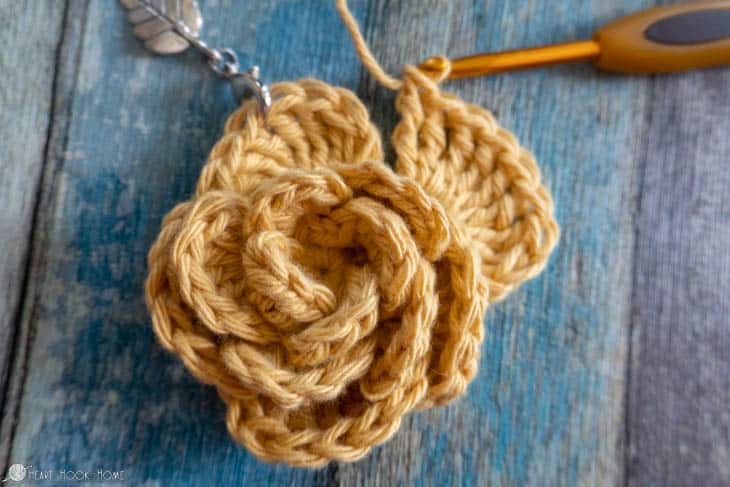


Ta-da! I’m so excited about these cute little vent clips. What color will you use, and will you make a small or a larger flower?
Crochet Flower Video Tutorial


6 Comments