Walker Organizer Crochet Pattern
This post may contain affiliate links, meaning that I may earn a small commission if you make a purchase. See our disclosure policy for more information.
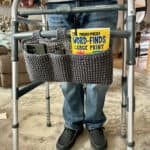


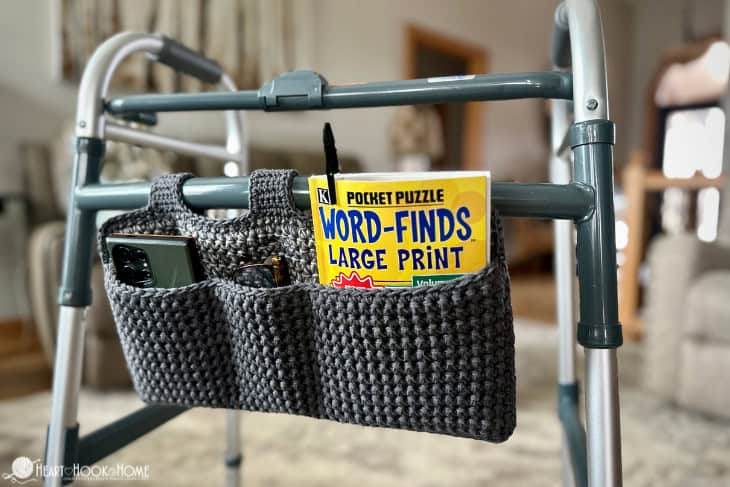
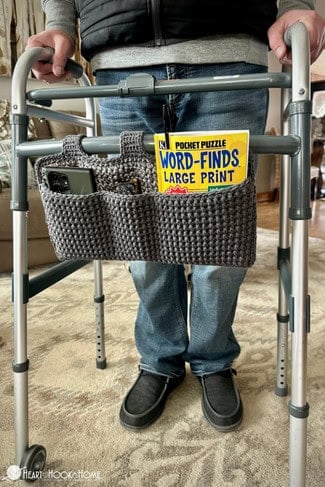
Do you know someone that uses a walker to aid in their mobility? Perhaps someone you love, or someone at the local long term care facility, could use a brand new – and super snazzy – custom walker organizer! Let’s make one using this free crochet pattern.
Walker Organizer Crochet Pattern
This is the second installment in the 2025 Donation Crochet Series. This year, on the second Friday of each month, I will share one new, free crochet pattern that is something that can be donated or made with love for someone else to use.
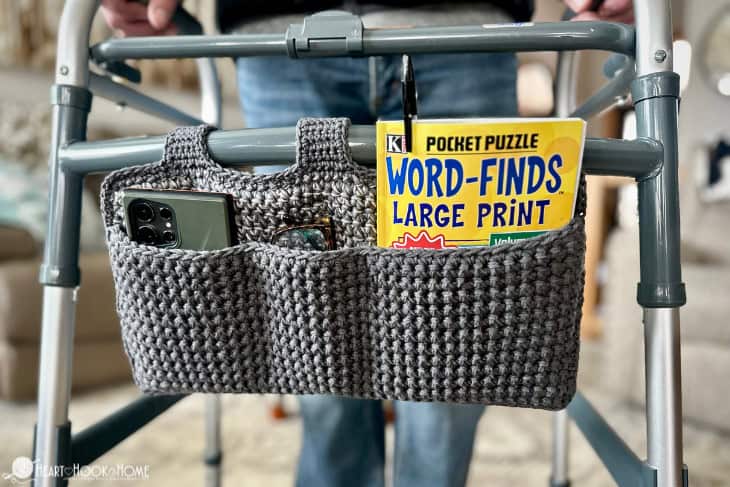
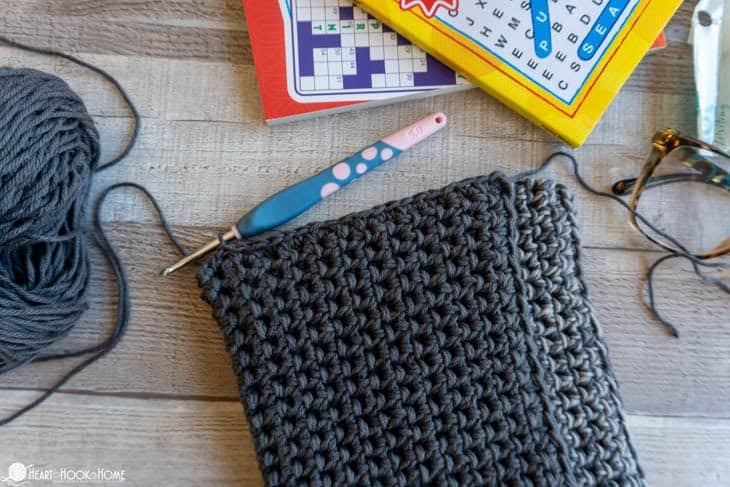
Don’t you just love how versatile crochet is? Whatever we need, and when there’s someone in need, crochet is there to help in whatever way it can. Let’s use our skills to crochet a walker organizer that can easily carry a phone, a pair of eyeglasses, a small book or crossword, a couple of pens, tissues, etc.
The width of the pockets on your crocheted walker organizer is completely customizable. For example, if a pocket for a phone isn’t necessary, you could make four smaller pockets or have one large pocket for a full sized book or bible.
We are holding two strands of cotton yarn together for the majority of this pattern. If you have bulky weight cotton yarn on hand (such as Comfy Bulky) or some bulky acrylic yarn you would like to use (such as Brava Bulky) you can use just one strand of yarn but definitely be sure to check your gauge against mine. You may need to adjust your hook size.
Cotton is a great yarn to use because you can wash the organizer as needed and it holds up to heavy use. Paired with the sturdiness of the stitch this makes for a SUPER high quality walker organizer. 👌🏻
Grab the ad-free, printable PDF version of this pattern on Ravelry, Etsy, or right here in the Heart Hook Home blog shop!
Materials:
100% Cotton yarn (Dishie cotton used in “Ash” and “Silver”)
-approx. 420 yards total (300 Color A, 120 Color B)
Crochet hook in size 7mm or size needed to obtain gauge
(2) Stitch Markers
(3) 1″ buttons
Yarn Needle
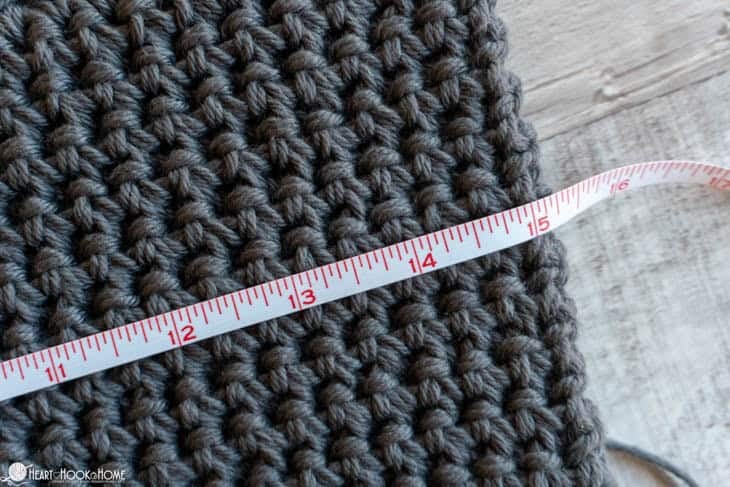
Gauge: 10 sts x 20 rows = 4” square using the Thermal Stitch
Finished Dimensions: Approx. 15″ wide and 6″ tall (not including hangers)
Pattern Notes:
Pattern written in US terms.
The ch-1 at the beginning of each row does NOT count as a stitch.
BLO = Back Loop Only
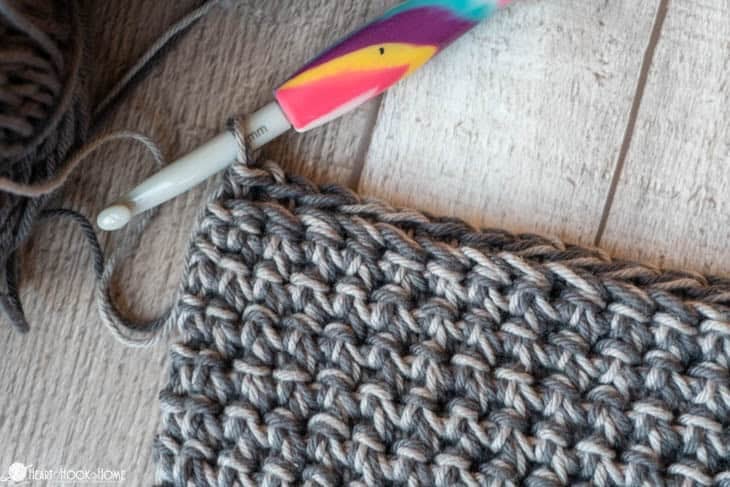
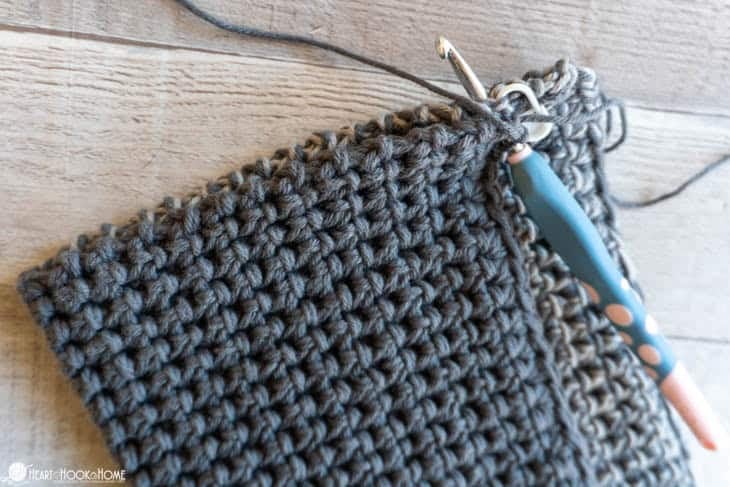
The Thermal Stitch is a dense crochet stitch. See a detailed tutorial for the Thermal Stitch here. This is great for something that needs to hold its shape and stand up to heavy use.
If you need help reading a crochet pattern, make sure you head over here and check out this detailed post.
Walker Organizer Pattern:
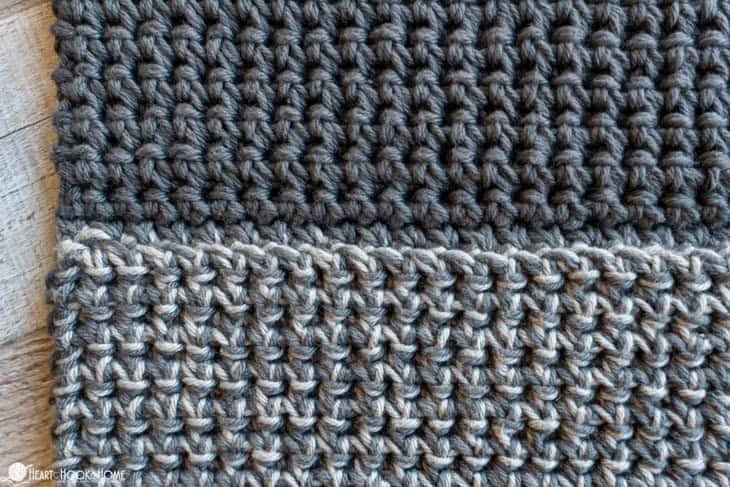
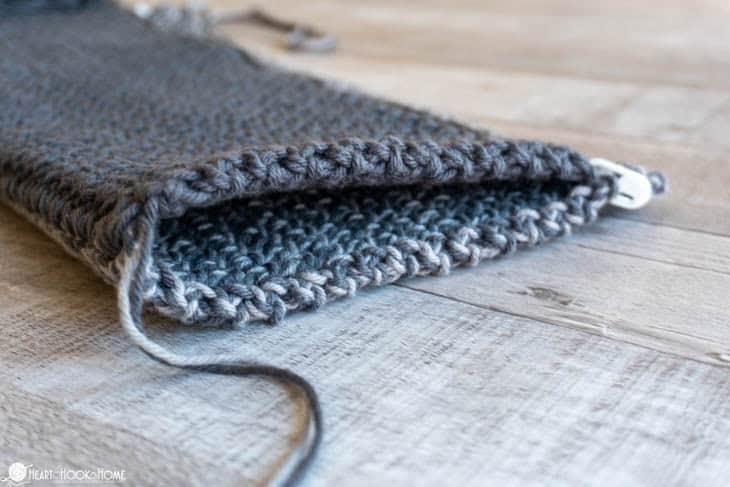
Holding two strands of yarn together, we start with the “back”…
Row 1: Ch-41, sc in blo of 2nd ch from hook and in ch to end. (40)
Rows 2 through 33: Ch-1, turn, thermal st across. (40)
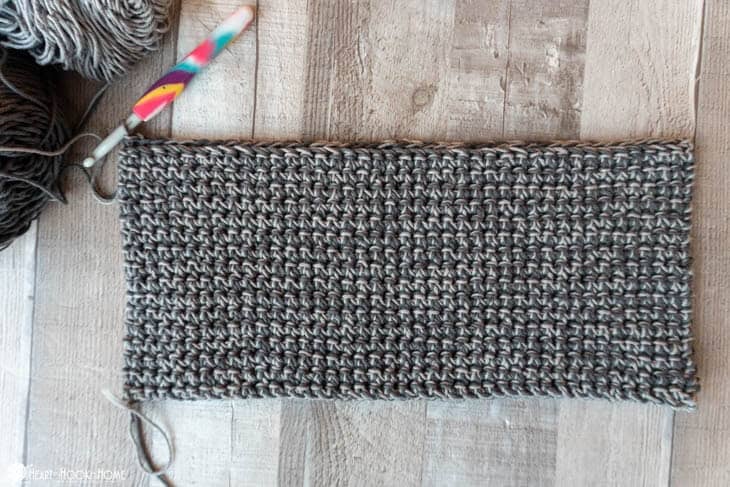
Row 34: Ch-1, turn, finish off thermal st by going through all three (6 strands of yarn total) loops. (40)
Fasten off and weave in all ends.
Pocket:
With the organizer “back” facing upside down and toward you (as pictured), attach in base of row 1 with a sl st.
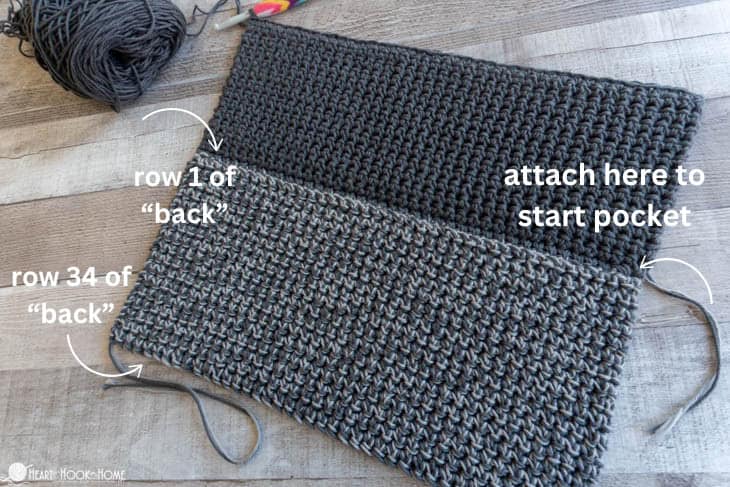
Row 1: Ch-1, sc in between each st across. (40)
Row 2: Ch-1, turn, sc in each st across. (40)
Row 3: Ch-1, turn, sc in BLO of each st across. (40)
Rows 4 through 24: Ch-1, turn, thermal st across. (40)
Row 25: Ch-1, turn, finish off thermal st by going into all three (6 yarn strands) loops. (40)
Do not fasten off, but drop one of the strands of yarn so that you are working the remainder of the pattern with a single strand. (If you’re using one strand of bulky weight yarn, simply continue on.)
Before we crochet around the perimeter, let’s create the individual pockets.
Wanna save this for later?
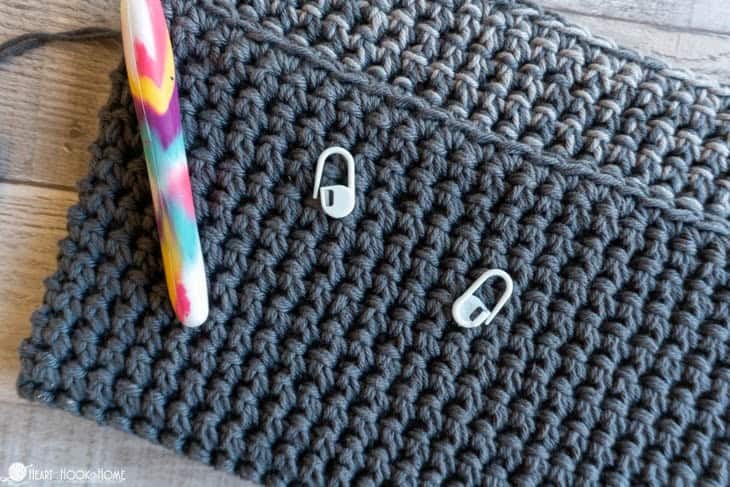
Fold up the “pocket” flap and pin the top two corners into place using the stitch markers.

Starting about 5″ from the left edge (as pictured) sew through both thicknesses from the bottom up to form a phone pocket.
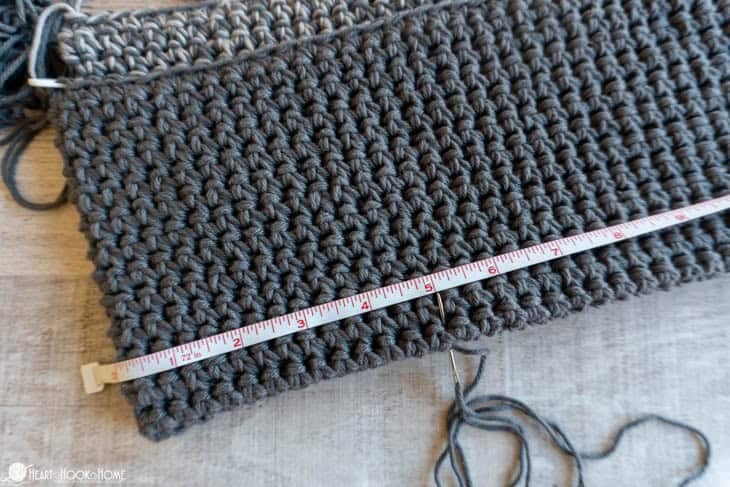

Sew another line about 6″ in from the right edge. These pocket sizes are completely customizable!

This should give you three pockets. One for a phone, one for eyeglasses or tissues, and one for a small book/crossword etc.
When the pockets are finished, it’s time to add the three straps. To do that you will…

Attach in the 6th st from the right edge… (note that I started with a row of edging before starting my straps and I wish I hadn’t. Either way is fine.)
Strap Pattern (will make three total):
Row 1: Ch-1, sc in same as join and in next 4 sts (5).
Rows 2 through 14: Ch-1, turn, sc in each st across. (5)
Row 15: Ch-1, turn, sc in first st, ch-3, sk-3 sts, sc in final st. (5)

Row 16: Ch-1, turn, sc in first st, 3sc around ch-sp, sc in final st. (5)

Row 17: Ch-1, turn, sc in each st across. (5) Fasten off and weave in ends.

Leave 8 sts open and attach in next st. Repeat strap pattern.
Leave 8 sts open and attach in next st. Repeat strap pattern.

Where still attached from making the “pocket”…
Ch-1, sc working through both thicknesses down side placing 3sc in corner st.
Sc between each of the sts across bottom, 3sc in corner st.
Sc through both thicknesses up the other side.

When you reach the top, sc up and around each of the straps. When you get back to where you started, fasten off using Invisible Join.

Sew on (3) buttons on the back in the corresponding location. You’re finished!
I hope you love this pattern and that the person that gets to use it loves it, too!
More free patterns:
Yoga Mat Bag Free Crochet Pattern


One Comment