Home ยป Hook ยป Reverse Shell Stitch Tutorial :: Crochet Technique (with photos)

Reverse Shell Stitch Tutorial :: Crochet Technique (with photos)

This post may contain affiliate links, meaning that I may earn a small commission if you make a purchase. See our disclosure policy for more information.

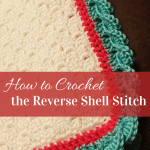
A friend of mine recently had a baby girl and to celebrate I made a classic C2C crochet baby blanket in white, and topped it off with this gorgeous reverse shell stitch.


How to Crochet the Reverse Shell Stitch (Tutorial with Photos)

To start. Attach the yarn where you would like to start your border. I am doing a baby blanket with corners, and this pattern goes in a three stitch repeat. I started mine so that center of the shell that lands on the corner thenย straddles the corner. Because of the three stitch repeat, I started in the second stitch from the corner where I wanted to end. If you need help reading a crochet pattern, make sure you head over here and check out this detailed post.

To reverse shell

1. Chain 3 to begin your first shell. Then, dc in same stitch and in the next two stitches so that you have 3dc in a row. Next, chain three. (see photo)

firststep

2. Flip the work to the left so that you are looking at the BACK of the dcs you just created. You’ll slip stitch to the TOP of the ch-3 you made in the very beginning. Then, chain-1 and flip the work back over. (see photo)

secondstep

3. You have created a ch-3 that you will now work 7 dcs AROUND to create the shell. (see photo)

thirdstep

Wanna save this for later?

We'll email this post to you, so you can come back to it when you're ready.

4. For the next shell, you’ll dc in the next 3 stitches, then chain-3 and flip your work to see the back, and anchor to the post of the previous shell. (see photo)

fourthstep

fifthstep

Continue along…

For each individual shell, you’re just going to continueย making three dcs, then make a chain-3, flip work over so that you canย anchor to the post of the previous shell, flip back to front and workย the new shell around the ch-3. Once you get the hang of it, it is a breeze!

sixthstep

Isn’t that a beautiful technique?! Just LOVE this! You could add this to blankets, I thought it would make a cute top edging for a little girl’s crown or the trim on a dress… the possibilities are endless!

See more crochet tips and techniques:

How to Crochet a Classic Granny Square
Crochet Video Tutorial: How to Crochet The Chain Stitch
Finger Burn? You Need a Finger Cuff for Crochet
Crochet Tip: How to Create a Straight {Invisible} Seam When Crocheting in the Round
The Difference Between Knitting and Crocheting & Master Your Tension

Similar Posts

Leave a Reply

Your email address will not be published. Required fields are marked *

This site uses Akismet to reduce spam. Learn how your comment data is processed.

56 Comments

  1. I'm adding this as a hem to a shirt that was too short. I'm loving how it looks though I'm confused how to end it and connect it.
  2. I have been crocheting c2c blankets for over 60 years, and I just end the edges with the plain old shell border, or the crab stitch. I just located your border, and it is beautiful. This will be my border for c2c blankets from this day forward. Thank you very much. I crochet baby blankets, since my retirement, and donate them to women shelters. They will be happy to see a new border, as I am happy also.
  3. me salvaste mi dia, ahora puedo ayudar ayudar a hermana. estoy desde el sabado, rntando y por fin aparece tu omo un angel. gracias muchas gracia y Dios e bendiga.
  4. How do I add a 1 inch border to a crocheted hat so that the hat will still be reversible? My friend gave me the hat to fix so she can use it as a chemo hat. Thank you!
  5. I just finished a blanket and wanted a new trim for it. Found this, tried it and I love it. It is beautiful. Thank you.
  6. Hi Ashley. Was looking for a beautiful edge to finish off a baby blanket I'm doing for my niece's new baby. Your tutorial is so clear and easily explained. I got the hang of it by the 3rd shell. Wonderful job. Thank you so much. Yvonne.
  7. Thanks so much for your help with this beautiful crochet stitch. I really love it.Would you be okay with telling me how to end the stitch whenlhave finish the round. thanks so very much.
  8. Hi have found your web page through Ideal Me and i like your crochet work could i subscribe to your web page please thankyou
    1. Hi Janet! I'm so glad you found me. :) At the bottom of every page there is a box to subscribe for emails. I look forward to being yarn friends!
  9. THANK YOU for this tutorial! It was written more clearly than a couple similar patterns I checked out, and it worked up very easily. I recently used this border to finish off a project for my crochet group. I used the sc base (instead of the dc base) like one or two of the other commenters. You can see the back story and pictures at https://www.facebook.com/OrlieRaeGifts/posts/463687997332723 =)
  10. Just found this edging this afternoon and put it on the baby blanket I have been working on for my Primary Care Doctor. It came out WONDERFUL! But....you don't give any directions on connecting the ends when you get all the way around the blanket. I just fudged it and sewed the ends together so they look like all of the other "waves" and the way that they connect. I changed the three DC to SC and then did the CH3 and SL ST to the last SC of the previous wave. I then did only 5 DC into the CH 3 loop. It all worked out great. I was afraid of running out of yarn and could not afford to purchase another Pound of Love to complete the border. I posted the pictures on my Pintrest page, https://www.pinterest.com/tigger328101151/crochet-afghans/. The blanket is the blue one with the Dalmatain puppy sleeping on the quarter moon.
    1. Oh, I'm sorry. I did a new a tutorial using single crochet instead of double, and I did include that here. http://hearthookhome.com/crochet-border-reverse-shell-using-single-crochet/ I need to redo this one! Thank you
          1. Iโ€™m sorry, that sounded confusingโ€ฆslip stitch into the first DC from the beginning shell.
  11. Hi. I am just finishing a baby blanket for a friend and have been looking for an edging for it. I have tried a few others but being a newbie at this I had alot of trouble figuring out their directions! That said I just love how you use a picture to illustrate each step of this really pretty trim. I do believe that even a newbie like me could follow your directions. Thanks so much - I am excited to get going on it!
  12. Thank you! Very nice tutorial! I had a very thick yarn and converted this stich from dc's to SC and hdc. Looks perfect for baby blanket!
  13. Hi, I saw some others asking about corners but never saw a reply, how do you do the corners with this? Thanks!
    1. She did a single crochet in white to clean up the edge of her corner to corner blanket, then the hot pink/red is just double crochet in each of the single crochet stitches with two DC in the corner. At least, that's what it looks like to me.
    1. Hi! How many stitches are there in your border row? Can you send me a photo so I can see what it looks like? ashlea729 at gmail dot com. :D
  14. Could you share how this is finished off? I can't seem to get it to look right no matter how I finish.nplease help :)
  15. Hi, I'm making a baby blanket so in the corners do change anything??? Because isn't working for me in the corners. Thank you
  16. I have been looking up different borders lately because I'm tired of just doing scalloped edge. I came across this one a few times on Pinterest, but not from your blog. It looked complicated and not something I could really do. A few days ago, I came across your blog on a pin and the picture by picture gave me the courage I needed to try it on my own! I had just finished a blanket and wanted to to put a new border on it and couldn't have come across your blog at a more appropriate time!! I have been home with my sick daughter and finished the border while she was napping....I LOVE IT!!! Thank you so much for your detail. I am so pleased with how it came out, it has renewed my love for corner to corner and I will be using this for all of my baby blankets. I have a pic on my phone and if I can figure out how to get it on here, I will be sure to post it. I have enjoyed cruising around on your blog. Thank you so much!