How to Crochet the Double Moss Stitch
This post may contain affiliate links, meaning that I may earn a small commission if you make a purchase. See our disclosure policy for more information.

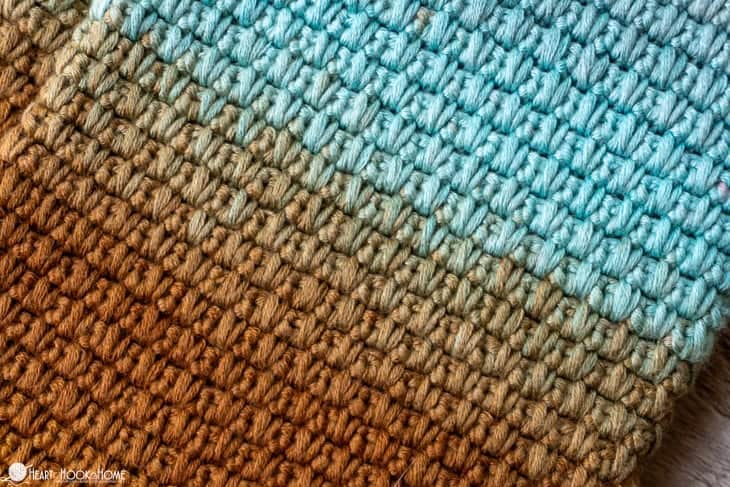
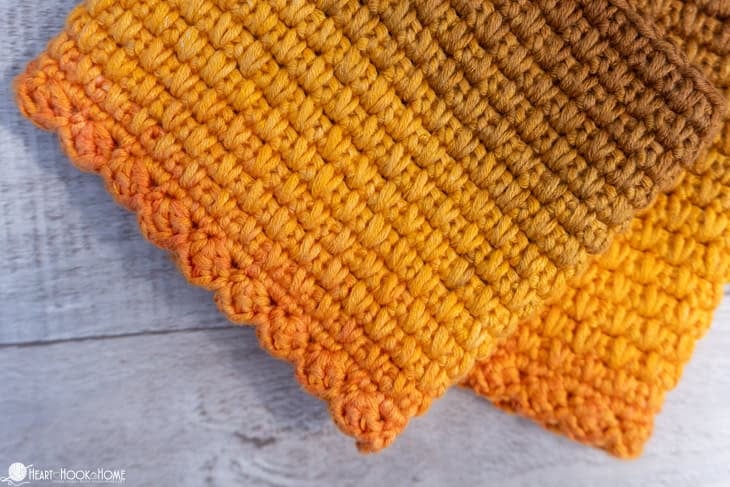
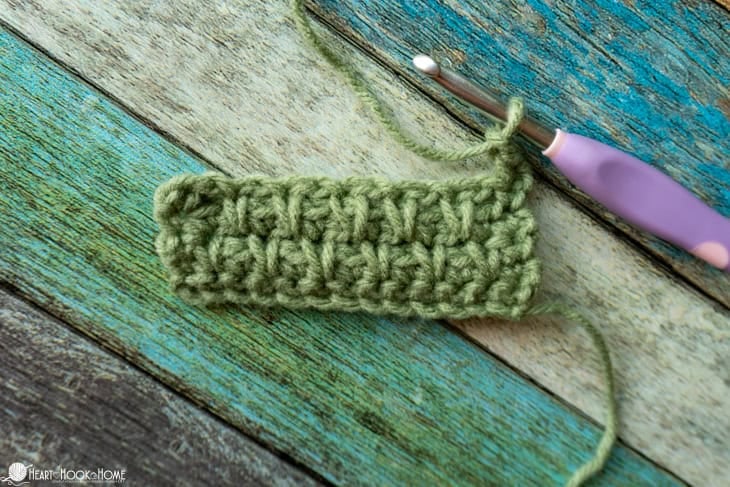
The Double Moss stitch is a fun, gorgeous crochet stitch that works up beautifully and is much easier than it looks. Learn how to crochet the double moss using this written and video tutorial.
Double Moss Stitch Tutorial
The Double Moss Stitch is similar to the regular Moss Stitch but with more texture, more depth, and more density. This is a great stitch to use for all things from blankets to pot holders!
We incorporate Single Crochet Spike Stitches into this stitch pattern that are worked around the chains from the previous rows, which creates a nice thickness that helps the fabric hold its shape. Because of the added thickness of the stitch, you may find that you need to go up a hook size or two from what you typically would use with your yarn choice.
Questions about the Double Moss Stitch
How many chains do you need to start the Double Moss? In order to start the Double Moss Stitch you’ll need to start with a row of single crochet stitches in any odd number. If you are starting with a chain, and single crocheting your way back through, you will need to start with any even number since the last chain made constitutes the side of the first single crochet stitch.
It is helpful when crocheting the Double Moss Stitch to keep the chains on the looser side throughout. I have found that if I do not keep my tension a bit looser than normal that the fabric starts to shrink in on me.
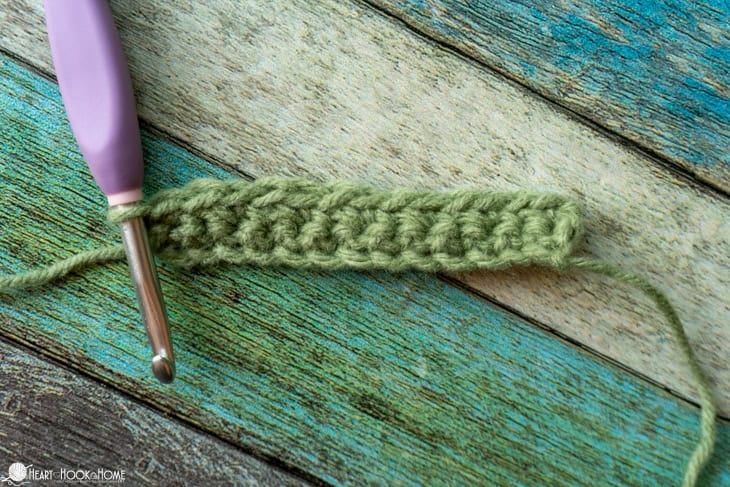
This stitch is a four-row repeat. Once you get the first handful of rows down, the rest is a breeze!
To make the Double Moss stitch you need to start with an EVEN number of chains. Note that if you prefer starting with a foundation single crochet row you’ll want to have an odd number.
Double Moss Stitch Written Instructions:
1. Start with any even number of chains. For this tutorial I am starting with 14 chain stitches.
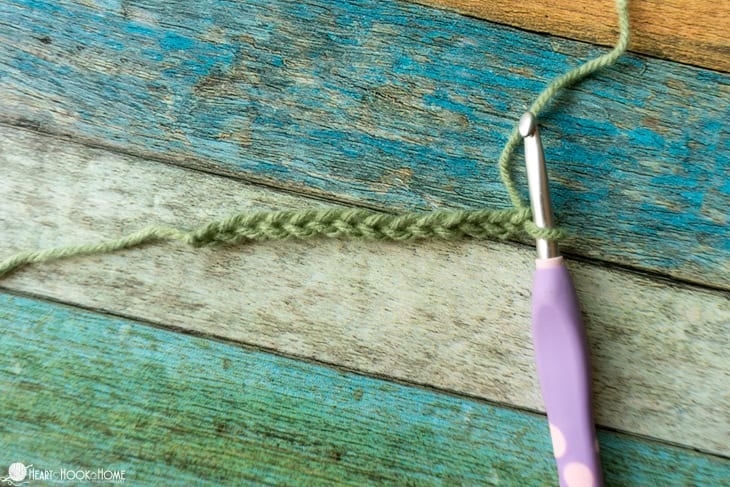
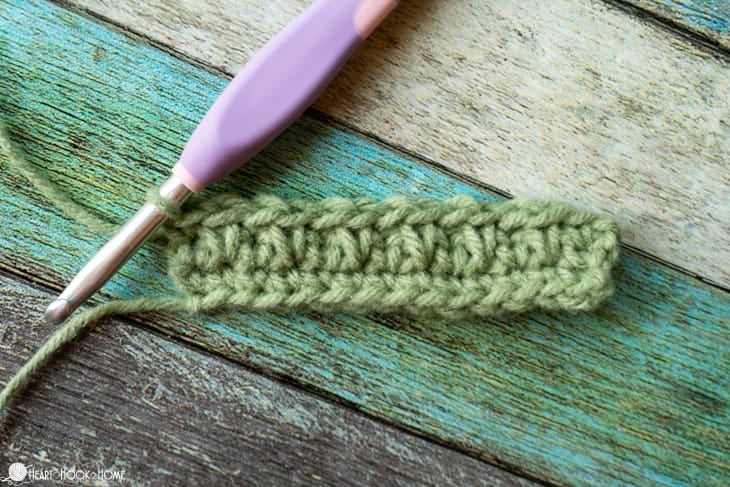
2. Single crochet in the second chain from the hook and in each to end. You should now have an ODD number of single crochet stitches.

3. Chain one and turn, placing one single crochet in the first stitch.
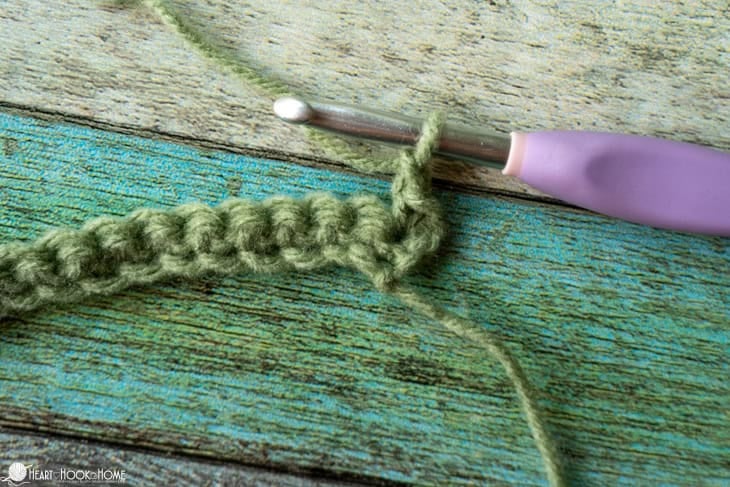
4. Chain one, skip the next stitch, and single crochet in the next stitch.
Repeat step 4 until you reach the end of the row.
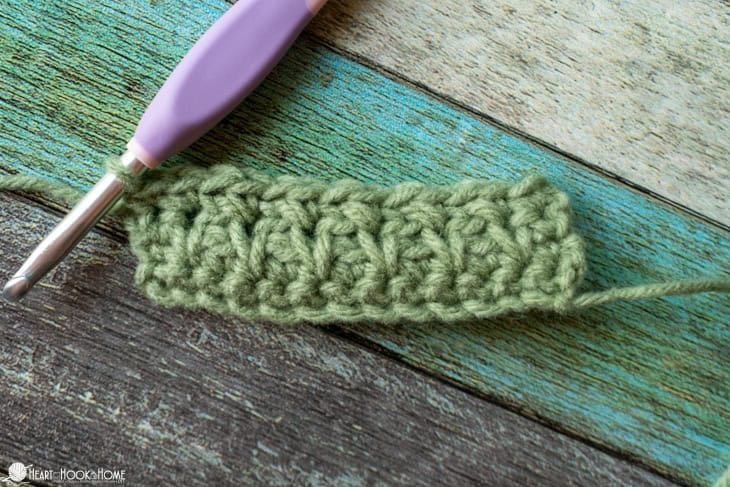
5. Chain one and turn, placing one single crochet in the first stitch.
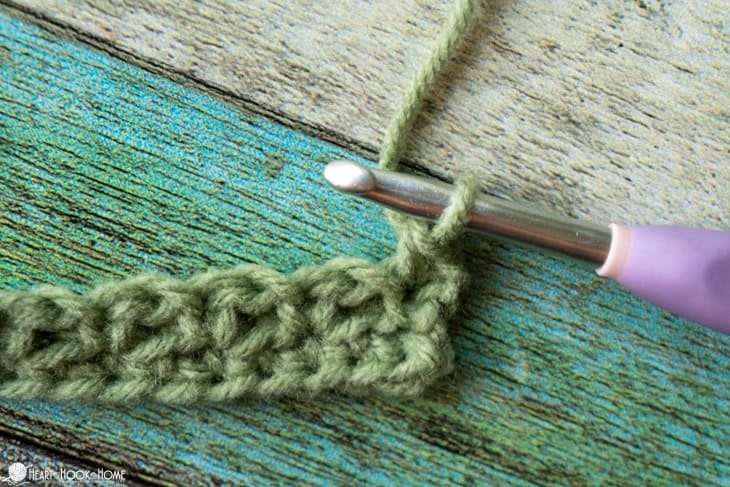
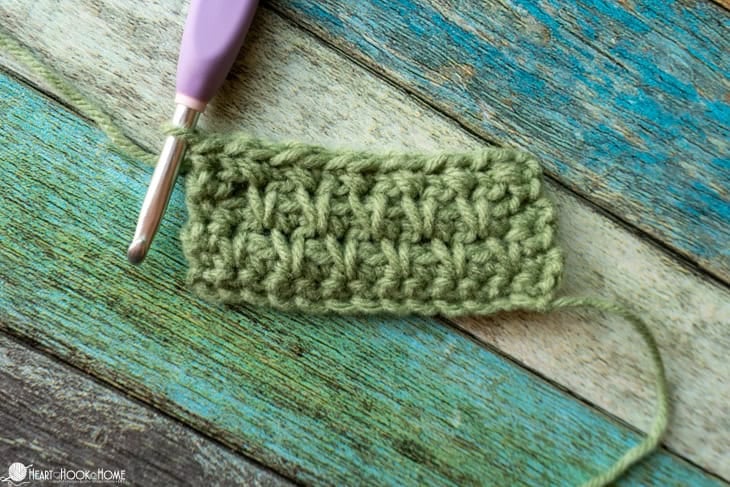
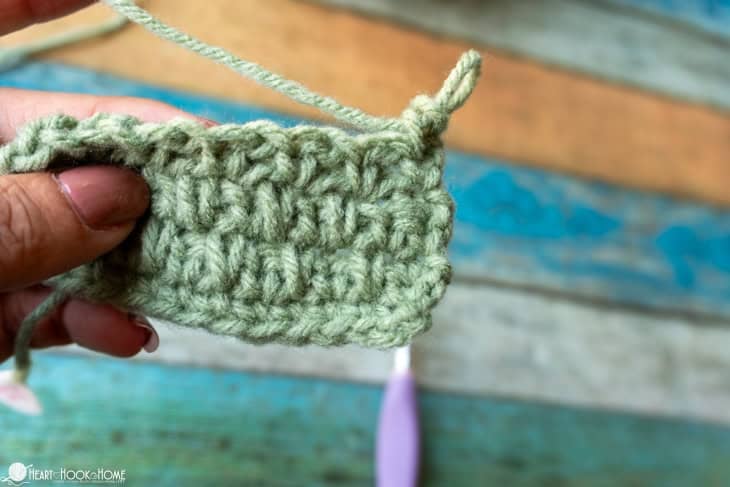
6. Make a Single Crochet Spike Stitch in the skipped stitch from row 1 (see photo) and chain one.

Repeat step 6 until you only have two stitches remaining.
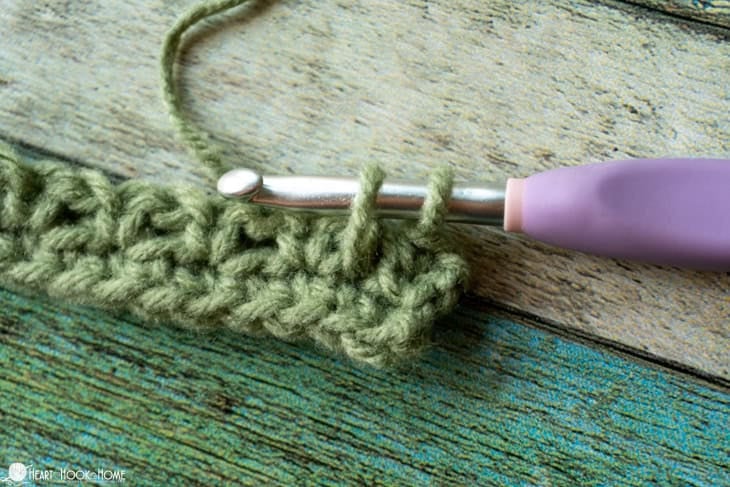
7. Single Crochet Spike Stitch in the second to last stitch, and single crochet in the final stitch.
8. Chain one and turn, placing one single crochet in EACH of the first two stitches.
9. Chain one, skip the next chain space, and single crochet in the next stitch (should be the Ssc from the previous row).
Repeat step 9 until only one stitch remains.
10. Single crochet in the final stitch. Note that you should have two single crochets in a row to start this row and to end this row.
Wanna save this for later?
11. Chain one and turn, placing one single crochet in the first stitch.
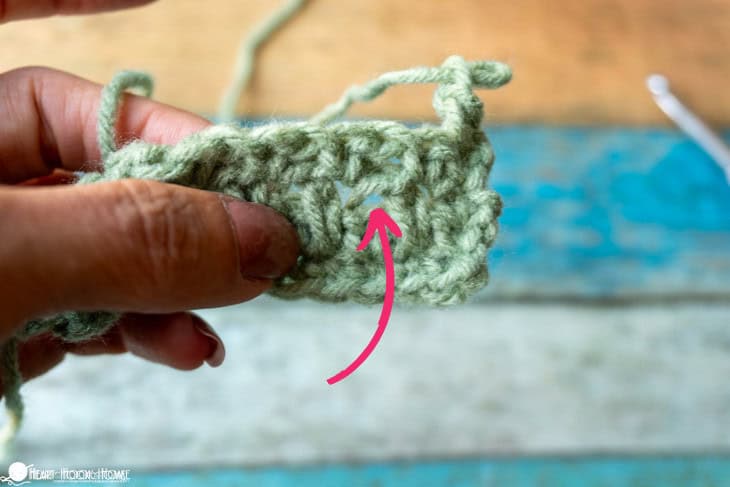
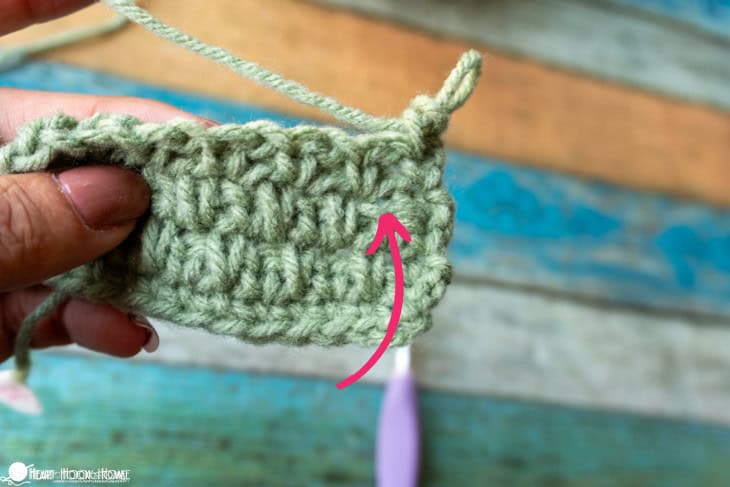
12. Chain one, skip the next stitch, and Single Crochet Spike Stitch in the chain space from the row two rows down (see photo).
Repeat step 12 until there are only two stitches remaining.
13. Chain one, skip the next stitch, and single crochet in the final stitch.
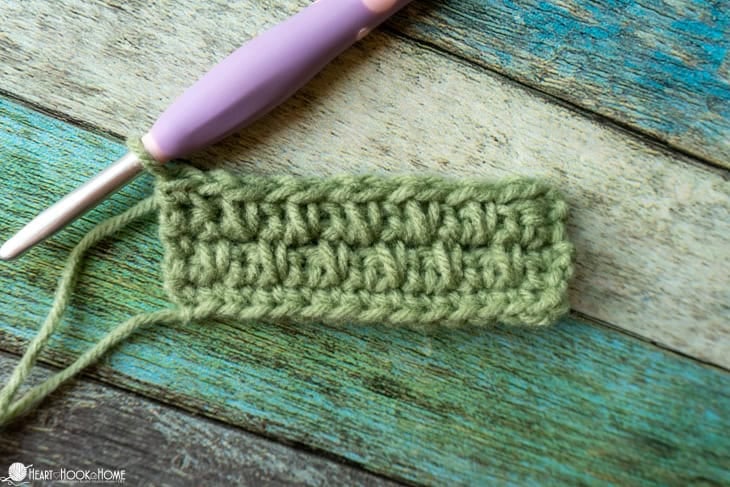
14. Chain one and turn, placing one single crochet in the first stitch.
15. Chain one, skip the next chain space, and single crochet in the next stitch (should be the Ssc from the previous row).
Repeat step 15 until there are only two stitches remaining.
16. Chain one, skip the next chain space and single crochet in the final stitch.
17. Chain one and turn, placing one single crochet in the first stitch.
18. Single Crochet Spike Stitch in the chain space from the row two rows down, chain one, skip next stitch.
Repeat step 18 until there are only two stitches remaining.
19. Single Crochet Spike Stitch in the chain space from the row two rows down, and single crochet in the final stitch.

Start over at step 8 and continue adding rows until the piece is as tall as desired or needed.
When you go to fasten off, make sure that you end on a Single Crochet Spike Stitch row, and I like to substitute single crochet stitches instead of chains on that final row to keep things more stable and tidy for the border stitches, if adding one.
If you love the look of the Double Moss Stitch and the regular Moss Stitch, you would love the Moss Stitch worked in a Granny Square!
Here is the VIDEO tutorial for the Double Moss Stitch:
If you would rather watch this video on YouTube, you can find it on my channel here. Don’t forget to subscribe while you’re there!
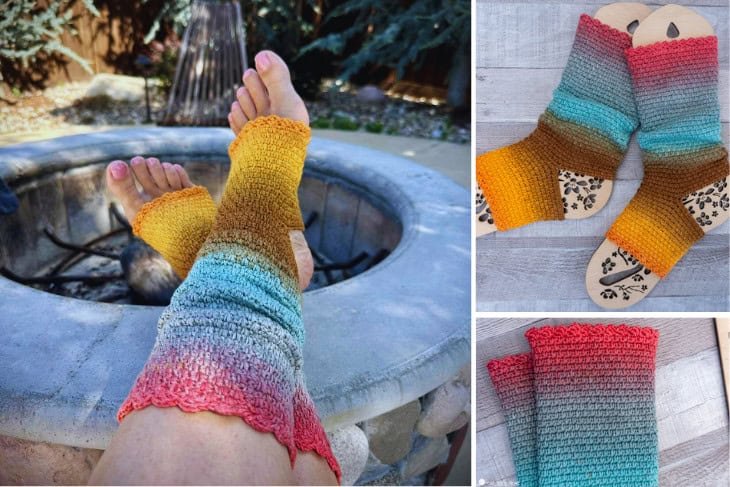
That’s it! I hope you love this stitch and that you use it often! If you’re itching to get your “feet wet” with a fresh pattern, consider making the Double Moss Yoga Socks, a new pattern right here on Heart Hook Home!
More stitch tutorials:
Wide Half Double Crochet Stitch Tutorial
How to Crochet the Star Stitch (Step-by-Step)
Crochet Larksfoot Stitch Tutorial


