Baby Star Sleep Sack Free Crochet Pattern
This post may contain affiliate links, meaning that I may earn a small commission if you make a purchase. See our disclosure policy for more information.


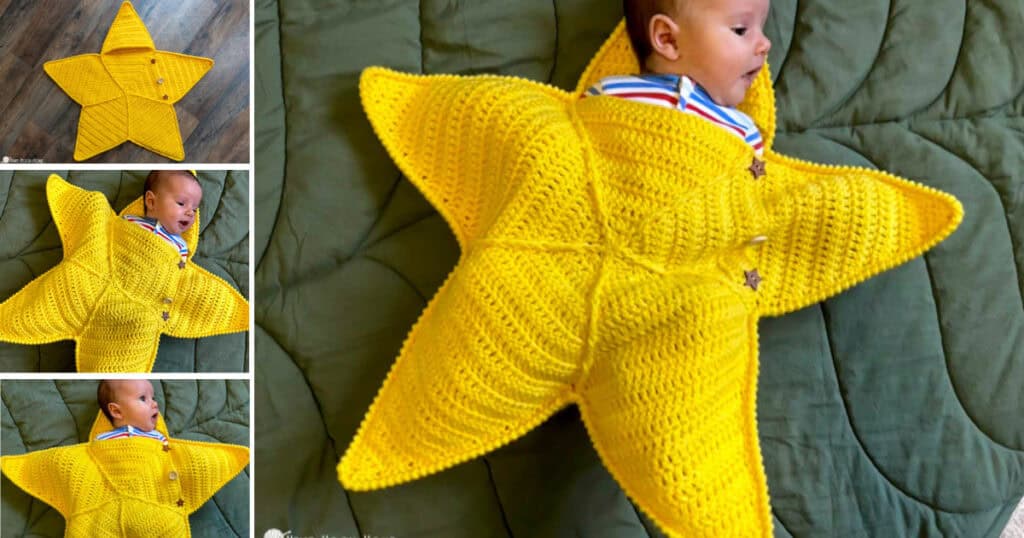
Do you have a new little one in your life? If you’re looking for the perfect sleeper for your own little one, or for gifting at a baby shower, this Star Sleep Sack using this free crochet pattern is the perfect thing! Available in three sizes – let’s make one!
Baby Star Sleep Sack Free Crochet Pattern
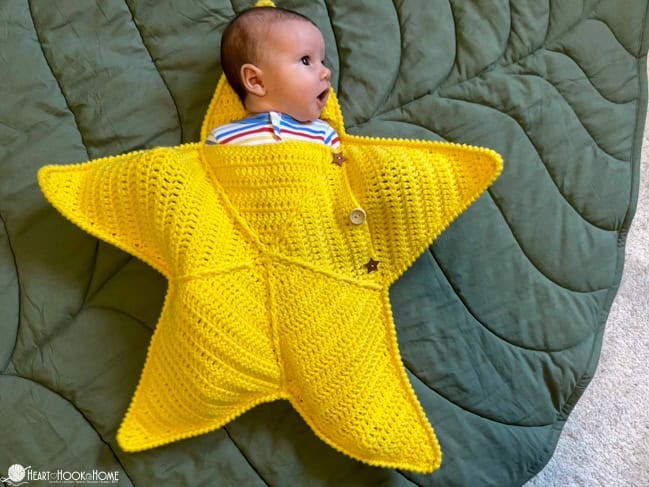
This little sleeper might just be cutest little sleep sack you ever did see! We use one of my favorite worsted weight yarns, Brava Worsted, to make one of three sizes: Newborn, 3-6M, or 6-12M. This is a five-point star crochet pattern that we turn into a cute little cocoon type sleeper.
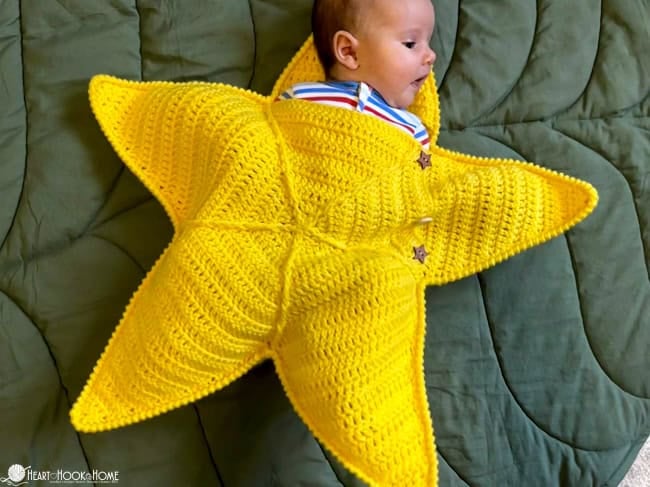
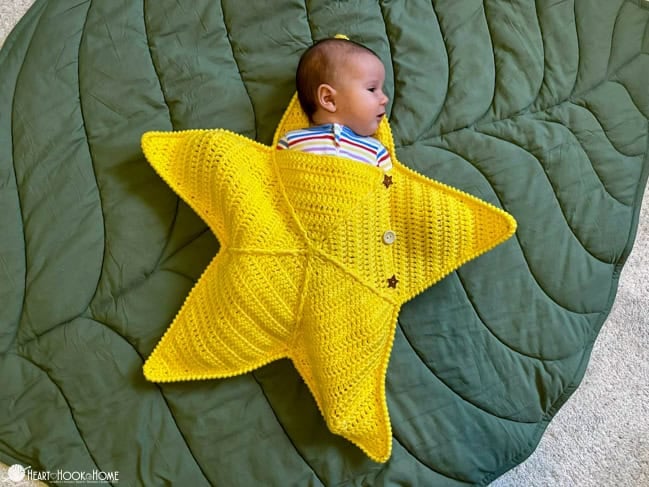
This adorable little sleep sack is shaped like a star with one point for each appendage. How precious is this?! Great for a gift for a new baby or for your own little one to stay cozied up while they sleep.
To determine the size needed for your little one, measure their “trunk” from their shoulders to their bum. You could use a zipper instead of the button closure if you’re feeling adventurous!
Grab the ad-free, printable version of this pattern on Ravelry, Etsy, or right here in the Heart Hook Home Blog Shop. Thank you!
Materials:
Worsted weight yarn (Brava Worsted used)
-approx. (485, 535, 670) yards
Crochet hook in size H/5mm or size needed to obtain gauge
(3 or 4) ¾” buttons
Gauge: 15 sts x 8 rows = 4” square using Double Crochet
Pattern Notes:
Pattern written using US terms.
Beginning chain does NOT count as a stitch.
Even rounds are Right Side (unless otherwise noted)
Body worked in join and turn rounds. Arms/Legs/Head (star points) worked in rows.
If you need help reading a crochet pattern, make sure you head over here and check out this detailed post.
Sizing: (0-3M, 3-6M, 6-12M) = trunk length up to (11”, 12”, 13”)
Abbreviations/Stitches:
Ch(s): Chain(s)
Sc: Single Crochet
St(s): Stitch(es)
Dc: Double crochet
Sk: Skip
Dc2tog: Double crochet two together
Sl st: Slip stitch
FpDtr: Front Post Double Treble Crochet
MC: Magic Circle
Bpdc: Back post Double crochet
RS/WS: Right/Wrong Side
Crab Stitch
Pattern:
Back Body
Round 1: Magic Circle, ch-2, 10 dc in circle. Join with a sl st in top of 1st dc. (10)
Round 2: Ch-2, do not turn, 2 dc in same as join, dc in next. * 3dc in next (mark centermost st), dc in next * repeat between * * 3 more times. Dc in same as 1st two sts. Join with a sl st in top of 1st dc. (20)
Rounds 3: Ch-2, turn, 2 dc in same as join, dc in each st to marker. * (2dc, ch-1, 2dc) in marked st, dc in each st to marker * repeat between * * 3 more times. (2dc, ch-1) in same as 1st two sts. Join with a sl st in top of 1st dc. (40)
Round 4: Ch-2, turn, 2 dc in ch sp, dc in each st to next ch sp. * 3dc in ch sp (mark centermost st), dc in each st to next ch sp * repeat between * * 3 more times. Dc in same as 1st two sts. Join with a sl st in top of 1st dc. (50)
Rounds 5 through (10, 10, 12): Alternate rounds 3 and 4. (ending with 140, 140, 170 sts)
3-6M ONLY
Round 11: Ch-2, turn, 2 dc in ch sp, dc in each st to marker. * 3dc in marked st (mark centermost st), dc in each st to next marker * repeat between * * 3 more times. Dc in same as 1st two sts. Join with a sl st in top of 1st dc. (150)
Do not fasten off. Continue to Star Points below.
Front Body
Round 1: MC, ch-2, 10 dc in MC. Join with a sl st in top of 1st dc. (10)
Round 2: Ch-2, do not turn, Fpdc around first st, * 3dc in next, Fpdc around next st (mark this st) * repeat between * * 3 more times. 3dc in last st. Join with a sl st in top of 1st Fpdc. (20)
Round 3: Ch-2, turn, 2dc in same as join, dc in each st to marker. * (2dc, ch-1, 2dc) in marked st, dc in each st to next marker * repeat between * * 3 more times. (2dc, ch-1) in same as first two sts of round. Join with a sl st in top of 1st dc. (40)
Round 4: Ch-2, turn, FpDtr around post st 2 rows down, dc in ch sp, dc in each st to next ch sp. * [dc in ch sp, FpDtr around post st 2 rows down (mark this st), dc in ch sp], dc in each st to next ch sp * repeat between * * 3 more times. Dc in same as first two sts. Join with a sl st in top of 1st dc. (50)
Rounds 5 through (10, 10, 12): Alternate rounds 3 and 4 (ending with (140, 140, 170 sts)
3-6M ONLY
Round 11: Ch-2, turn, Bpdc around post st in last round, dc in same as join, dc in each st to marker. * dc in marked st, Bpdc around post st in last round, dc in marked st, dc in each st to next marker * repeat between * * 3 more times. Dc in same as first dc of round. Join with a sl st in top of 1st st. (150)
Do not fasten off. Continue to Star Points below.
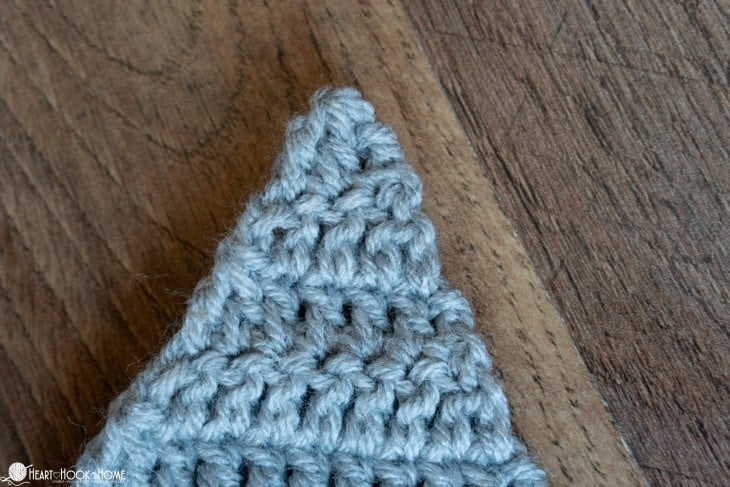
Star Points
1st point
From where you left off on “body”…
Row 1: Ch-2, turn, sk first st, dc in next st (ch-2 plus dc = dc2tog for remainder of pattern), dc in next (25, 27, 31) sts, dc2tog. (27, 29, 33)
Row 2: ch-2, turn, sk first st, dc in next st, dc across until 2 sts remain, dc2tog. (25, 27, 31)
Row 3 through (13, 14, 16): repeat row 2. (ending with 3 sts)
Wanna save this for later?
Row (14, 15, 17): Ch-2, turn, sk first st, dc2tog in last 2 sts. (1)
Fasten off.
Remaining Back Body Star Points
With (WS, RS, WS) facing, attach yarn in same stitch that last star point ended and complete Rows 1 through (14, 15, 17) as above.
Repeat until all 5 star points are complete. Weave in ends.

Remaining Front Body Star Points
With (WS, RS, WS) facing, attach yarn in same stitch that last star point ended and complete Rows 1 through (14, 15, 17) as above.
Repeat until 3 star points are complete. [1st and 2nd points will be the Legs, and 3rd point will be the Right Arm (as worn)]
Front Head and Left Arm star points are made separately and attached in construction.
Front Left Arm (as worn) Star Point
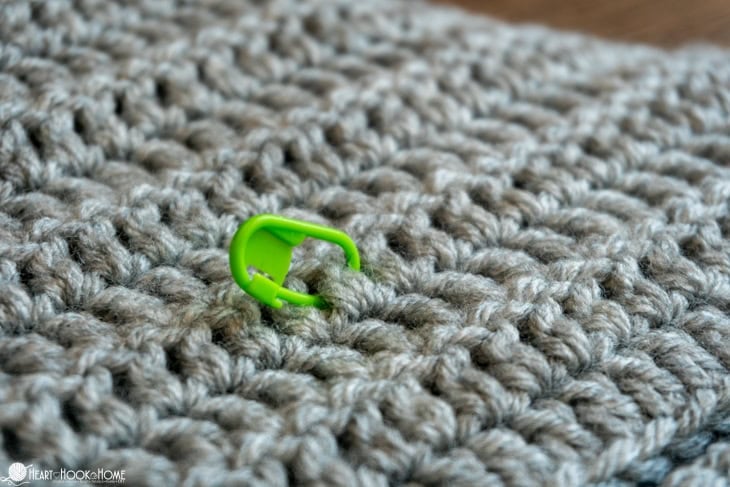
(Even, Odd, Even) rows are RS. Mark the RS to help with construction.
Row 1: Ch-(29, 31, 35), dc in 3rd ch from hook and each ch to end. (27, 29, 33)
Rows 2 & 3: ch-2, turn, dc in each st across. (27, 29, 33)
Row 4: Ch-2, turn, sk first st, dc in next st, dc in next 25 sts, dc2tog. (25, 27, 31)
Rows 5 through (15, 16, 18): Repeat row 4. (ending with 3 sts)
Row (16, 17, 19): Ch-2, turn, sk first st, dc2tog in last 2 sts. (1)
Fasten off.
Front Head Star Point
(Odd, Even, Odd) rows are RS. Mark the RS to help with construction.
Row 1: Ch-(28, 30, 34), dc in 3rd ch from hook and in next (23, 25, 29) chs, dc2tog in last two chs. (25, 27, 31)
Row 2: ch-2, turn, sk first st, dc in next st, dc across until 2 sts remain, dc2tog. (23, 25, 29)
Row 3 through (12, 13, 15): repeat row 2. (ending with 3 sts)
Row (13, 14, 16): Ch-2, turn, sk first st, dc2tog in last 2 sts. (1)
Fasten off and weave in ends.
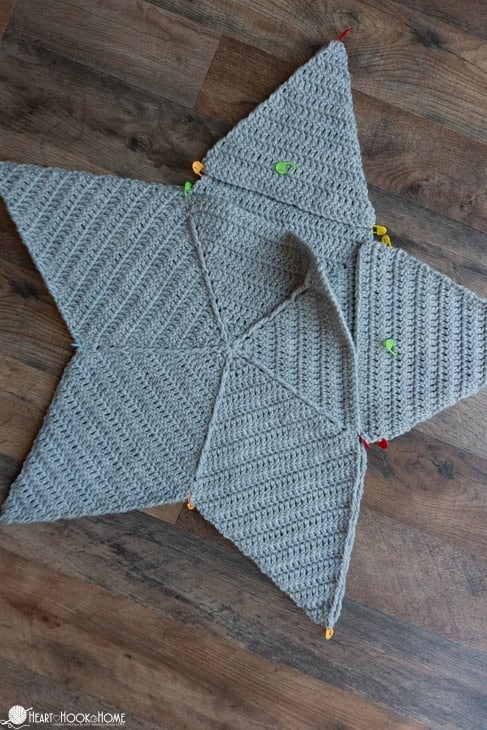
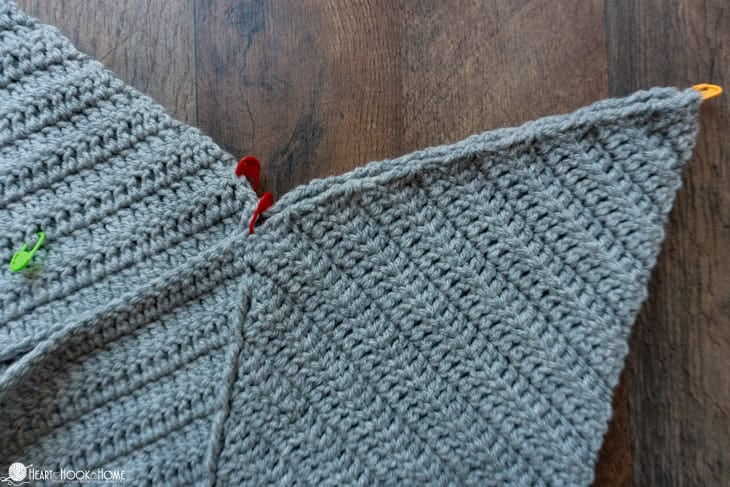
Construction:
Position Front Body, Left Arm Point, and Head Point on top of Back Body with WS’s together. Pin (or st mark) into place ensuring rows are lined up on all star points.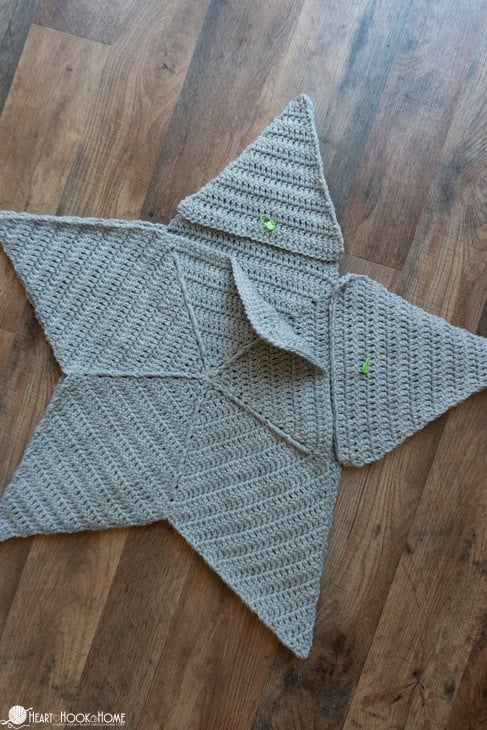
Edging:
Attach yarn at base of any 2 star points (into the top of a post st) making sure to go through both front and back…
Round 1: ch-1, sc in same as join. Sc evenly around cocoon (through both layers) placing 2 sc’s into each row end and 3 sc’s into each top of star points. Join with a sl st to first st.
* Note that the Front Left Arm is 2 rows longer than the Back. Those 2 bottom rows will not be worked into during edging.
* Front Head is 1 row shorter than Back Head, so when you get to first row of Back Head you will only work through the 1 layer.
Round 2: Ch-1 (do not turn), Crab st in each st around. Fasten off with Invisible Join and weave in ends.
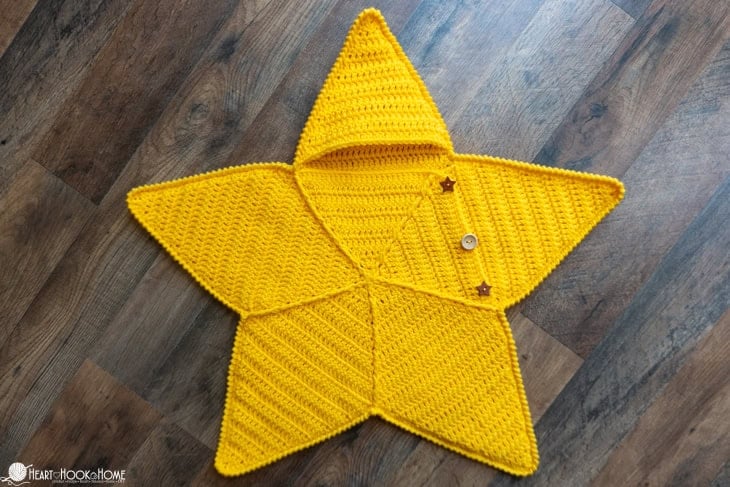
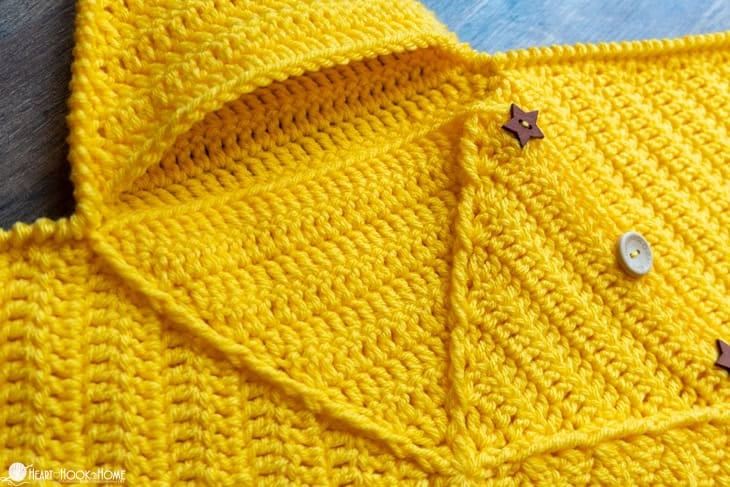
Buttons:
Buttons will be placed on the bottom two rows of Front Left Arm. Arrange 3-4 buttons evenly across, centered between the two rows and sew into place.
I hope you love this baby star sleeper pattern and that you’ll share a photo of yours with me when you’re finished! Please be sure to tag @HeartHookHome across all social media, or share in the Heart Hook Home Crochet Community on Facebook. ♥
More free patterns for baby:
Great Gender-Neutral Crochet Baby Blankets
One-Skein Baby Pants: Free Crochet Pattern
Pique-A-Boo Baby Blanket: Free Crochet Pattern


One Comment