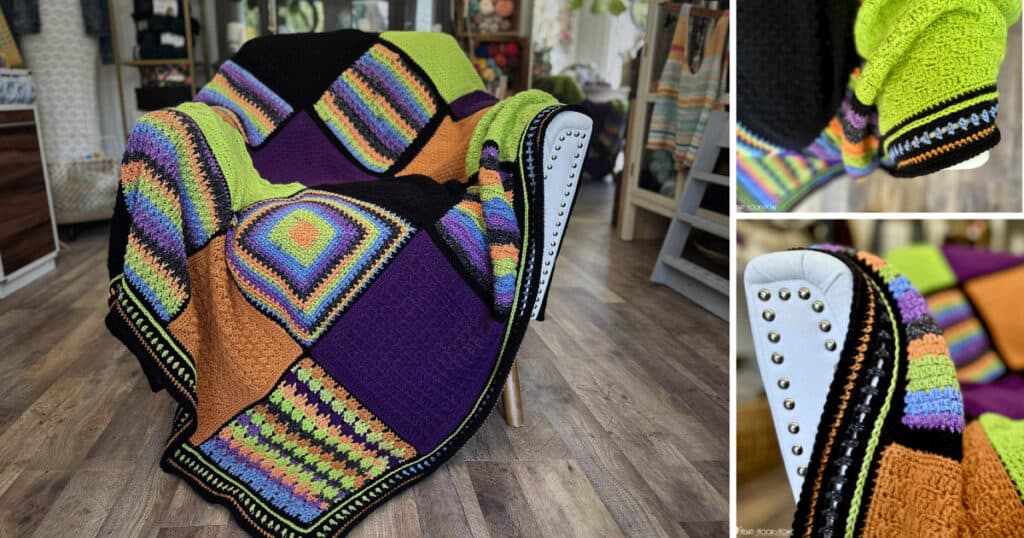
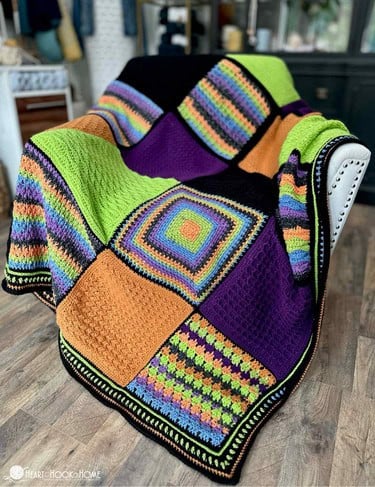
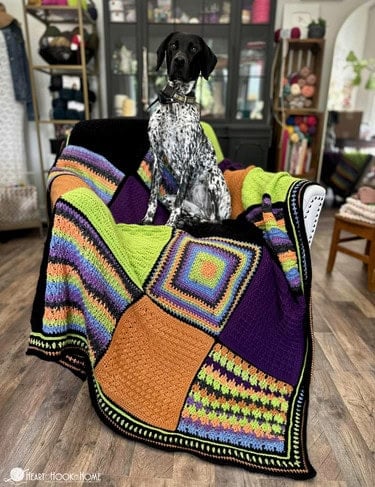
Halloween Sparkle Stitch Mix Blanket Crochet Along
This post may contain affiliate links, meaning that I may earn a small commission if you make a purchase. See our disclosure policy for more information.

Are you a Halloween person? Do you love anxiously waiting for little Trick-or-Treaters to knock on your door asking for candy? I love Halloween, but one thing I don’t have is a Halloween blanket. Let’s crochet one together in this Halloween Sparkle Stitch Mix Blanket Crochet Along!
Halloween Sparkle Stitch Mix Blanket Crochet Along
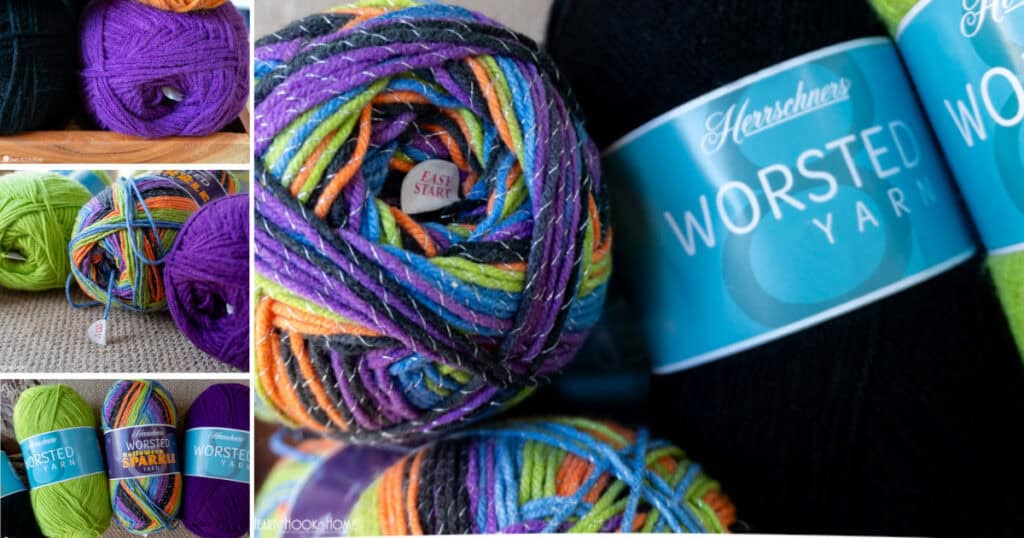
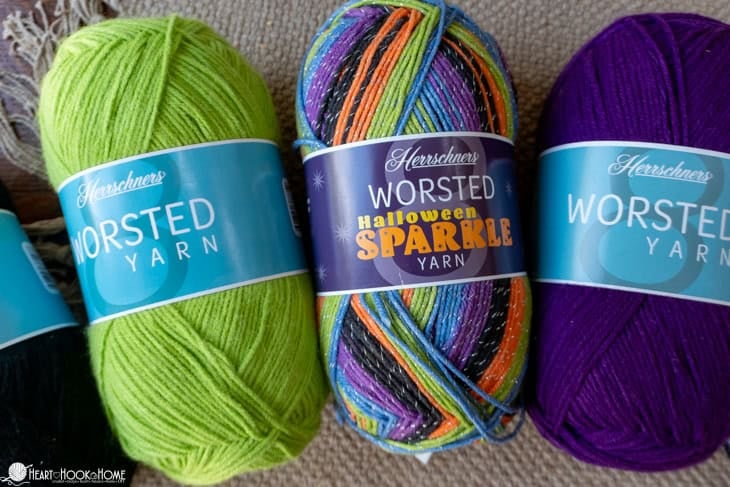
There’s something about this sparkly Halloween Yarn that I cannot get enough of. I’m usually not much of a sparkly or sequin person. In fact, I can’t remember the last thing I crocheted with sparkle yarn. But this yarn? This Halloween Sparkle Worsted 8? I can’t help myself. It’s GORGEOUS and makes for a beautiful throw!
If you too love this sparkle yarn (available in Halloween/Fall colorways OR in Holiday colorways), make a Halloween Sparkle Stitch Mix Blanket with me! Starting August 15th, we’ll crochet these beautiful colors into a Halloween themed throw perfect for watching scary movies on the couch this fall. Keep reading for more info.
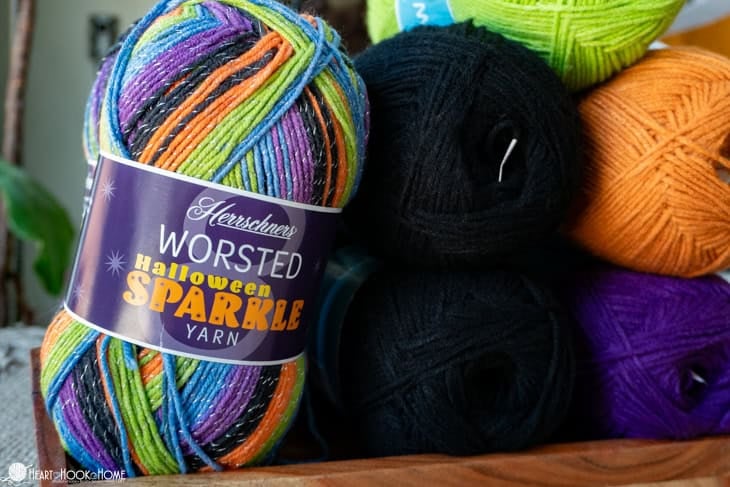
For my Stitch Mix throw I ordered a total of SEVEN Herrschners Worsted 8 acrylic yarn skeins. Each skein has 489 yards meaning that if you order the same quantity of yarn as I did, we’ll each have 3,423 yards of Halloween-y fiber goodness to crochet up a stitch mix throw for fall.

Materials:
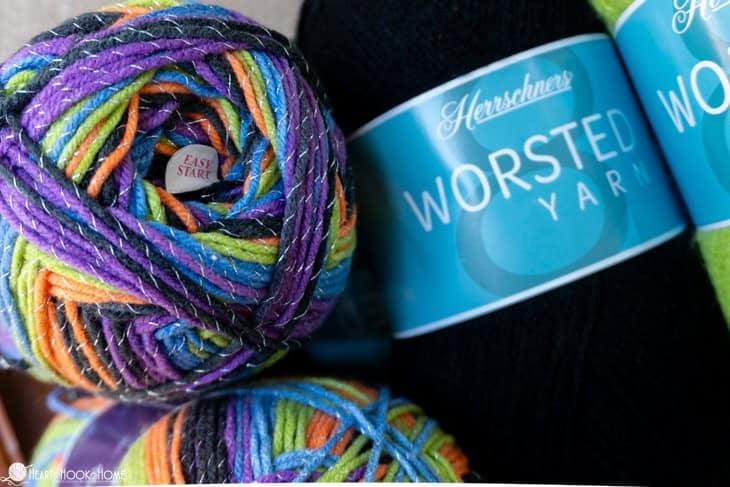
(2) Herrschners Halloween Sparkle skeins (“Monster Mash” pictured)
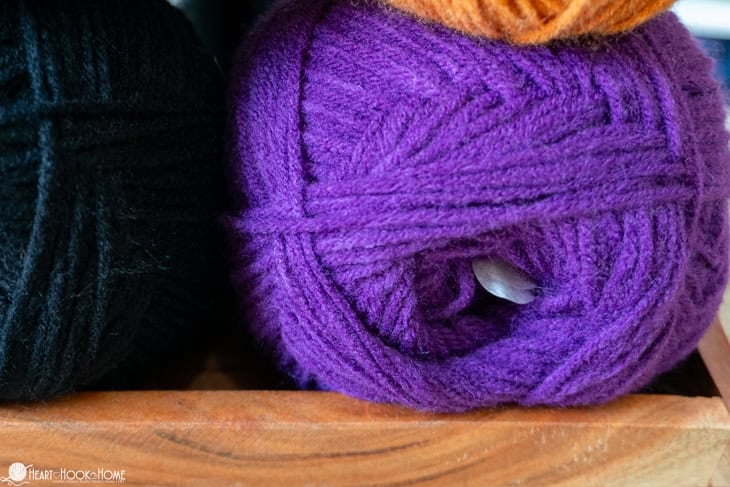
(2) Herrschners Worsted 8 skeins (“Black” pictured)
(1) Herrschners Worsted 8 Skein (“Lime” pictured)
(1) Herrschners Worsted 8 Skein (“Chestnut” pictured)
(1) Herrschners Worsted 8 Skein (“Eggplant” pictured)
Note that if you want to make a holiday themed throw instead, they have gorgeous yarns in holiday colorways!
Crochet hook in size I/5.5mm or size needed to obtain gauge
Gauge: 14 sts in 4″ width using Double Crochet
Pattern Notes:
Patterns written using US terms.
The ch(s) at the beginning of each row do NOT count unless otherwise stated.
FLO = Front Loop Only
It is ideal for all squares to be slightly under 12″ so that we can block them all to the same size. Within half an inch (1 cm) or so is best. If you need to add another border row to get to that range, that’s perfectly fine!
I personally plan on using the black yarn for the border row(s) on my sparkle squares.
For this stitch mix throw I am taking the backbone of the 2021 Crochet Stitch Sampler Afghan pattern and I am making some tweaks to it. I’m removing some of the squares and adding some new stitches that I’ve learned to love in the four years since making that first stitch sampler blanket.
There will be ten (10) 12″ square patterns included, with the stitches used strategically selected to ensure we’ll have maximum yardage left over for a nice, chunky, Halloween-y border. The color breakdown of my squares is…
(2) Scrap Squares using ALL of the colors (Larksfoot Stitch)
If you want to order more yarn for a larger size throw or blanket, the squares needed for each of the sizes are listed below. Crochet as many of these squares as you like! The 12″ squares range in yardage from as little as ~120 yards to as many as ~180 yards a piece.

We will start crocheting on August 15th. Each day I walk 6 miles at the park while I crochet. I will take my yarn for the square with me, we’ll talk about the stitch, and crochet on it together. I am allotting myself two days’ worth of walking time for each square. I am making twenty squares, so that will take forty days! If all goes to plan (I don’t walk outside when it’s raining, so hopefully we have dry August and September mornings!), that means I should finish my twentieth square on or around September 24th.
Then we’ll assemble our squares together, add the big “boooo-tiful” border and finish by the end of September! Plenty of time for us to use our gorgeous, new, sparkly, spooky throw blankets before Halloween. I am so excited to crochet this with you! I will add new squares to this blog post as I start crocheting them, every two days.
I hope you’ll join me as I crochet this Halloween Stitch Mix Throw! If you need help reading a crochet pattern, make sure you head over here and check out this detailed post. Come back to this post starting on August 15th, or sign up for the Crochet Along Email alerts here:
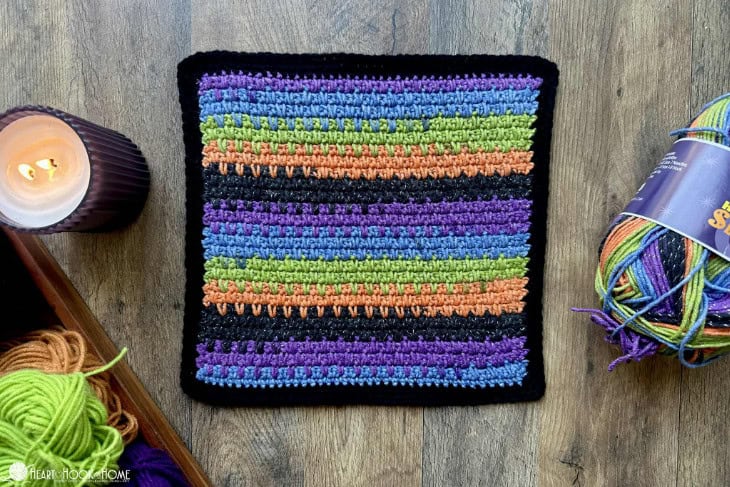
Square Pattern #1 – Brick Stitch Square
Here is a full tutorial on the Brick Stitch. If you like, follow along with the video using a chain-43 as needed in the following pattern. For this square I used about 140 yards.
For all squares in this blanket we are using the I/5.5mm hook. If you need to adjust the width of this Brick Stitch square to be just shy of 12″, add to or remove from the starting chain in multiples of FOUR stitches.
Row 1: Ch-43, dc in 3rd ch from hook and in each to end. (41)
Row 2: Ch-1, turn, sc in first st. sc in FLO of each st across, sc in last st. (41)
Row 3: Ch-2, turn, dc in first st, * dc in FLO of the dc from 2 rows down, dc in next 3 sts * repeat between * * to end. (41)
Row 4: repeat row 2 (41)
Row 5: Ch-2, turn, * dc in 3 sts, dc in FLO of the dc from 2 rows down * repeat between * * to end, dc in last st. (41)
Rows 6 through 29: repeat rows 2 through 5 (41)
Row 30: repeat row 2 (41)
Row 31: repeat row 3 (41)
Border: Do not turn, but rotate clockwise. Sc evenly down row ends, 3sc in corner. Sc in each st to end, 3sc in corner. Sc evenly up row ends, 3sc in corner. Sc in each st to end 2sc in last st. If desired, do one more row of single crochets around the border to clean things up or to get the square to size. Fasten off with Invisible Join.
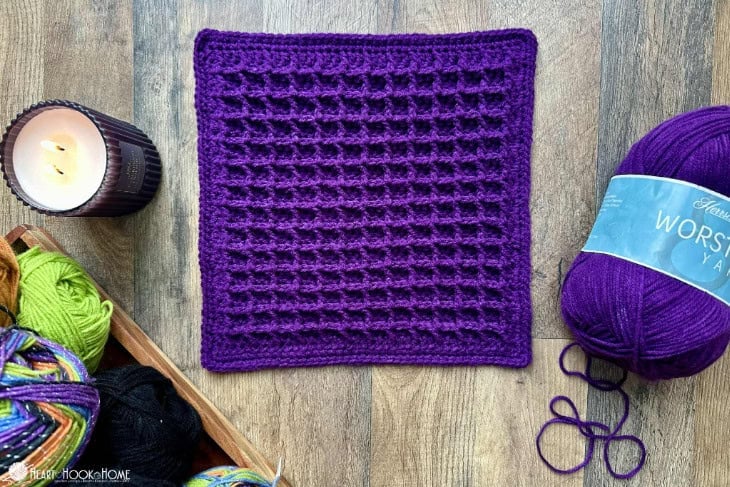
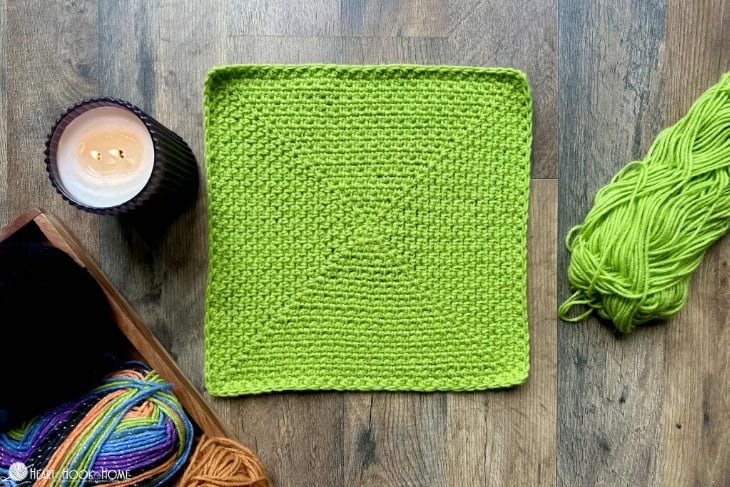
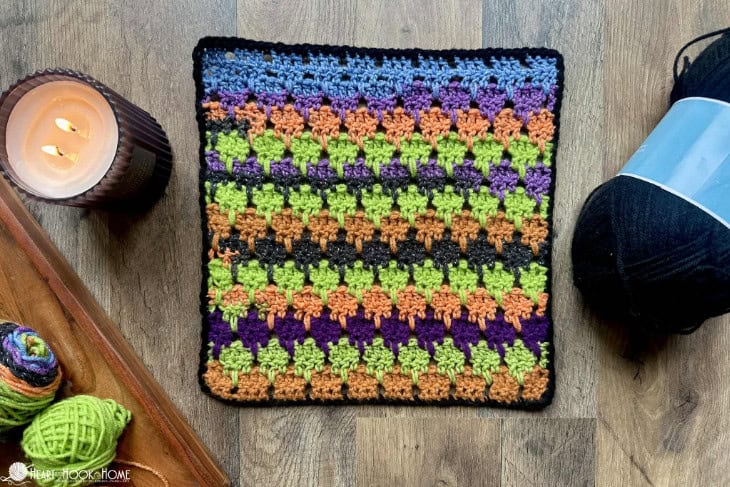
Square Pattern #2 – Waffle Square:
Head over for the full Waffle Stitch tutorial if needed. If you like, follow along with the video tutorial starting with a chain-41 (or Fdc-39). For this square I used about 164 yards.
For all squares in this blanket we are using the I/5.5mm hook. If you need to adjust the width of this Waffle square to be just shy of 12″, add to or remove from the starting chain in multiples of THREE stitches.
Row 1: Ch-41, dc in 3rd ch from hook and in each chain to end. (39)
Row 2: Ch-2, turn, dc in first stitch. * Fpdc around next st, dc in next 2 sts * repeat between * * 11 more times. Fpdc around next st, dc in last st. (39)
Row 3: Ch-2, turn, dc in the first 2 sts. * Fpdc around next 2 sts, dc in next st * repeat between * * 11 more times. Dc in last st. (39)
Rows 4 through 27 (or until about 11.5″ tall): alternate rows 2 & 3 (39)
Row 28: repeat row 2 (39)
Border: Rotate the square and sc evenly down row ends, 3sc in corner, sc across bottom edge, 3sc in corner, sc evenly up row ends, 3sc in corner, sc across, placing 2 sc in same as first border stitch. If desired, do one more row of single crochets around the border to clean things up or to get the square to size. Fasten off using Invisible Join.

![]()
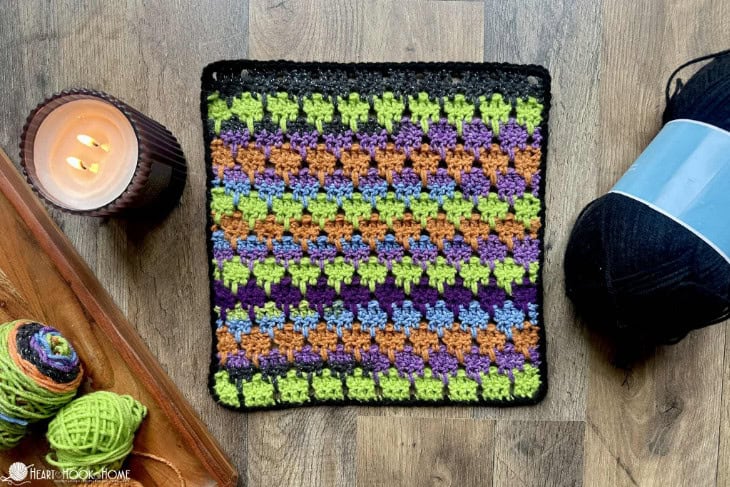
Square Pattern #3 – Blanket Stitch Square:
Head over for the full Blanket Stitch tutorial if needed. Note that the square pattern below starts with a row of single crochets instead of a chain. This helps the square/blanket to be more stable when seaming and bordering, etc. For this square I used about 145 yards.
For all squares in this blanket we are using the I/5.5mm hook. If you need to adjust the width of this Blanket Stitch square to be just shy of 12″, add to or remove from the starting chain in multiples of THREE stitches.
Row 1: Ch-40, sc in 2nd ch from hook and in each ch to end. (39)
Rows 2 through 30 (or until about 11.5″ tall): Ch-2 (does not count), turn, 2dc in first st, * sk-2 sts, (sc, 2dc) in next st * repeat between * * until two sts remain, sk-next st, sc in final st. (39)
Border: Rotate the square and sc evenly down row ends, 3sc in corner, sc across bottom edge, 3sc in corner, sc evenly up row ends, 3sc in corner, sc across, placing 2 sc in same as first border stitch. If desired, do one more row of single crochets around the border to clean things up or to get the square to size. Fasten off using Invisible Join.
![]()

Square Pattern #4 – Corner to Corner (C2C) Square:
Head over for the full Corner to Corner tutorial if needed. For this square I used about 150 yards.
For all squares in this blanket we are using the I/5.5mm hook. Keep adding blocks until the overall width reaches 11.25″ (28.5 cm) – 11.5″ (29.25 cm).
Row 1: Ch-5, dc in 3rd ch from hook and in next 2 chs. (1 block made).
Row 2: Ch-5, turn, dc in 3rd ch from hook and in each of next 2 chs, (sl st, ch-2, 3dc) around ch-sp. (2 blocks made)
Row 3: Ch-5, turn, dc in 3rd ch from hook and in each of next 2 chs, [(sl st, ch-2, 3dc) around next ch-sp] twice. (3 blocks made)
Row 4: Ch-5, turn, dc in 3rd ch from hook and in each of next 2 chs, [(sl st, ch-2, 3dc) around next ch-sp] 3 times. (4 blocks made)
Row 5: Ch-5, turn, dc in 3rd ch from hook and in each of next 2 chs, [(sl st, ch-2, 3dc) around next ch-sp] 4 times. (5 blocks made)
Rows 6 – 17: Continue adding rows until you reach measurement. Mine needed 17 rows, adjust yours if needed. (17 blocks)
When ready to decrease…
Row 18: Turn, sl st two times up block, sl st in ch-2 sp. Ch-2, 3dc around ch-sp. [(sl st, ch-2, 3dc) around next ch-sp] to end.
Repeat row 18 until only one block remains. Turn, sl st two times to corner.
Border: Rotate the square and sc evenly to other corner, 3sc in corner, sc across bottom edge, 3sc in corner, sc evenly up to other corner, 3sc in corner, sc across top, placing 2 sc in same as first border stitch. If desired, do one more row of single crochets around the border to clean things up or to get the square to size. Fasten off using Invisible Join.
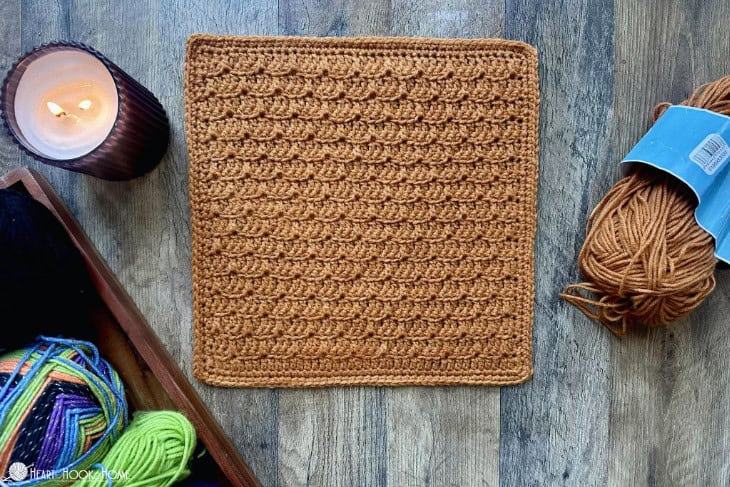
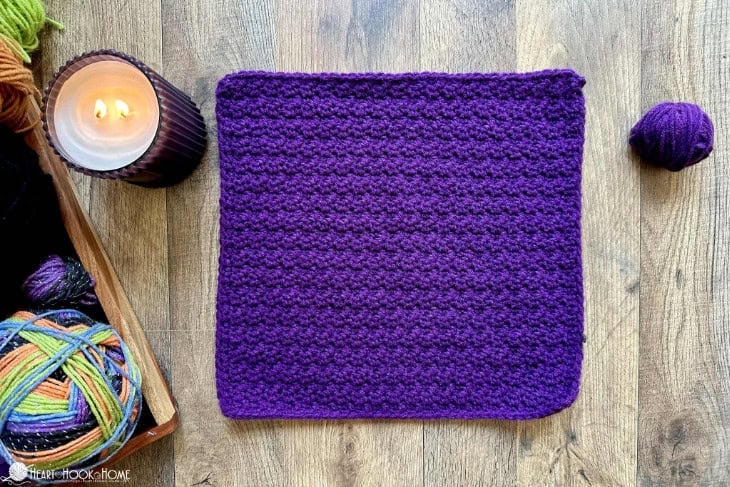
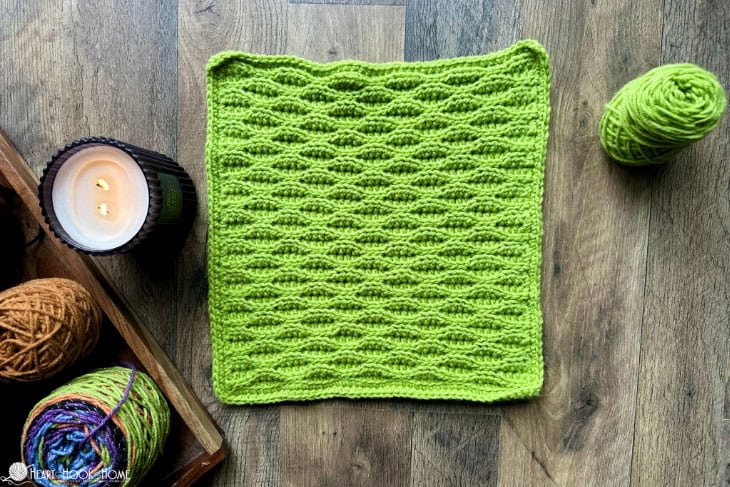
Square Pattern #5 – Lemon Peel Square:
Head over for the full Lemon Peel tutorial if needed. If you need to adjust the width of this Lemon Peel Stitch square to be just shy of 12″, add to or remove from the starting chain in multiples of TWO stitches.
For all squares in this blanket we are using the I/5.5mm hook. For this square I used about 129 yards.
Row 1: Ch-41, sc in second ch from hook, dc in next. * sc in next, dc in next * repeat between * * to the end of the row. (40)
Rows 2 through 35 (or until about 11.5″ tall): Ch-1, turn, * sc in next, dc in next * repeat between * * to the end of the row. (40)
Border: Rotate the square and sc evenly down row ends, 3sc in corner, sc across bottom edge, 3sc in corner, sc evenly up row ends, 3sc in corner, sc across, placing 2 sc in same as first border stitch. If desired, do one more row of single crochets around the border to clean things up or to get the square to size. Fasten off using Invisible Join.
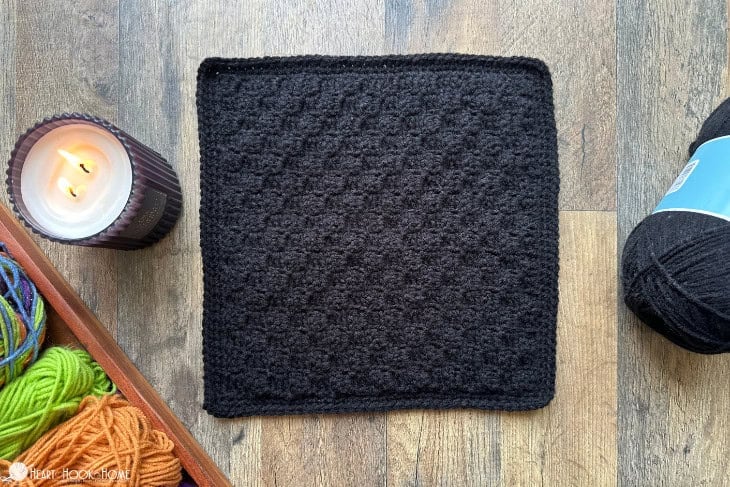
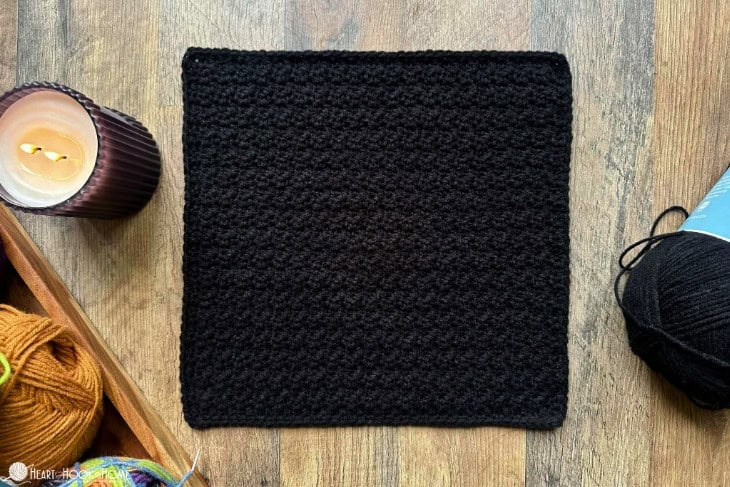
Square Pattern #6 – Moss Stitch Granny Square:
For all squares in this blanket we are using the I/5.5mm hook. For this square you’ll need about 140 yards, and you’ll simply keep adding rows until the square is 11.25″ (28.5 cm) – 11.5″ (29.25 cm) or so.
This is a great square to follow along with the full Moss Stitch Granny tutorial, so I’ve included that for you here. If you do not like the square or have trouble starting, you can instead use the regular Moss Stitch square pattern from the original Stitch Sampler Afghan pattern here.
Row 1: Magic Circle, [sc, ch-1] 4X in circle. Join to top of first sc. (8) Mark each ch-sp with a stitch marker.
Round 2: Ch-1, turn, sc in marked sp to the right of the join, ch-1, (sc, ch-1, sc, ch-1) in each of the next 3 marked stitches, sc in same as first st marker, ch-1. Join to top of first sc. (16)
Round 3: Ch-1, turn, (sc, ch-1) in same ch-sp as join, * sc in next ch-sp, ch-1, (sc, ch-1, sc, ch-1) in marked/corner sp * repeat between * * two more times, sc in next ch-sp, ch-1, sc in same ch-sp as first st, ch-1. Join to top of first sc. (24)
Round 4: Ch-1, turn, (sc, ch-1) in same ch-sp as join, * (sc, ch-1) in each ch-sp to corner, (sc, ch-1, sc, ch-1) in corner sp * repeat between * * two more times, (sc, ch-1) in each ch-sp to corner, (sc, ch-1) in same ch-sp as first st, ch-1. Join to top of first sc. (32)
Wanna save this for later?
Continue adding rounds until you the square reaches 11.25″ (28.5 cm) – 11.5″ (29.25 cm) – (Should be around 25 rounds or so). When that happens…
Border:
Ch-1, turn, sc in corner ch-sp, * Sc2tog using next sc and the sc from two rounds down, repeating that stitch to next corner, 2sc in corner sp * repeat between * * three more times. If desired, do one more row of single crochets around the border to clean things up or to get the square to size. Fasten off using Invisible Join.
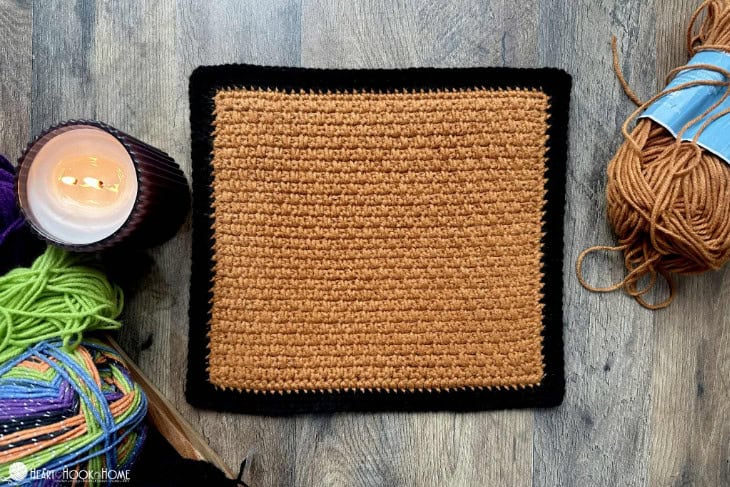
Square Pattern #7 – Almond Ridges Square:
Head over for the full Almond Ridges tutorial if needed. If you need to adjust the width of this square to be just shy of 12″, add or remove from the starting chain in multiples of EIGHT stitches. Note that it is better for the square to be too small and add additional border rows than for it to be too big.
For all squares in this blanket we are using the I/5.5mm hook. For this square I used about 153 yards.
Row 1: Ch-45, Sl st in 2nd chain from hook and in the next 3 sts. * Hdc in next 4 sts, sl st in next 4 sts * repeat between * * to end. (44)
***work in the BLO for the remainder of the pattern***
Row 2: Ch-1, turn, sl st in first 4 sts, * hdc in next 4 sts, sl st in next 4 sts * repeat between * * to end. (44)
Rows 3 – 4: Ch-1, turn, hdc in first 4 sts. * sl st in next 4 sts, hdc in next 4 sts * repeat between * * to end. (44)
Row 5 – 6: Ch-1, turn, sl st in first 4 sts, * hdc in next 4 sts, sl st in next 4 sts * repeat between * * to end. (44)
Rows 7 – 42: Repeat rows 3 – 6 nine more times.
Border: Ch-1, turn, sl st in BLO of each st across top, 2sc in corner. Rotate and sc evenly across row ends, 2sc in corner st. Sl st in BLO of each st across, 2sc in corner st. Rotate and sc evenly across row ends, sc in same as beginning. If desired, do one more row of single crochets around the border to clean things up or to get the square to size. Fasten off using Invisible Join.
Square Pattern #8 – Alpine Stitch Square:
Head over for the full Alpine Stitch tutorial if needed. If you need to adjust the width of this square to be just shy of 12″, add to or remove from the starting chain in multiples of TWO stitches.
For all squares in this blanket we are using the I/5.5mm hook. For this square I used about 177 yards.
Row 1: Fdc-39 (or ch-41, dc in 3rd ch from hook and in each to end). (39)
Row 2: Ch-1, turn, sc in each st to end. (39)
Row 3: Ch-2, turn,* dc in next, fptc around st two rows down * repeat between * * to end. Dc in last. (39)
Row 4: repeat row 2 (39)
Row 5: Ch-2, turn, dc in first 2 sts * Fptr around dc from two rows down, dc in next * repeat between * * until 3 sts remain. Fptr around next, dc in remaining 2 sts. (39)
Row 6: repeat row 2 (39)
Rows 7 – 38: repeat rows 3 – 6 (39)
*adjust height by crocheting 4 fewer rows or 4 more rows
Row 39: repeat row 3 (39)
Border: Rotate square and sc evenly down row ends. 3sc in corner st, sc across bottom edge. 3sc in corner st, sc evenly up row ends. 3sc in corner st, sc in each st across, 2sc in same as starting. If desired, do one more row of single crochets around the border to clean things up or to get the square to size. Fasten off using Invisible Join.

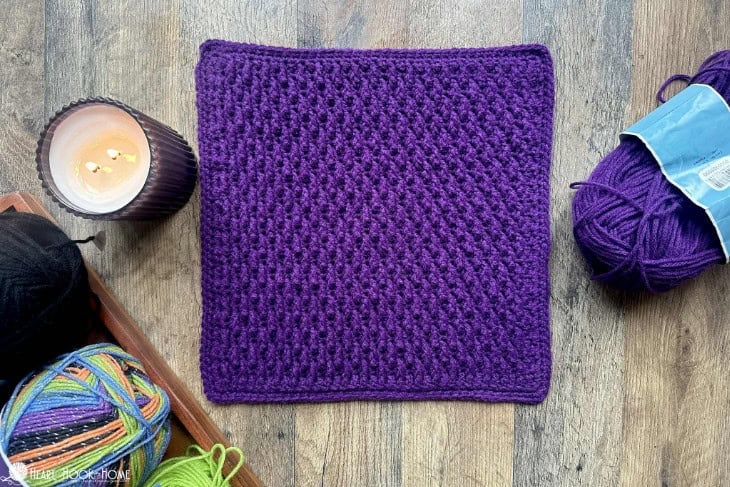
Square Pattern #9 – Double Moss Stitch Square:
Head over for the full Double Moss stitch tutorial if needed. If you need to adjust the width of this square to be just shy of 12″, add to or remove from the starting chain in multiples of TWO stitches.
For all squares in this blanket we are using the I/5.5mm hook. For this square I used about 136 yards.
Row 1: Ch-40, sc in second ch from hook and in each ch to end. (39)
Row 2: Ch-1, turn, sc in first st, * ch-1, sk-next st, sc in next * repeat between * * to end. (39)
Row 3: Ch-1, turn, sc in first st, * Ssc in skipped st two rows down, ch-1, sk next st * repeat between * * until two sts remain, Ssc in skipped st two rows down, sc in final st. (39)
Row 4: Ch-1, turn, sc in first two sts, * ch-1, sk-ch-sp, sc in next Ssc * repeat between * * until one st remains, sc in final st. (39)
Row 5: Ch-1, turn, sc in first st, * ch-1, sk next st, Ssc in sp two rows down * repeat between * * until two sts remain, ch-1, sk next st, sc in final st. (39)
Row 6: Ch-1, turn, sc in first st, * ch-1, sk-next ch-sp, sc in Ssc * repeat between * * until two sts remain, ch-1, sk-next ch-sp, sc in final st. (39)
Row 7: Ch-1, turn, sc in first st, * Ssc in ch-sp two rows down, ch-1, sk next st * repeat between * * until two sts remain, Ssc in ch-sp two rows down, sc in final st. (39)
Rows 8 through 47: repeat rows 4 through 7 in order (39)
Row 48: repeat row 4
Row 49: repeat row 5
Row 50: repeat row 6
Row 51: Ch-1, turn, sc in first st, * Ssc in ch-sp two rows down, sc next st * repeat between * * until two sts remain, Ssc in ch-sp two rows down, sc in final st. (39)
Border: Rotate square and sc evenly down row ends. 3sc in corner st, sc across bottom edge. 3sc in corner st, sc evenly up row ends. 3sc in corner st, sc in each st across, 2sc in same as starting. If desired or needed, do one more row of single crochets around the border to clean things up or to get the square to size. Fasten off using Invisible Join.
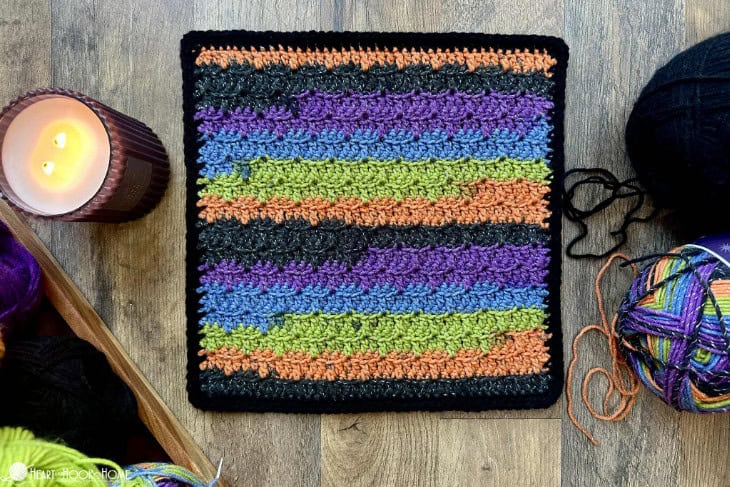
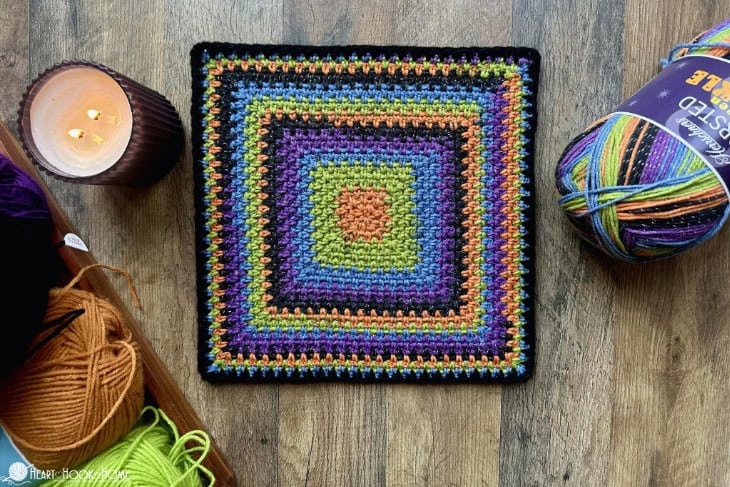
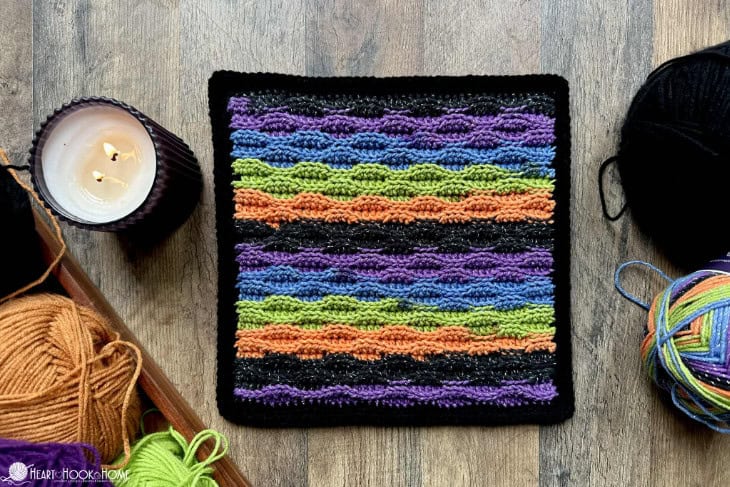
Square Pattern #10 – Larksfoot Stitch Square:
Head over for the full Larksfoot Stitch tutorial if needed. If you need to adjust the width of this Larksfoot Stitch square to be just shy of 12″, add to or remove from the starting chain in multiples of FOUR stitches.
For all squares in this blanket we are using the I/5.5mm hook. To make this square we are using all of the scrap yarn (orange, lime, purple, and sparkle as needed) from making all of the other squares. Change colors every TWO rows, and I am changing colors randomly and trying to keep them proportionate throughout the two squares we’ll make in this manner.
Sdc = Spike Double Crochet (Larksfoot tutorial here)
Using Color A…
Row 1: Ch-41, dc in 4th ch from hook, dc in next ch (this counts as three dcs in a row), * Ch-1, sk-1 ch, dc in next 3 chs * repeat between * * across. (39)
Row 2: Ch-3 (counts as dc here and throughout), turn, dc in next 2 sts. * ch-1, sk-1, dc in next 3 sts * repeat between * * across, placing last dc in top of beg ch. (39)
Change to Color B…
Row 3: Ch-4 (counts as dc + ch-1 here and throughout), turn, sk next st, dc in next st, * Sdc in ch sp two rows down, dc in next, ch-1, sk-1, dc in next * repeat between * * across, placing last dc in top of beg ch. (39)
Row 4: Ch-4, turn, sk next ch, * dc in next 3 sts, ch-1, sk-1 * repeat between * * across until one st remains. Dc around beg ch sp. (39)
Change to Color C…
Row 5: Ch-3, turn, Sdc in ch sp two rows down, dc in next, * ch-1, sk-1, dc in next, Sdc in ch sp two rows down, dc in next * repeat between * * across, placing final dc in third ch from beg ch. (39)
Row 6: Ch-3, turn, dc in next two sts. * Ch-1, sk-1, dc in next 3 sts * repeat between * * across, placing last dc in top of beg ch. (39)
Rows 7 through 28 (or until just shy of 12″): repeat rows 3 through 6, maintaining the color change sequence every two rows
Where still attached, rotate to work into row ends… (I am using black for the border on this one…)
Border: Ch-1, * sc 2x evenly down each dc row to corner, 3sc in corner st, sc in each st across, 3sc in corner st * repeat between * * one more time. If desired or needed, do one more row of single crochets around the border to clean things up or to get the square to size. Fasten off using Invisible Join.
Now that we have all TEN of our square patterns, we’ll work on finishing all of them, weaving in ends, and preparing for assembly/border. If you haven’t yet signed up for the email alerts, be sure to do that now!
For assembly I am using the technique that I used in this similar blanket. Since I’m using black yarn for joining the squares on this blanket I am not going to attempt to share photos. It’s hard to see in real life, much less in a photo! Here is the video tutorial for How to Join Crochet Squares, or you can watch it on YouTube here. Be sure to subscribe while you’re there!
Blanket Border:
Using Main Color, attach near any corner…
Row 1: Ch-1, sc in each st around, placing 3sc in each corner st. Join to first st.
Row 2: Ch-1, sc in each st around, placing 3sc in each corner. Join to first st.
Change to accent color (I used “Lime” and needed about 30 yards for this round)…
Row 3: Ch-1, sl st in FLO of each st around. Join to first st.
Change back to Main Color…
Row 4: Ch-1, sc in BLO of each st from round 2. Join to first st.
Row 5: Ch-1, sc in each st around. Join to first st.
Change to accent color (I used the sparkle yarn and needed about 60 yards for this round)…
Row 6: Ch-1, * hdc in next st, ch-1, sk next st * repeat between * * around entire blanket. Join to first st. (It’s okay if the corners don’t hit perfectly – no one will know).
Change back to Main Color…
Row 7: Ch-1, 2sc around each ch-sp from row 6, placing 3sc around each corner ch-sp. Join to first st.
Row 8: Ch-1, sc in each st around, placing 3sc in each corner st. Join to first st.
Change to accent color (I used the “orange” yarn and needed about 50 yards for this round)…
Row 9: Ch-1, sc in each st around, placing 3sc in each corner st. Join to first st.
Change back to Main Color…
Rows 10 and 11 (or until you can no longer complete another full round): Ch-1, sc in each st around entire blanket, placing 3sc in each corner. Join to first st.
We. Are. Finished!!! All we have left is to weave in any straggling yarn ends and to enjoy our lovely Halloween Sparkle Blanket!
If you loved making this blanket and want to make a Holiday Sparkle Stitch Mix Crochet Along version make sure you sign up for that here! This will be a fun, project that we can make together through the holiday season. Love it!
Be sure to check out the daily videos from this project on Instagram, Facebook, and TikTok.
More crochet blanket patterns:
Simple Tunisian Chevron Throw Blanket Pattern
Cluster Ripple Blanket: Free Pattern
Comfort Crochet Blanket in Multiple Sizes


8 Comments