Blanche V-Neck Sweater Free Crochet Pattern
This post may contain affiliate links, meaning that I may earn a small commission if you make a purchase. See our disclosure policy for more information.
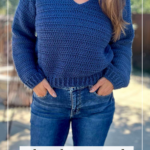

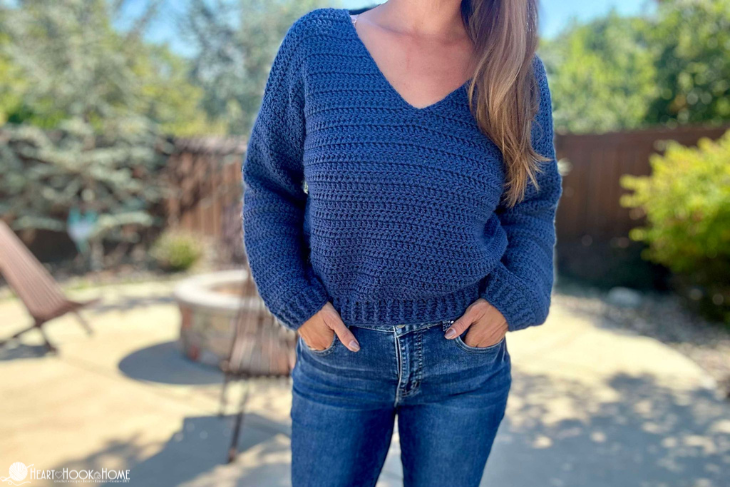
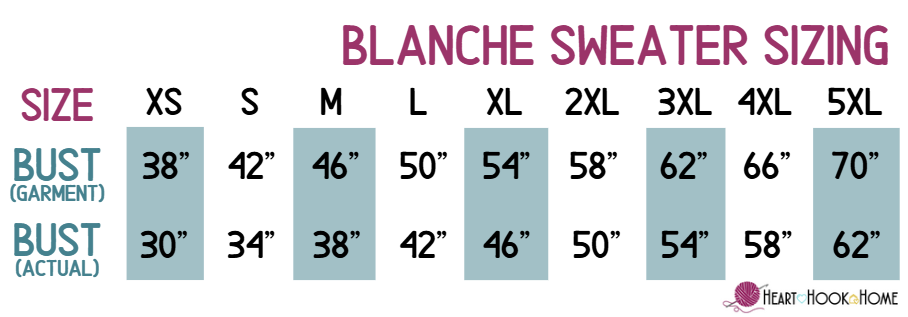
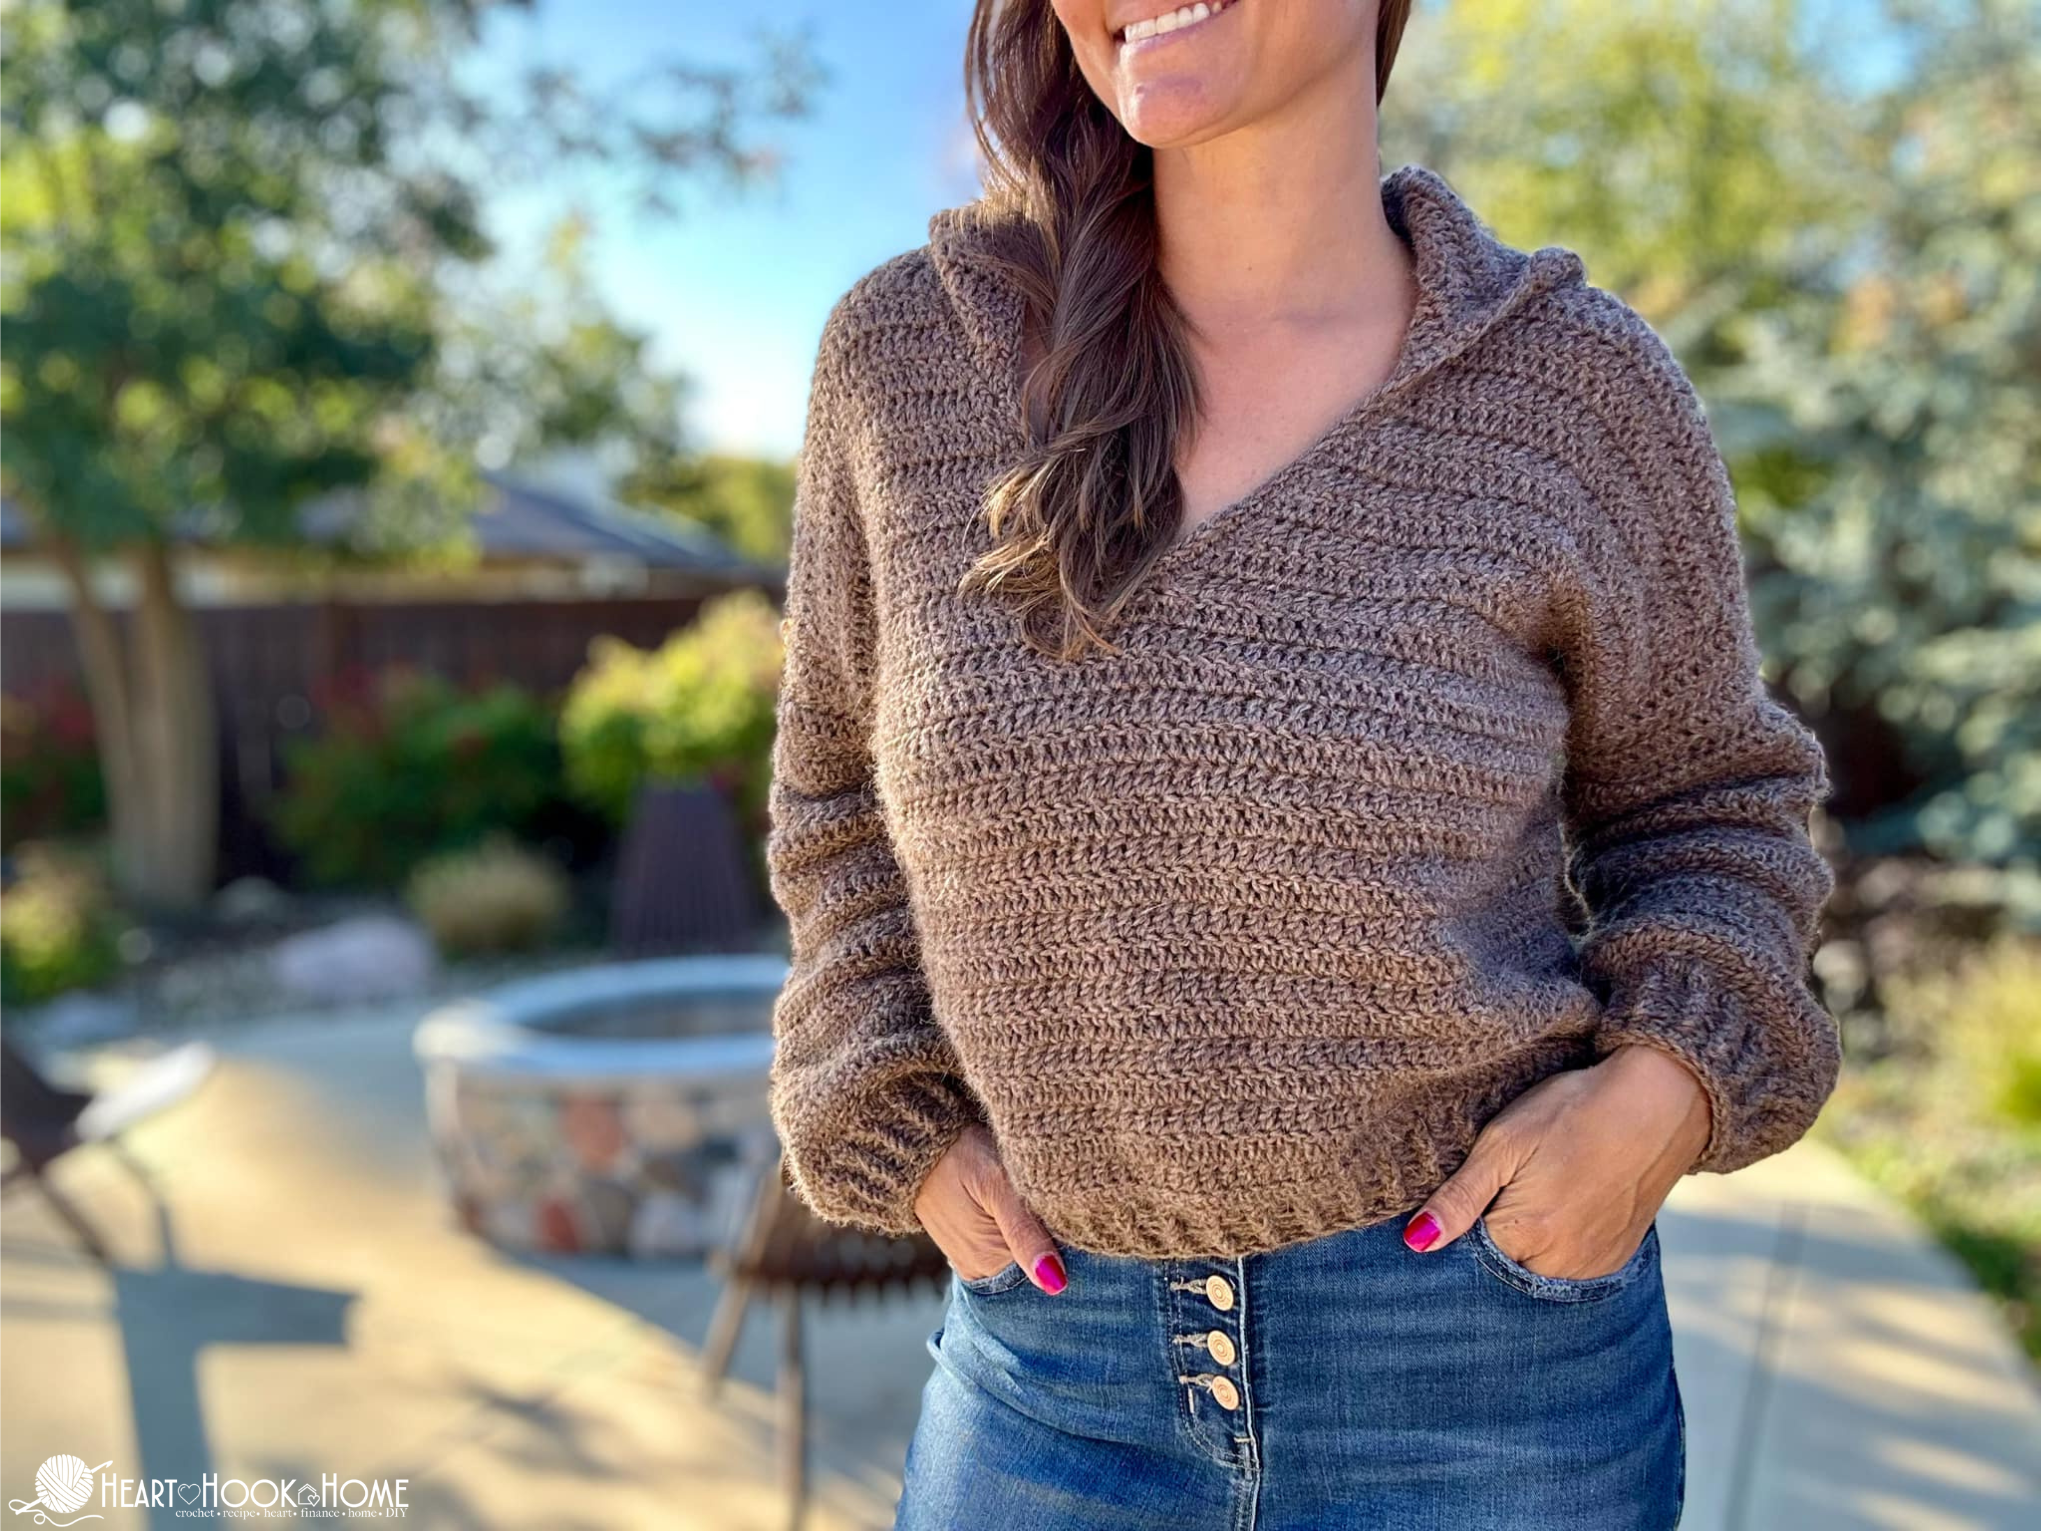
Sometimes you just need a simple, no frills, easy crocheted sweater. The Blanche V-Neck sweater ticks all of those boxes! Available in NINE sizes from XS through 5XL, this is a free crochet pattern that is beginner friendly. Let’s make one!
Blanche V-Neck Sweater
What I love about the NEW Blanche sweater is that it is oversized so it is very comfortable to wear. I don’t like fabric too high up on my neck, so sometimes a v-neck is just what the doctor ordered.
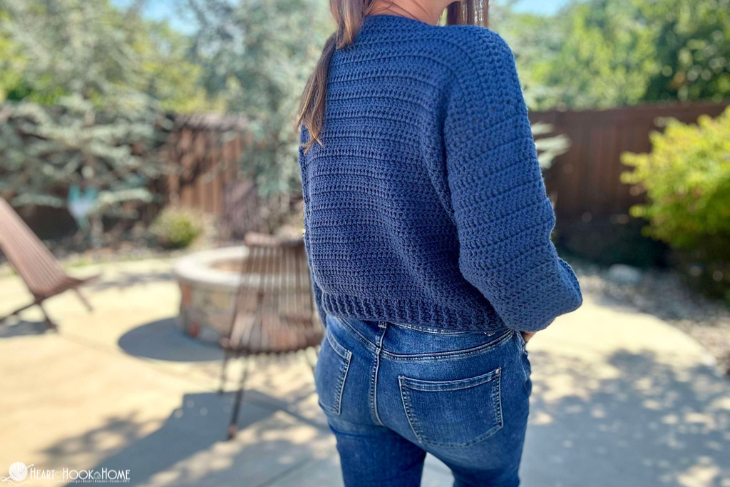
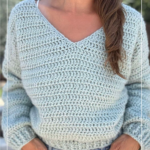
The Blanche Sweater uses a worsted weight yarn with a size K/6.5mm crochet hook – or the size needed to match gauge. This means that it works up quickly and has an excellent squish factor.
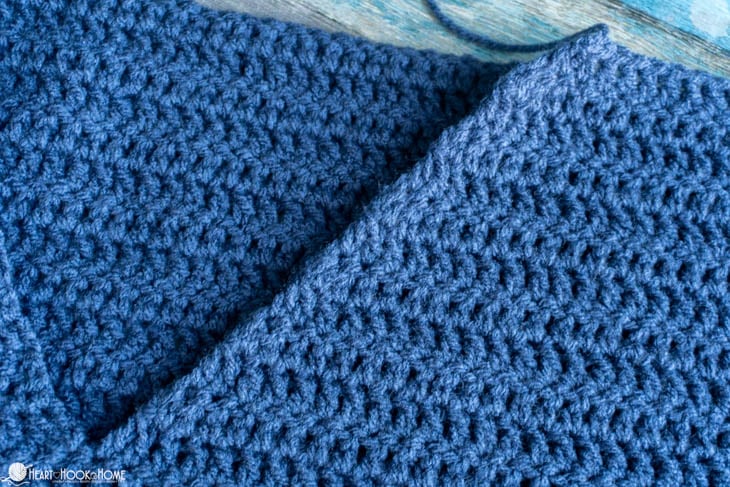
We are using the double crochet stitch, which is a basic crochet stitch that works up quickly. If this will be your first crochet garment from a pattern, this is a great one! There is minimal shaping, very little seaming or sewing, and the sleeves are easy peasy!
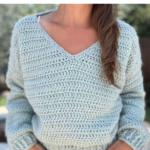
When I set out to design this sweater it was actually using Tunisian Crochet. I wanted a v-neck sweater that is a bit oversized in just the right places. That’s how the Olivia V-Neck sweater pattern came to be. If you want the Tunisian version of this pattern, you can find that (also for free!) here.

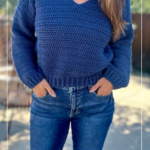
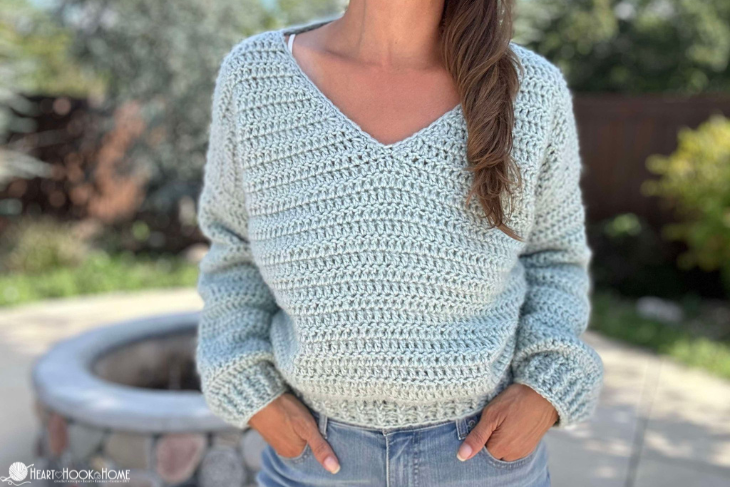
Now the Blanche is here! This sweater is a traditional crochet version. If you’re looking for a beginner-friendly sweater to crochet, this is it. If you’re looking for something basic and easy, this is it. If you’re looking for something flattering and comfy, this is it!
Great yarn options for this design would be any worsted weight yarn that can match gauge. You could use Herrschner’s Worsted Value yarn, Brava Worsted, Lion Brand Vanna’s Choice, Mary Maxim Value yarn, or any other worsted weight yarn. Just be sure to check your gauge against mine so that yours turns out the correct size.
Grab the ad-free, printable version of this pattern on Ravelry, Etsy, or right here in the Heart Hook Home Blog Shop. Thank you!
If you need help reading a crochet pattern, make sure you head over here and check out this detailed post.
Materials:
Worsted weight yarn (Herrschner’s Value, Brava Worsted, Vanna’s Choice, Mary Maxim, etc)
-approx. (780, 900, 980, 1060, 1150, 1400, 1525, 1650, 1730) yards
Crochet hook in size 6.5mm or size needed to obtain gauge
Gauge: 11 sts x 7 rows = 4” square using the double crochet stitch
Pattern Notes:
Pattern written using US terms.
Chain 2 at the beginning of each round/row does NOT count as a stitch.
Dc2tog = double crochet two together (decrease) for which a tutorial can be found here.
Front Post/Back Post (fp/bp) used for cuffs and edging, for which a tutorial can be found here.
Pattern:
Round 1: Fdc-(104, 116, 128, 140, 148, 160, 172, 180, 192). Join to top of first st made to form circle. Alternately you could ch-(106, 118, 130, 142, 150, 162, 174, 182, 194), dc in 3rd ch from hook and in each to end. (104, 116, 128, 140, 148, 160, 172, 180, 192)
Rounds 2 through (15, 17, 19, 19, 19, 21, 21, 21, 21): Ch-2, turn, dc in each st around. Join to top of first st. (104, 116, 128, 140, 148, 160, 172, 180, 192)
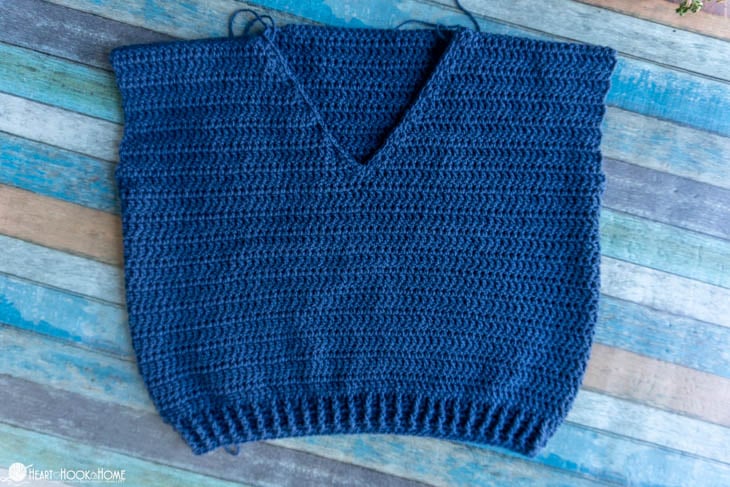
“Back”:
Row (16, 18, 20, 20, 20, 22, 22, 22, 22): Ch-3, turn, dc in (52, 58, 64, 70, 74, 80, 86, 90, 96) sts only. (52, 58, 64, 70, 74, 80, 86, 90, 96)
Rows (17, 19, 21, 21, 21, 23, 23, 23, 23) through (27, 29, 32, 33, 34, 38, 41, 42, 42): Ch-2, turn, dc in each st to end. (52, 58, 64, 70, 74, 80, 86, 90, 96)
Fasten off leaving a long enough tail for shoulder seaming.
Front #1 for Sizes XS, S, M, L, XL 2XL, 3XL ONLY:
Attach in next open stitch from Round (15, 17, 19, 19, 19, 21, 21)…
Row (16, 18, 20, 20, 20, 22, 22): Ch-2, dc in (24, 27, 30, 33, 35, 38, 41) sts, dc2tog. (25, 28, 31, 34, 36, 39, 42)
Row (17, 19, 21, 21, 21, 23, 23): Ch-2, turn, dc2tog, dc in each st to end. (24, 27, 30, 33, 35, 38, 41)
Row (18, 20, 22, 22, 22, 24, 24): Ch-2, turn, dc in all but last 2 sts, dc2tog. (23, 25, 29, 31, 34, 37, 40)
Rows (19, 21, 23, 23, 23, 25, 25) through (26, 28, 30, 30, 30, 32, 32): alternate previous two rows (ending with (15, 18, 21, 24, 26, 29, 32) sts)
Sizes XS, S ONLY: Row (27, 29): Ch-2, turn, dc in each st to end. (15, 18)
Rows (-, -, 31, 31, 31, 33, 33) through (-, -, 32, 33, 34, 40, 41): Ch-2, turn, dc in each st to end. (-, -, 21, 24, 26, 29, 32)
Fasten off leaving a long enough tail for shoulder seaming.
Front #1 for Sizes 4XL & 5XL ONLY:
Attach in next open stitch from Round (21, 21)…
Row (22, 22): Ch-2, dc in (43, 46) sts, dc2tog. (44, 47)
Row (23, 23): Ch-2, turn, dc in each st to end. (44, 47)
Rows (24, 24) through (38, 38): alternate previous two rows (ending with (36, 39) sts)
Rows (39, 39) through (42, 42): repeat row (23, 23) (36, 39) sts
Fasten off leaving a long enough rail for shoulder seaming.

Front #2 for Sizes XS, S, M, L, XL 2XL, 3XL ONLY:
Attach in next open stitch from Round (15, 17, 19, 19, 19, 21, 21)…
Row (16, 18, 20, 20, 20, 22, 22): Ch-2, dc2tog, dc in each of remaining (24, 27, 30, 33, 35, 38, 41) sts. (25, 28, 31, 34, 36, 39, 42)
Row (17, 19, 21, 21, 21, 23, 23): Ch-2, turn, dc in all but last 2 sts, dc2tog. (24, 27, 30, 33, 35, 38, 41)
Row (18, 20, 22, 22, 22, 24, 24): Ch-2, turn, dc2tog, dc in each st to end. (23, 25, 29, 31, 34, 37, 40)
Rows (19, 21, 23, 23, 23, 25, 25) through (26, 28, 30, 30, 30, 32, 32): alternate previous two rows (ending with (15, 18, 21, 24, 26, 29, 32) sts)
Sizes XS, S ONLY: Row (27, 29): Ch-2, turn, dc in each st to end. (15, 18)
Rows (-, -, 31, 31, 31, 33, 33) through (-, -, 32, 33, 34, 40, 41): Ch-2, turn, dc in each st to end. (-, -, 21, 24, 26, 29, 32)
Fasten off leaving a long enough tail for shoulder seaming.
Front #2 for Sizes 4XL & 5XL ONLY:
Attach in next open stitch from Round (21, 21)…
Row (22, 22): Ch-2, dc2tog, dc in remaining (43, 46) sts. (44, 47)
Row (23, 23): Ch-2, turn, dc in each st to end. (44, 47)
Rows (24, 24) through (38, 38): alternate previous two rows (ending with (36, 39) sts)
Rows (39, 39) through (42, 42): repeat row (23, 23) (36, 39) sts
Fasten off leaving a long enough rail for shoulder seaming.
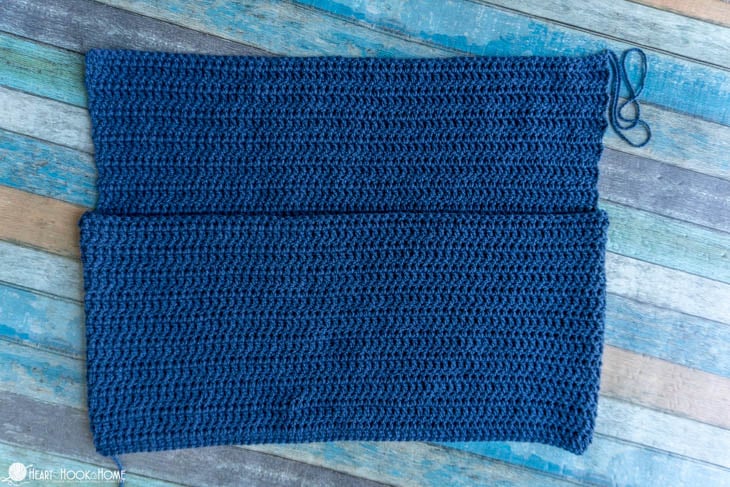
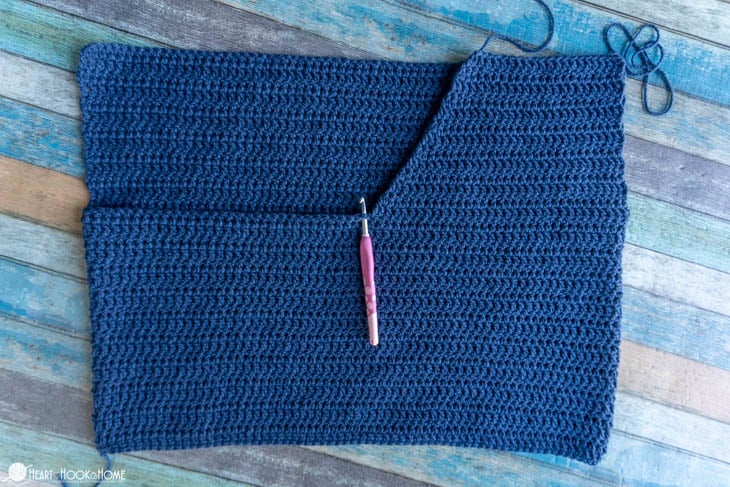
Construction:
Seam shoulders using the Mattress Stitch or the Invisible Shoulder stitch method.


Bottom, Sizes XS, S, M, L ONLY:
Attach at bottom seam…
Round 1: Ch-2, * dc in next st, dc2tog * repeat between * * around until two sts remain, dc2tog. Join to top of first st. (69, 77, 85, 93, -, -, -, -, -)
Bottom, Sizes XL, 2XL, 3XL ONLY:
Attach at bottom seam…
Round 1: Ch-2, * dc in next st, dc2tog * repeat between * * around, dc in final st. Join to top of first st. (-, -, -, -, 99, 107, 115, -, -)
Wanna save this for later?
Bottom, Sizes 4XL & 5XL ONLY:
Attach at bottom seam…
Round 1: Ch-2, * dc in next st, dc2tog * repeat between * * around, dc in each of final 3 sts. Join to top of first st. (-, -, -, -, -, -, -, 121, 129)
Bottom, ALL SIZES:
Round 2: Ch-2, turn, * Fpdc around next st, Bpdc around next st * repeat between ** around, Fpdc around final st. Join to top of first st. (69, 77, 85, 93, 99, 107, 115, 121, 129)
Round 3: Ch-2, turn, * Bpdc around next st, Fpdc around next st * repeat between ** around, Bpdc around final st. Join to top of first st. (69, 77, 85, 93, 99, 107, 115, 121, 129)
Round 4: Ch-2, turn, * Fpdc around next st, Bpdc around next st * repeat between ** around, Fpdc around final st. Join to top of first st. (69, 77, 85, 93, 99, 107, 115, 121, 129)
Round 5: Ch-1, do not turn, sc in each st around. Fasten off using Invisible Join. (69, 77, 85, 93, 99, 107, 115, 121, 129)
Sleeves:
Attach at bottom of armhole…
Round 1: Ch-2, dc (20, 20, 22, 22, 24, 28, 30, 32, 32) times evenly up to shoulder seam, dc (20, 20, 22, 22, 24, 28, 30, 32, 32) times evenly down the other side. Join to top of first st. (40, 40, 44, 44, 48, 56, 60, 64, 64)
Rounds 2 through (27, 27, 27, 27, 27, 27, 27, 27, 27) or to desired length: Ch-2, turn, dc in each st around. Join to top of first st. (40, 40, 44, 44, 48, 56, 60, 64, 64)
Sizes XS & S ONLY:
Round (28, 28): Ch-2, turn, * dc in next st, dc2tog * repeat between * * around, dc in final st. Join to top of first st. (27, 27)
Round (29, 29): Ch-2, turn, * Fpdc around next st, Bpdc around next st * repeat between ** around until one st remains, Fpdc around final st. Join to top of first st. (27, 27)
Round (30, 30): Ch-2, turn, * Bpdc around next st, Fpdc around next st * repeat between ** around until one st remains, Bpdc around final st. Join to top of first st. (27, 27)
Round (31, 31): Ch-2, turn, * Fpdc around next st, Bpdc around next st * repeat between ** around until one st remains, Fpdc around final st. Join to top of first st. (27, 27)
Round (32, 32): Ch-1, do not turn, sc in each st around. Fasten off using Invisible Join. (27, 27)
Repeat sleeve on other side.
Sizes M & L ONLY:
Round (28, 28): Ch-2, turn, * dc in next st, dc2tog, dc in next st, dc2tog, dc2tog * repeat between * * around, dc2tog, dc2tog. Join to top of first st. (27, 27)
Round (29, 29): Ch-2, turn, * Fpdc around next st, Bpdc around next st * repeat between ** around until one st remains, Fpdc around final st. Join to top of first st. (27, 27)
Round (30, 30): Ch-2, turn, * Bpdc around next st, Fpdc around next st * repeat between ** around until one st remains, Bpdc around final st. Join to top of first st. (27, 27)
Round (31, 31): Ch-2, turn, * Fpdc around next st, Bpdc around next st * repeat between ** around until one st remains, Fpdc around final st. Join to top of first st. (27, 27)
Round (32, 32): Ch-1, do not turn, sc in each st around. Fasten off using Invisible Join. (27, 27)
Repeat sleeve on other side.
Size XL ONLY:
Round (28): Ch-2, turn, * dc in next st, dc2tog, dc in next st, dc2tog, dc2tog * repeat between * * around, dc2tog, dc2tog, dc2tog, dc2tog. Join to top of first st. (29)
Round (29): Ch-2, turn, * Fpdc around next st, Bpdc around next st * repeat between ** around until one st remains, Fpdc around final st. Join to top of first st. (29)
Round (30): Ch-2, turn, * Bpdc around next st, Fpdc around next st * repeat between ** around until one st remains, Bpdc around final st. Join to top of first st. (29)
Round (31): Ch-2, turn, * Fpdc around next st, Bpdc around next st * repeat between ** around until one st remains, Fpdc around final st. Join to top of first st. (29)
Round (32): Ch-1, do not turn, sc in each st around. Fasten off using Invisible Join. (29)
Repeat sleeve on other side.
Sizes 2XL ONLY:
Round (28): Ch-2, turn, dc2tog in all but final two sts. Dc in each remaining st. Join to top of first st. (29)
Round (29): Ch-2, turn, * Fpdc around next st, Bpdc around next st * repeat between ** around until one st remains, Fpdc around final st. Join to top of first st. (29)
Round (30): Ch-2, turn, * Bpdc around next st, Fpdc around next st * repeat between ** around until one st remains, Bpdc around final st. Join to top of first st. (29)
Round (31): Ch-2, turn, * Fpdc around next st, Bpdc around next st * repeat between ** around until one st remains, Fpdc around final st. Join to top of first st. (29)
Round (32): Ch-1, do not turn, sc in each st around. Fasten off using Invisible Join. (29)
Repeat sleeve on other side.
Size 3XL ONLY:
Round (28): Ch-2, turn, dc2tog in all but final four sts. Dc4tog. Join to top of first st. (29)
Round (29): Ch-2, turn, * Fpdc around next st, Bpdc around next st * repeat between ** around until one st remains, Fpdc around final st. Join to top of first st. (29)
Round (30): Ch-2, turn, * Bpdc around next st, Fpdc around next st * repeat between ** around until one st remains, Bpdc around final st. Join to top of first st. (29)
Round (31): Ch-2, turn, * Fpdc around next st, Bpdc around next st * repeat between ** around until one st remains, Fpdc around final st. Join to top of first st. (29)
Round (32): Ch-1, do not turn, sc in each st around. Fasten off using Invisible Join. (29)
Repeat sleeve on other side.
Sizes 4XL, 5XL ONLY:
Round (28, 28): Ch-2, turn, dc2tog around. Join to top of first st. (32, 32)
Round (29, 29): Ch-2, turn, [dc in next 9 sts, dc2tog] 2x, dc in next 9 sts, dc3tog. Join to top of first st. (29, 29)
Round (30, 30): Ch-2, turn, * Fpdc around next st, Bpdc around next st * repeat between ** around until one st remains, Fpdc around final st. Join to top of first st. (29, 29)
Round (31, 31): Ch-2, turn, * Bpdc around next st, Fpdc around next st * repeat between ** around until one st remains, Bpdc around final st. Join to top of first st. (29, 29)
Round (32, 32): Ch-2, turn, * Fpdc around next st, Bpdc around next st * repeat between ** around until one st remains, Fpdc around final st. Join to top of first st. (29, 29)
Round (33, 33): Ch-1, turn, sc in each st around. Fasten off using Invisible Join. (29, 29)
Repeat sleeve on other side.
Neck, All Sizes:
Attach at either shoulder seam…
Round 1: Ch-1, sc evenly around neck opening. Fasten off using Invisible Join and weave in all ends.
Hood (Optional):
Attach 15 sts down the right side of the “front” (as worn).
Row 1: Ch-2, dc in same and each of next 14 sts to shoulder seam, 2dc in shoulder seam, dc in each of (22, 22, 22, 22, 22, 22, 22, 18, 18) sts of neck, 2dc in shoulder seam, dc in next 15 sts down the left side of the “front” (as worn). Stitch count: (56, 56, 56, 56, 56, 56, 56, 52, 52)
Rows 2 through 12 (all sizes): Ch-2, turn, dc in each st to end. (56, 56, 56, 56, 56, 56, 56, 52, 52)
Row 13: Ch-2, turn, dc to center of hood, dc3tog, dc in remaining sts across. (54, 54, 54, 54, 54, 54, 54, 50, 50)
Row 14: Ch-2, turn, dc in each st to end. (54, 54, 54, 54, 54, 54, 54, 50, 50)
Rows 15 through 24: alternate previous two rows (ending with (44, 44, 44, 44, 44, 44, 44, 40, 40) sts)
Row 25: repeat row 13 (42, 42, 42, 42, 42, 42, 42, 38, 38)
Fasten off leaving long enough tail for seaming. Sew shut using the Invisible Shoulder seam method. Weave in all ends.
Attach yarn anywhere around the neck opening…
Ch-1, sc in each st around. Fasten off using Invisible Join and weave in all ends.
That’s it! I hope you love it and that you’ll make many of them. I can’t wait to see yours! Be sure to tag @HeartHookHome across all social media, or share in the Heart Hook Home Crochet Community on Facebook.
More free sweater patterns:
Olivia Sweater: Free Tunisian Crochet Pattern
Godiva Tee Free T-Shirt Crochet Pattern


19 Comments