How to Crochet a Yarn Organizer or Fanny Pack
This post may contain affiliate links, meaning that I may earn a small commission if you make a purchase. See our disclosure policy for more information.
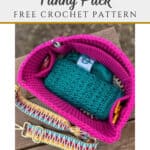
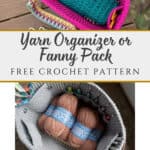
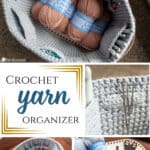
Could you use a new organizer for your yarn and crochet supplies? Perhaps you’re wanting to crochet yourself a fanny pack, or perhaps you want a sofa yarn organizer that sits next to you while you crochet and has all of your tools and supplies nicely organized and ready to use at a moment’s notice. Grab your hook and let’s make the coolest yarn organizer/yarn fanny pack you ever did see!
How to Crochet a Yarn Organizer or Fanny Pack
This pattern was born from my love of walking while I crochet. Or perhaps it should be crocheting while walking. Ha! I’ve had two different fanny packs over the years. The first one is an inexpensive fabric option that worked fine and is a good size, but I wanted more pockets instead of one huge pocket.

The second fanny pack I used was super cute but just too small, and the stitch markers had a way of jumping out of their pocket, never to be seen again. ️
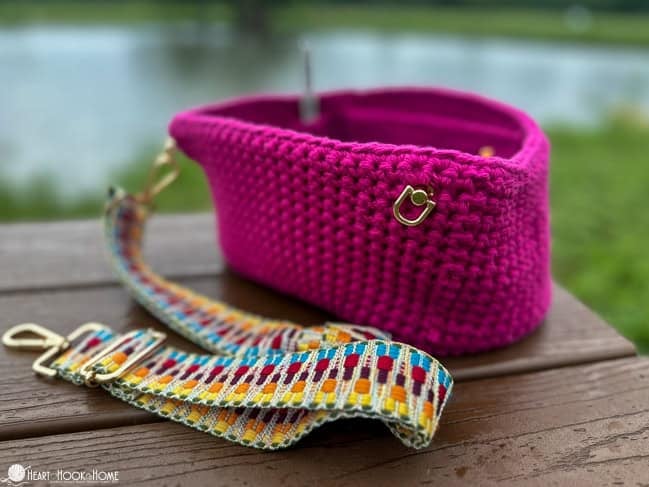
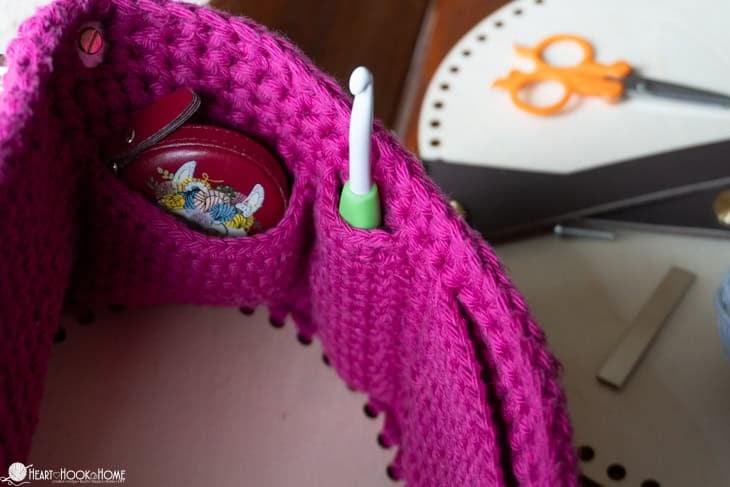
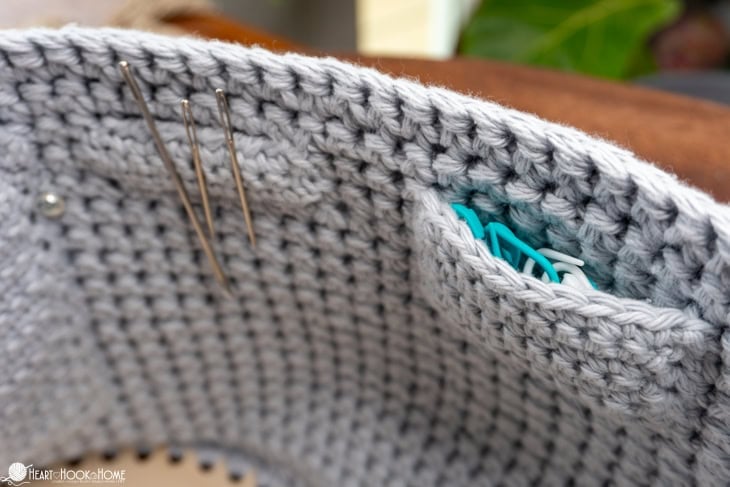
I had had enough! Instead of fighting with fanny packs that were not my favorite, I created a gorgeous and useful fanny pack to take on my morning walks that has the best functionality, including a built-in MAGNET to hold the yarn needles and scissors in place! How cool is that?!
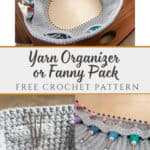
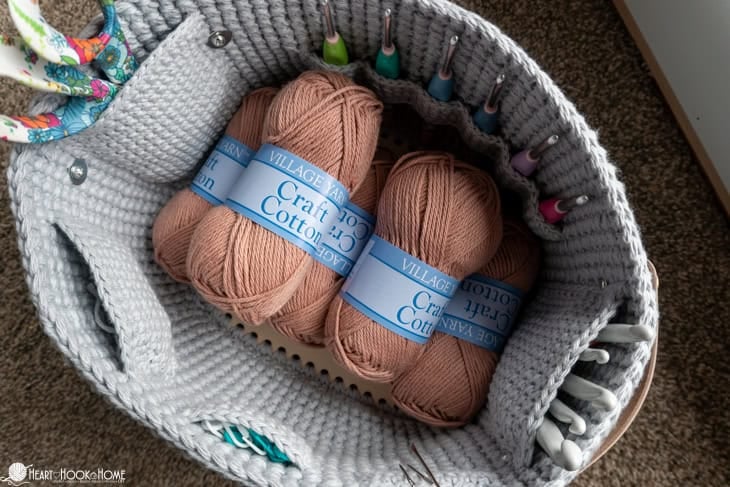
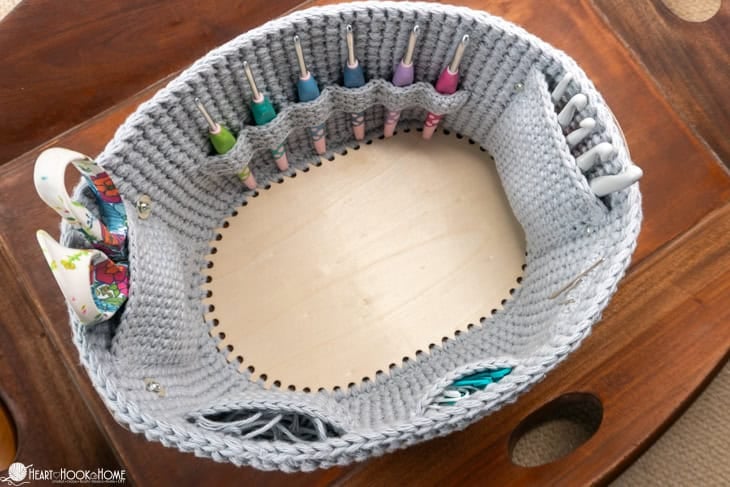
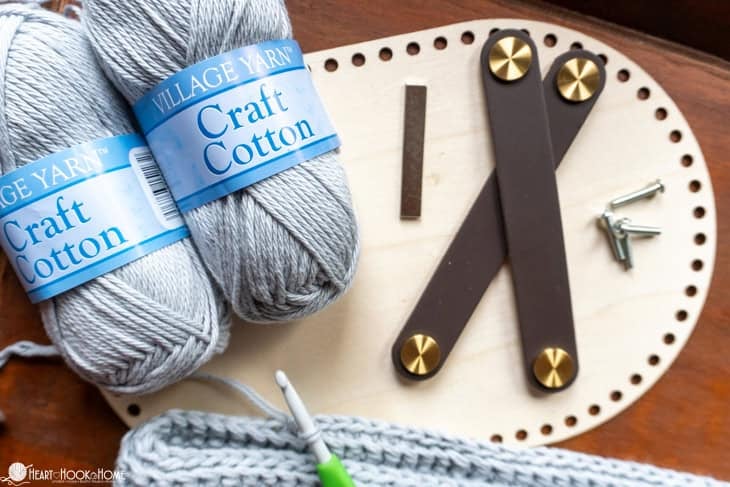
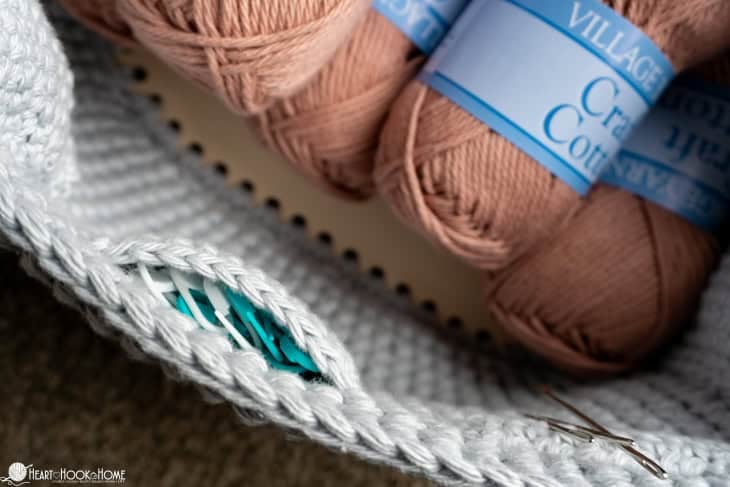
For this pattern we are using hard wooden bottoms that are intended for making baskets. The multi-pack that I purchased here comes with FIVE sizes. The fanny pack uses the second-to-largest size. The largest size is great to create a yarn organizer to have next to the sofa to keep your yarn needle, hooks, yarn, measuring tape, etc handy.
If you make both a sofa yarn organizer and the yarn fanny pack, you’ll have three smaller basket bottoms left over. Those might work great for smaller similar baskets in the office or bathroom to hold hair accessories, toothbrushes, or pens, etc. I plan to use the smallest oval to make one of these organizers on video. Stay tuned! I’ll share it here and on the Heart Hook Home YouTube channel when it’s ready.
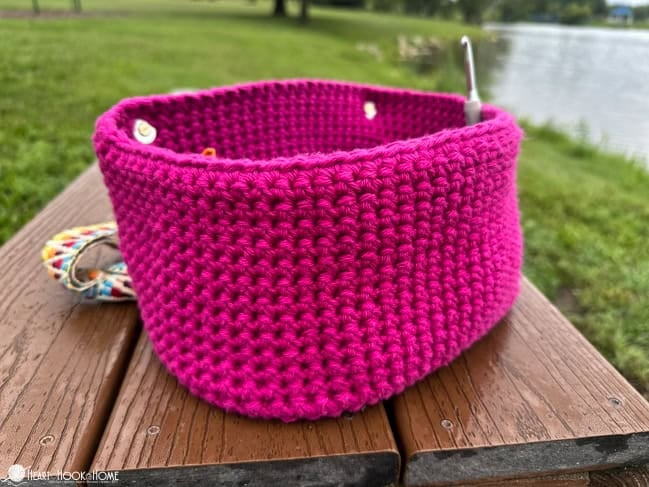
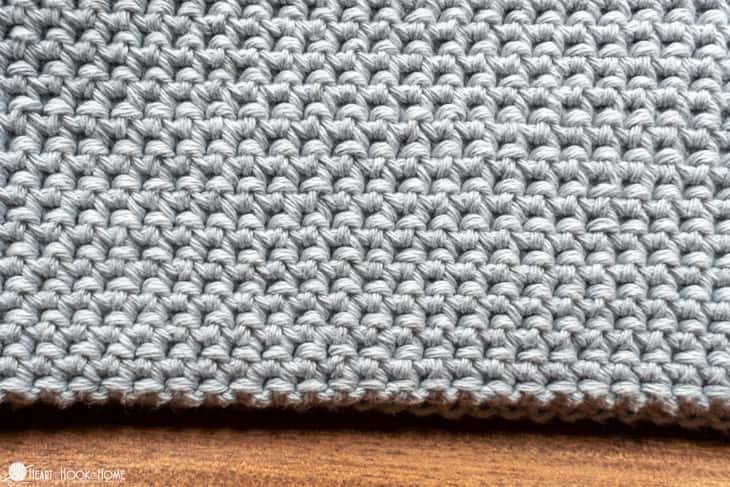
For this pattern I am holding two strands of worsted weight cotton together using a 6.5mm crochet hook to create the Thermal Stitch. This is a sturdy, no nonsense stitch that is perfect for projects that need to be a bit rigid or stiff. I used this for the Casserole Carrier in the 2021 Household Series and it’s still holding up great!

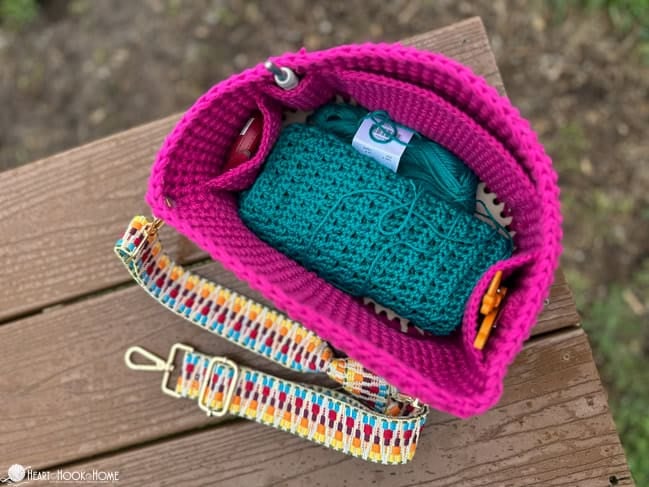
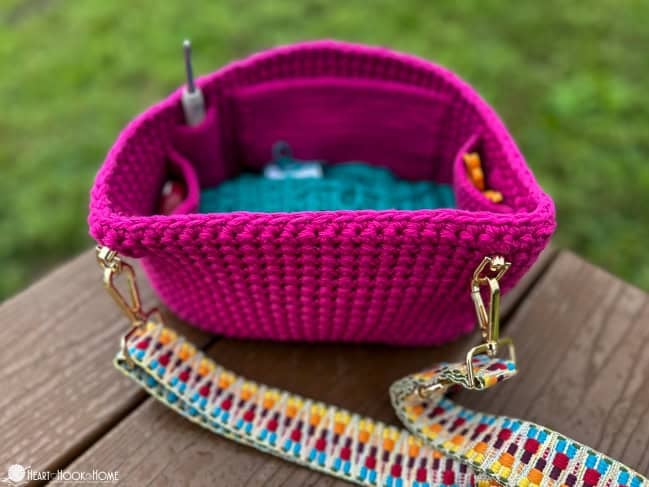
If you are using this Yarn Organizer as a fanny pack, you’ll need to either purchase or make the strap. I chose to buy mine because the hardware alone was almost as much and this way I didn’t have to crochet that, too. So, I picked up a cute style of these replacement straps. Note that it is a bit too long so I’m going to have to either shorten it, or keep the knot tied in it to shorten it up just right.
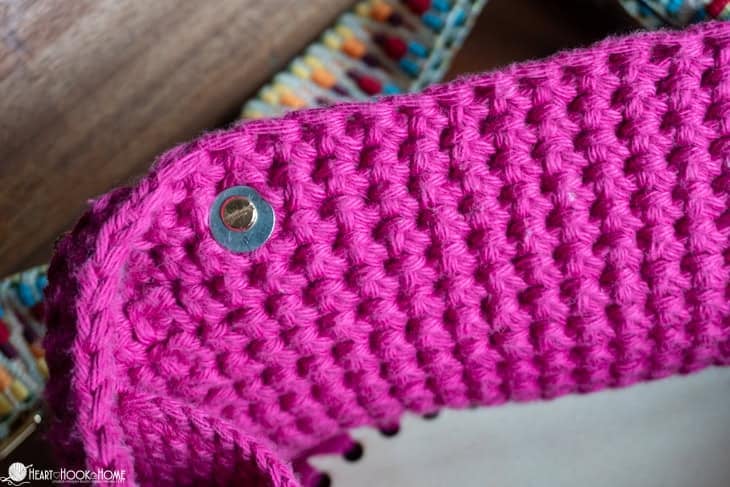
I also ordered a 6-pk of these kinds of fasteners to attach to the back. I did have to add an extra washer on the inside so that the screw didn’t pull through the crocheted fabric, but I just found a couple of them in our junk drawer and no one will be the wiser.
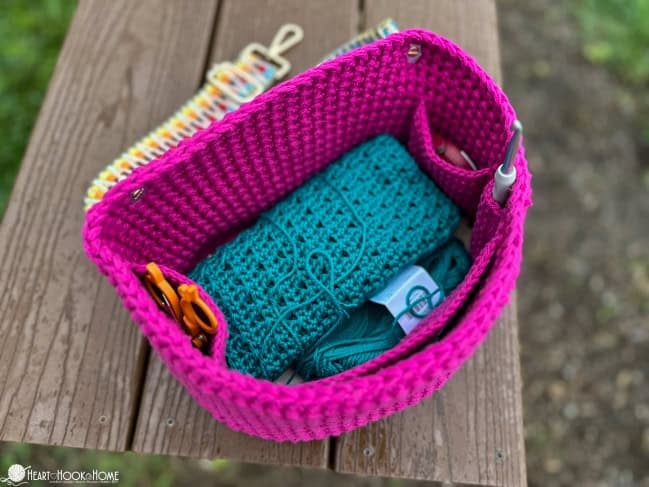
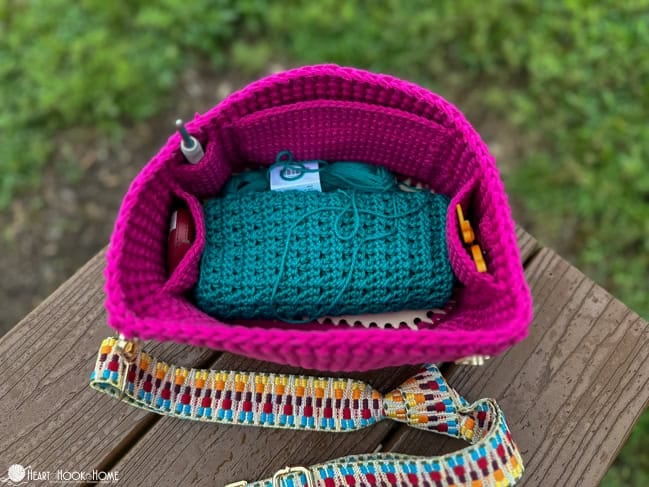
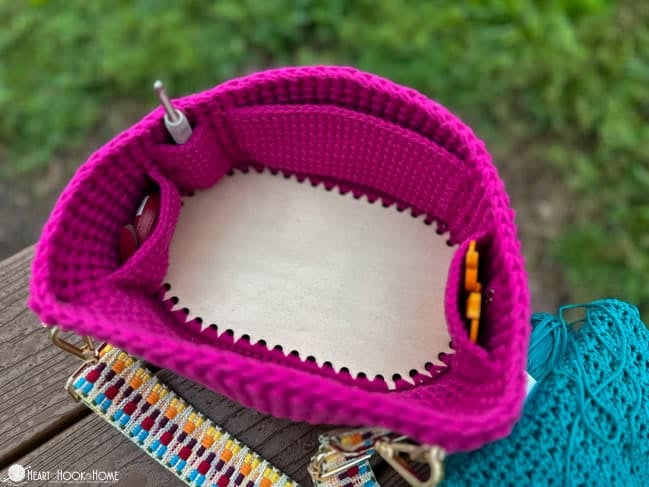
The great thing about this Yarn Fanny Pack is that you can choose your pockets. How many, what size, the placement… ALL of that is completely customizable.
If you are using this yarn organizer for a place to hold all of your supplies nice and tidy next to the sofa, or your favorite crochet spot, you can add as many pockets as you want to the OUTSIDE of the organizer too! So handy!
I have included two sizes of this pattern, the smaller for the fanny pack size and the larger for the sofa organizer size.
Grab the ad-free, printable version of this pattern on Ravelry, Etsy, or right here in the Heart Hook Home Blog Shop. Thank you! If you need help reading a crochet pattern, make sure you head over here and check out this detailed post.
Materials:
Craft Cotton (Worsted weight 100% cotton, double stranded, “Dragon Fruit” and “Silverware” pictured)
-approx. (500, 750) yards total
Crochet hook in size 6.5mm (for main portion, double stranded)
Crochet hook in size G/4mm (for pockets and crocheting into hard bottom holes.)
Hard Basket Bottom (like this, second to largest size used for fanny pack and largest size used for the sofa organizer)
Fanny pack replacement strap (for fanny pack only, like this)
Handles (optional, and for sofa organizer only, like this)
(2) Fastener hooks (like these)
(2) washers (to keep the hooks secured, like these)
Magnet for sewing into yarn needle pocket (like these)
Gauge: Not super important but 11 sts and 20 rows in 4″ square using the Thermal Stitch
Pattern Notes:
Pattern written using US terms.
Odd numbered rows are “Right Side”.
BLO = Back Loop Only
If you find it helpful, follow along with the Thermal Stitch tutorial here.
Sizing = (Fanny Pack, Sofa Organizer)
Pattern:
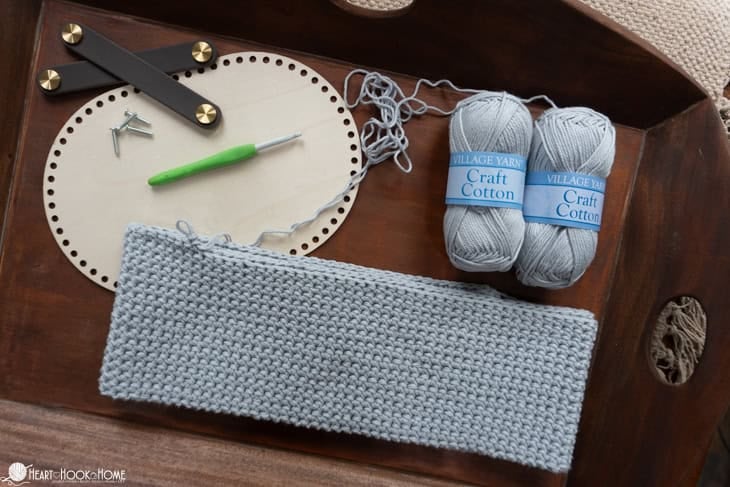
Row 1: Ch-(79, 97), sc in BLO of 2nd ch from hook and in each ch to end. Join to top of first st. (78, 96)
Rows 2 through (28, 34): Ch-1, turn, sc around using BLO of current round and BLO of previous round. Join to top of first st. (78, 96)
*or until desired height is reached, ending on an even round number
Row (29, 35): Ch-1, turn, sc through all three loops around (BOTH loops of current round AND the BLO of the previous round). Fasten off using Invisible Join. (78, 96)

Hard Bottom Prep:
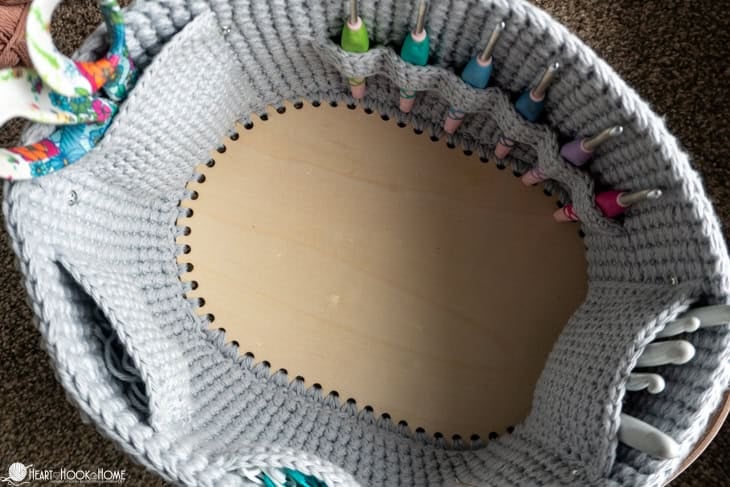
For the fanny pack you’ll need to crochet 78 stitches around the bottom so that we can sew stitch-for-stitch to the 78 stitches of the crocheted basket. There are 52 holes on the second-to-largest hard bottom. This means we need to add an additional 26 stitches. For the Sofa Organizer you’ll need to take your basket bottom from 64 holes to 96 stitches…
Note that you could start the entire basket using the holes and keep adding height instead of making the basket separate and attaching later, but I like being able to work on the basket without the rigid bottom slowing me down for as long as possible AND I find that when you crochet into the hard bottom, the basket has a tendency to shrink.
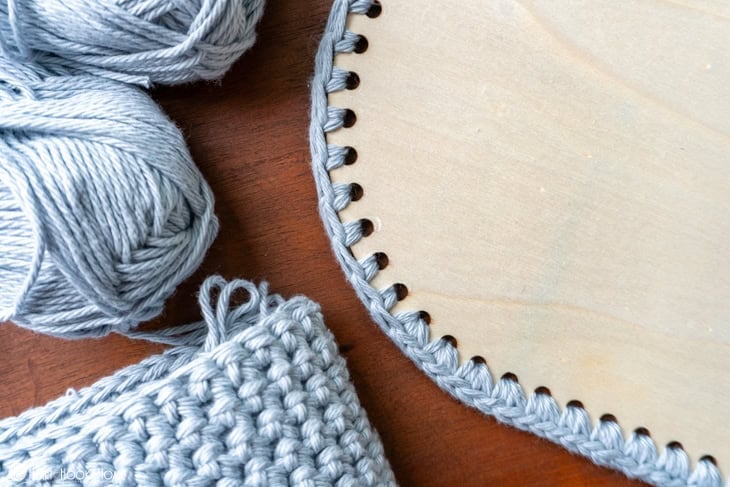
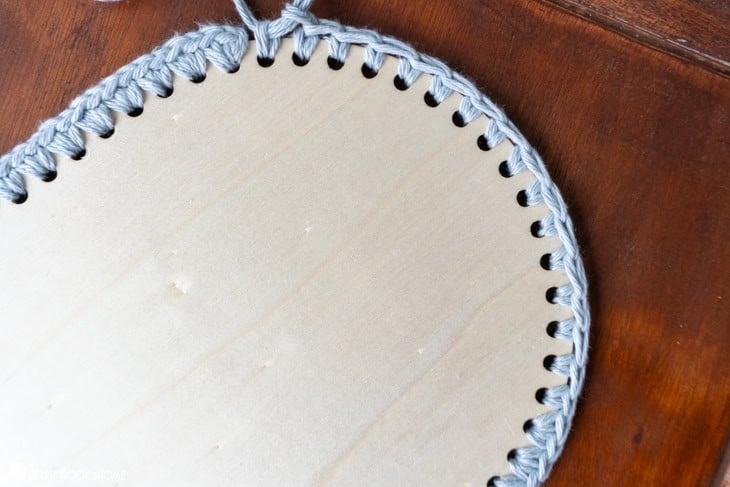
Next, plot out your stitches on the hard bottom so that you have (13, 16) sts centered on each flat side and (13, 16) sts centered on each end of the oval. As centered as can be. Attach in the far right (or left, if you’re left-handed) hole of the flat (13, 16) sts.
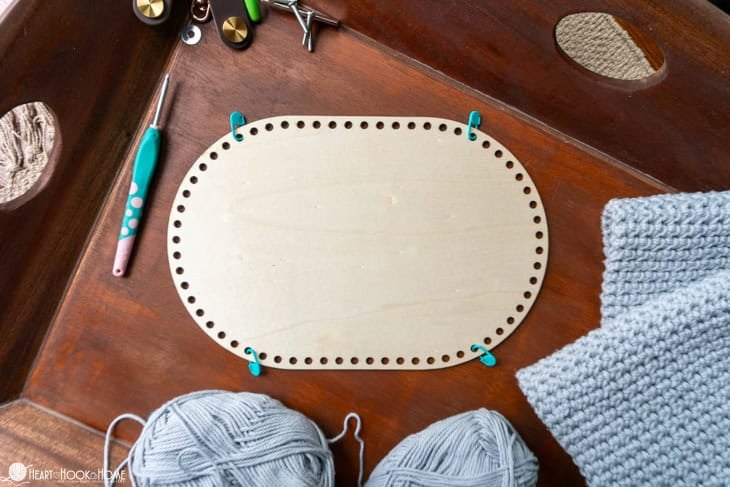
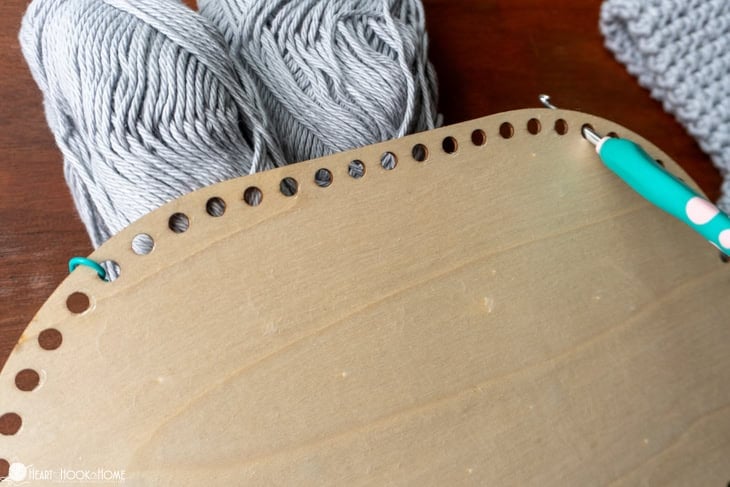
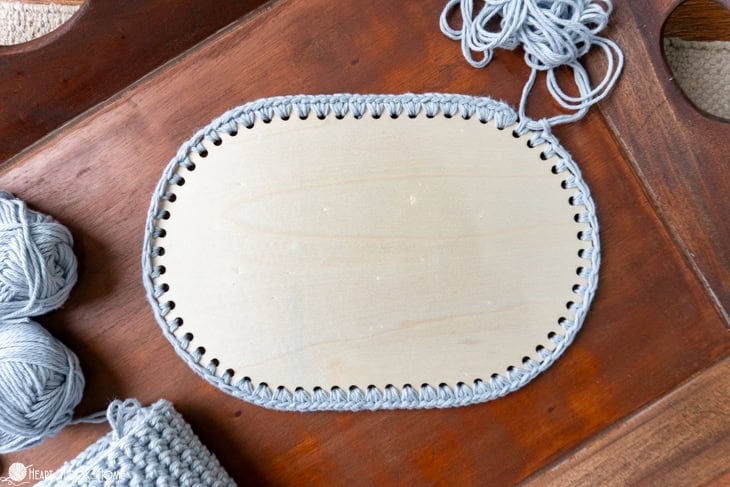
Prep Row: holding two strands of worsted weight yarn together with the 4mm hook… Ch-1, 2sc in each of next (13, 16) holes, sc in next (13, 16) holes, 2sc in each of next (13, 16) holes, sc in next (13, 16) holes. Fasten off leaving a long enough tail for sewing the basket to the basket bottom. You should have (78, 96) stitches on the hard bottom to equal the (78, 96) stitches on the crocheted portion.
Wanna save this for later?
Lay these pieces aside and create your pockets.
Pockets:
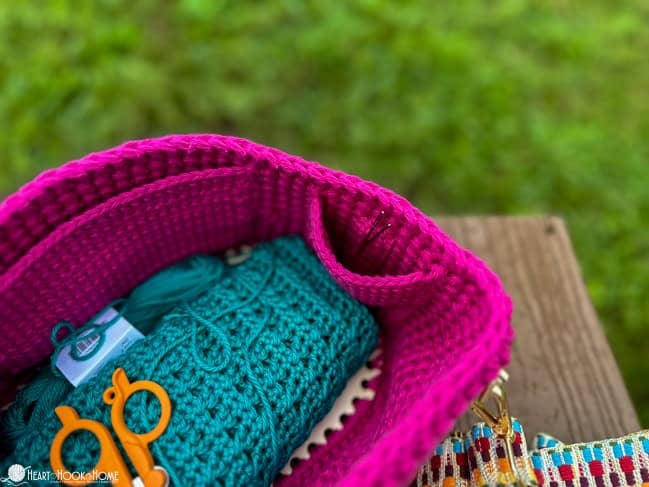
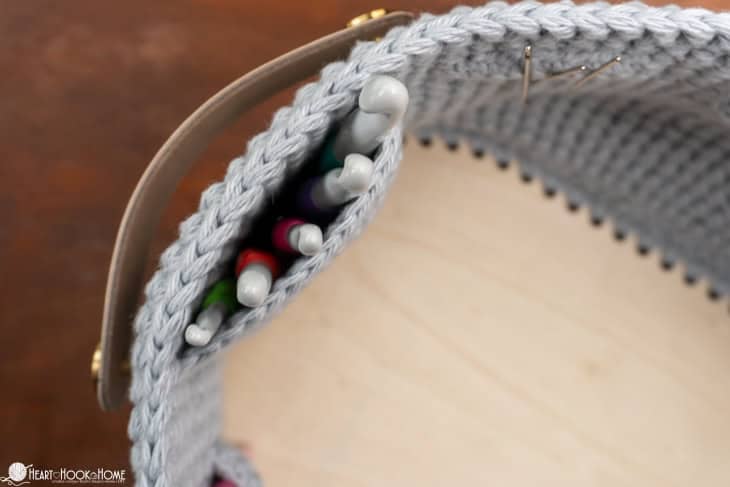
You can make as many pockets as will fit in, or ON, your fanny pack/organizer as you like. I have included here the pockets that I made for mine. Note that I did pin them in place using sewing pins just to make sure that 1.) they would all fit and 2.) that I liked the placement before I started sewing.
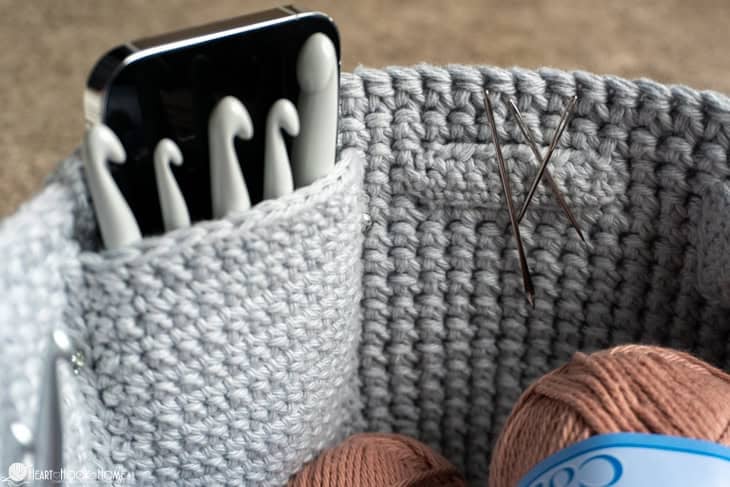
Cellphone size pocket:
Using the 4mm hook and single stranding the yarn, make two…
Row 1: Ch-26, sc in 2nd ch from hook and in each to end. (25) (Or Fsc-25)
Rows 2 through 19: Ch-1, turn, sc in each st to end. (25)
Rotate clockwise, ch-1, sc down to corner, 3sc in corner st, sc across bottom, 3sc in corner, sc up to corner. Sl st to corner st. Fasten off leaving a long enough tail to sew in place.
Crochet Hook size pocket (single):
Using the 4mm hook and single stranding the yarn…
Row 1: Ch-7, sc in 2nd ch from hook and in each to end. (6) (Or Fsc-6)
Rows 2 through 19: Ch-1, turn, sc in each st to end. (6)
Rotate clockwise, ch-1, sc down to corner, 3sc in corner st, sc across bottom, 3sc in corner, sc up to corner. Sl st to corner st. Fasten off leaving a long enough tail to sew in place.
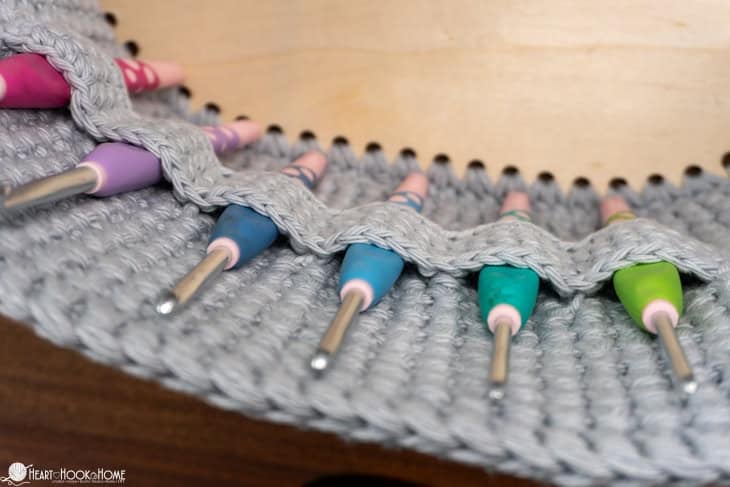
Crochet Hook size pocket (6 hooks):
Using the 4mm hook and single stranding the yarn…
Row 1: Ch-37, sc in 2nd ch from hook and in each to end. (36) (Or Fsc-36)
Rows 2 through 5: Ch-1, turn, sc in each st to end. (36)
Rotate clockwise, ch-1, sc down to corner, 3sc in corner st, sc across bottom, 3sc in corner, sc up to corner. Sl st to corner st. Fasten off leaving a long enough tail to sew in place. When sewing, feed yarn through and leave 5 sts for each hook before tacking it down again to create the next spacer.
Measuring Tape size pocket:
Using the 4mm hook and single stranding the yarn…
Row 1: Ch-16, sc in 2nd ch from hook and in each to end. (15) (Or Fsc-15)
Rows 2 through 15: Ch-1, turn, sc in each st to end. (15)
Rotate clockwise, ch-1, sc down to corner, 3sc in corner st, sc across bottom, 3sc in corner, sc up to corner. Sl st to corner st. Fasten off leaving a long enough tail to sew in place.
Yarn Needle size pocket:
Using the 4mm hook and single stranding the yarn…
Row 1: Ch-16, sc in 2nd ch from hook and in each to end. (15) (Or Fsc-15)
Rows 2 through 15: Ch-1, turn, sc in each st to end. (15)
Rotate clockwise, ch-1, sc down to corner, 3sc in corner st, sc across bottom, 3sc in corner, sc up to corner. Sl st to corner st. Fasten off leaving a long enough tail to sew in place.
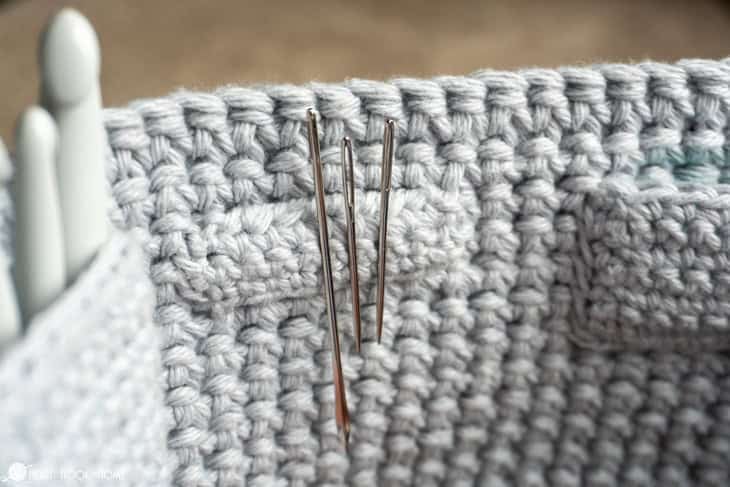
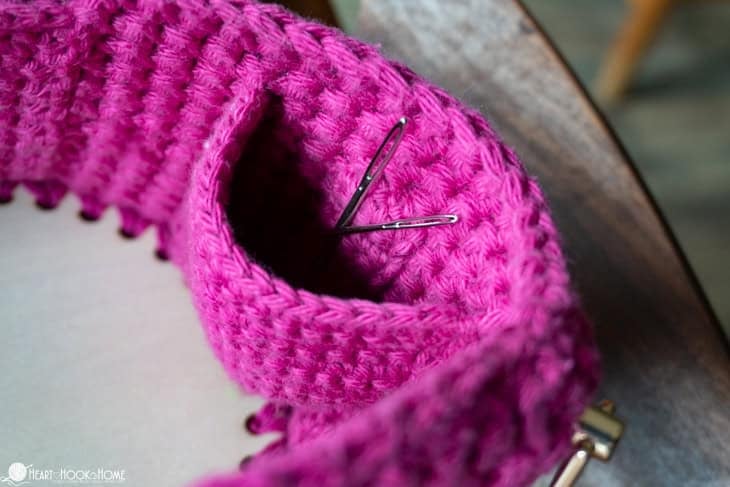
Magnet cover:
Using the 4mm hook and single stranding the yarn…
Row 1: Ch-5, sc in 2nd ch from hook and in each to end. (4) (Or Fsc-4)
Rows 2 through 13: Ch-1, turn, sc in each st to end. (4)
Fasten off leaving a long enough tail to sew in place. (No border on this one)
Construction:
Pin your pockets into place. When you’re happy with the placement, you may find it helpful to turn the organizer inside out to speed up the sewing process. If adding handles, add those first!
Using a yarn needle, sew the pockets into place using the long tails and the whip stitch. This is the easiest, fastest way to secure your pockets. Weave in the ends well and clip the yarn as you finish sewing them.
When you get to the pocket with the magnet sewn in, start sewing that pocket down first, then when you get almost all the way around, slide the magnet inside and stitch her closed so that it can not move around. You’ll want to be sure to sew this pocket on BEFORE you sew the larger pocket around it to hold the yarn needles themselves.
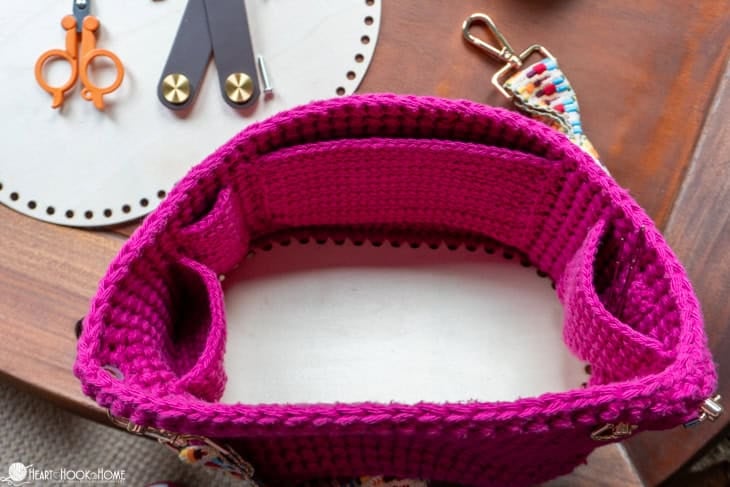
Add as many pockets as you can or as you like. When finished, position the fanny/organizer portion on the hard bottom and sew stitch for stitch using the long tails. You can use the Whip Stitch or the Mattress Stitch. Whip Stitch is certainly faster!
If making the fanny pack, the finishing touches are to attach the fasteners using the included screws and some spare washers you might have hanging around. Here is a multi-pack if you do not have washers aplenty.
If you are making a home organizer for sitting next to you in your favorite crochet spot, you might want to instead add handles to your organizer to move it from place to place easier. You can even use stylish handles like these to snazz it up a bit! I am going to have to get shorter screws, as for some reason they sent super long ones in the kit.
Nevertheless, I am SO excited to be able to carry my project and tools around without having to try to carry everything in my own two hands. I also love that if I have something else (like a coffee or tea mug) in my other hand, the hard bottom makes it to where I can hold this confidently with one arm. LOVE THAT!

I hope you love these patterns as much as I do! I plan on both of them getting a lot of use over the years, and I love the fact that we can make as many of them as we want. Organizers and fanny packs for everyone!!
I can’t wait to see yours! Be sure to tag @HeartHookHome across all social media, or share in the Heart Hook Home Crochet Community on Facebook.
More home and organization patterns:
Walker Organizer Crochet Pattern
Hanging Baskets: Free Crochet Pattern
Glove Box Organizer: Free Crochet Pattern
Card Carrier: Free Crochet Pattern
Kitchen Chair Cat Hammock Crochet Pattern


One Comment