Tunisian Crochet Granny Square Tutorial
This post may contain affiliate links, meaning that I may earn a small commission if you make a purchase. See our disclosure policy for more information.
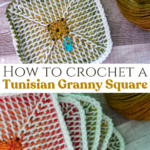
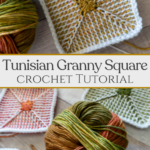
Looking for a new and fun way to crochet a granny square? Learn how to crochet a Granny Square using the Tunisian Crochet technique to make unique and gorgeous granny squares.
Tunisian Crochet Granny Square
If you’ve tried Tunisian Crochet, chances are you love it. The stitches are easy to learn, fun to make, come in a wide variety of textures, and they work up relatively quickly.
Tunisian is a cross between knitting and crocheting. This is great because it uses less yarn than regular crochet while also allowing beautiful color possibilities.
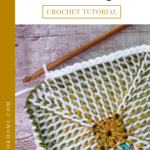
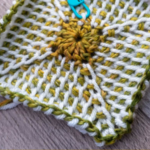
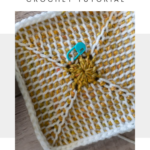
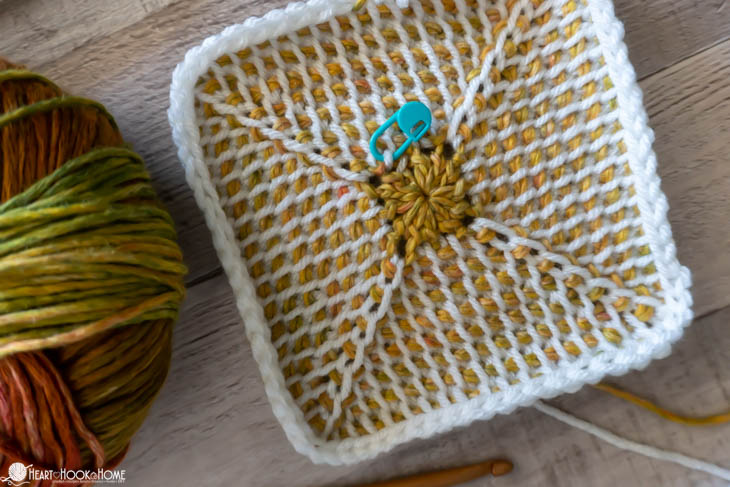
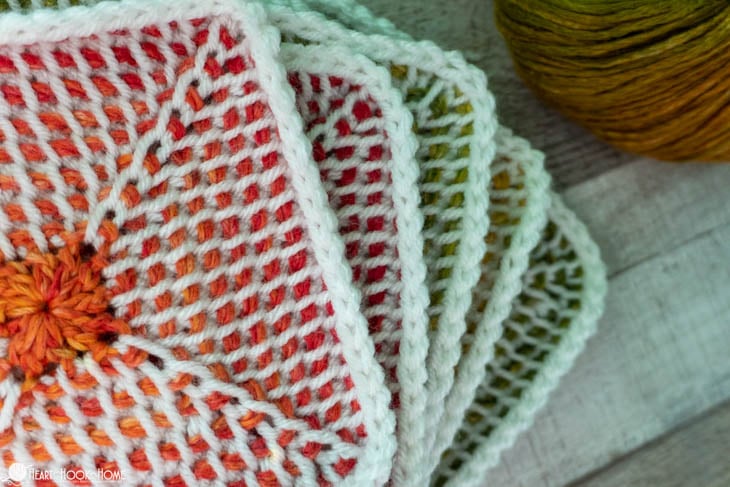
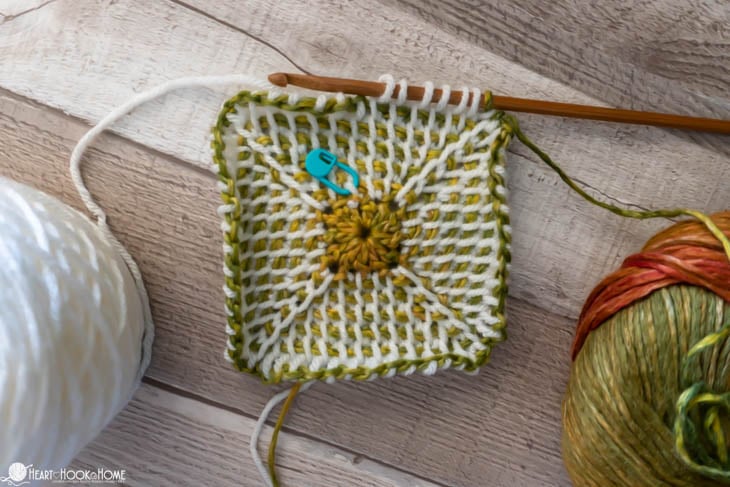
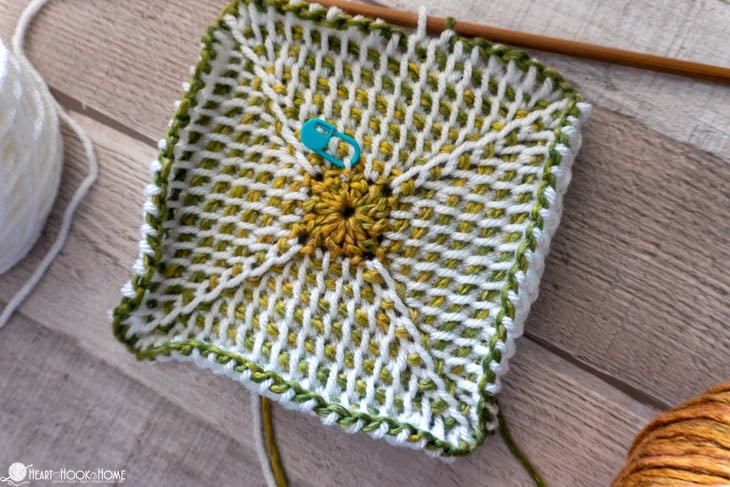
While most crocheters are familiar with the concept of classic Granny Squares, this technique is a bit different. Not only are we using Tunisian crochet to make these Granny Squares, but we are using two contrasting colors of yarn to make those stitches POP!
I hope you love this new take on an old favorite.
About Tunisian Granny Squares
Can you make a Granny Square using Tunisian Crochet? Absolutely! In fact, you can make a Granny Square using just about any Tunisian Crochet stitch.
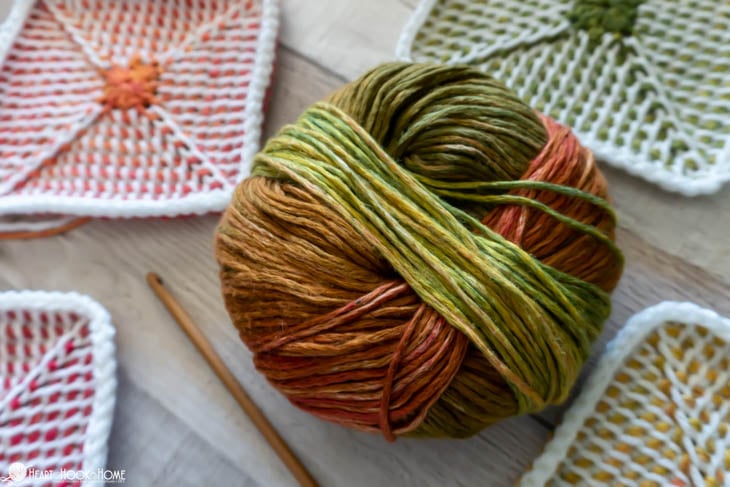
What type of yarn works best for Tunisian Granny Squares? You can use any yarn you like. To make the colors really pop you’ll want to use two contrasting colors of yarn. For this tutorial I am using a white Brava Worsted 500 skein with some fancy color-changing yarn I picked up on vacation this summer.
What stitches can I use for making Tunisian Granny Squares? Technically speaking once you get the granny square portion itself down, you can use ANY basic Tunisian stitch. I think it would be great with the Knit stitch, the Honeycomb, or the Reverse stitch. Play around with the possibilities and if you find one that makes a gorgeous square please share with me! Tag @HeartHookHome across all social media.
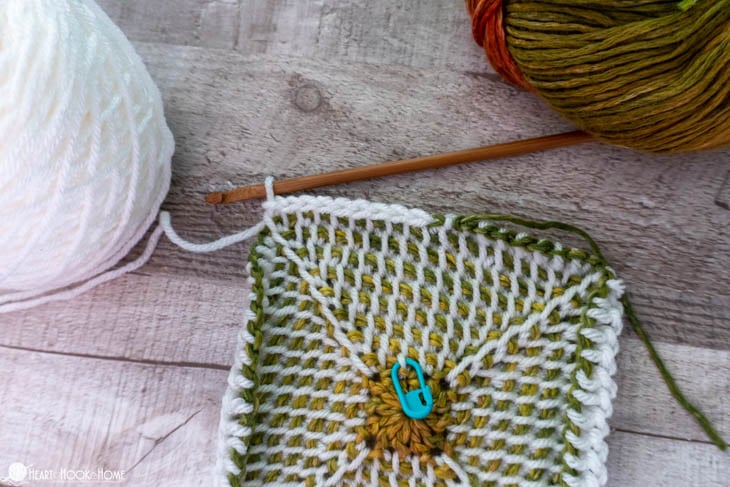
To make Tunisian Crochet Granny Squares you’ll need two balls of yarn – one for the Forward Pass and one for the Backward Pass. Since this uses the Tunisian in the Round method, you’ll also need a double ended crochet hook.
To get these gorgeous color changing effects you’ll want to use a solid color yarn for Color A (the Forward Pass, white in this tutorial) and a contrasting yarn color for Color B (the Backward Pass).
Before getting started on your first Tunisian Crochet Granny Square, you’ll want to check out my Ultimate Guide to Tunisian Crochet. This is a free, comprehensive, and DETAILED guide to all things Tunisian Crochet. If you love what you find, I invite you to sign up for the free 14 week course with the Tunisian Basics Crochet Along, after which you’ll have a gorgeous blanket.

If you are not brand new to Tunisian Crochet but could use some brushing up or would like to further your skills, I encourage you to sign up for the free 6-week long Advanced Tunisian Crochet Along. There you’ll learn how to Tunisian Crochet in the round, how to fix dropped stitches both worked flat AND in the round, changing colors, increasing and decreasing, and more. Whew!

Now that we know what we’re getting into… let’s learn how to make a Tunisian Granny Square step-by-step.
How to make a Tunisian Granny Square:
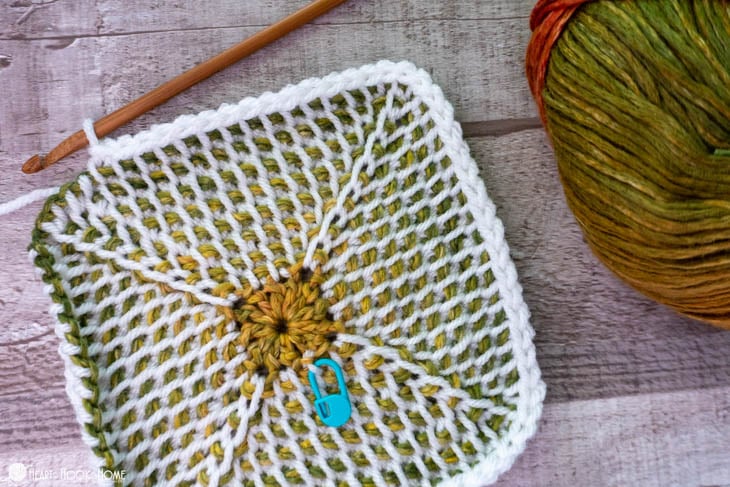
As in traditional Granny Squares, Tunisian Granny Squares increase at each of the four corners every round. This grows the square proportionately until the desired size is reached. For this square tutorial a yarn over = an increase.
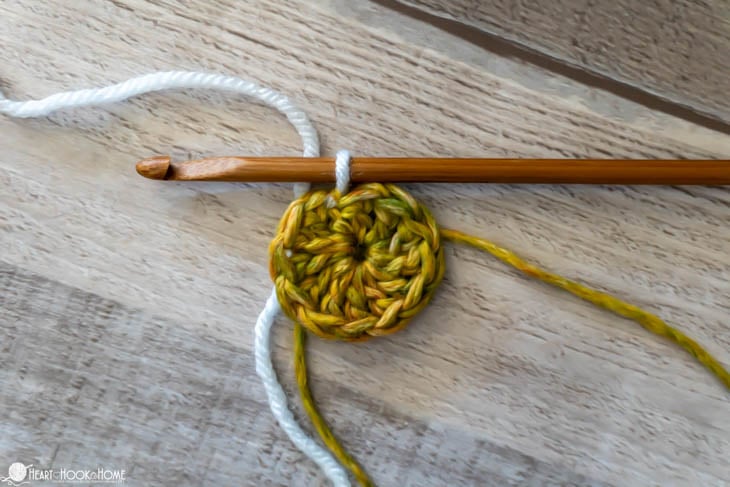
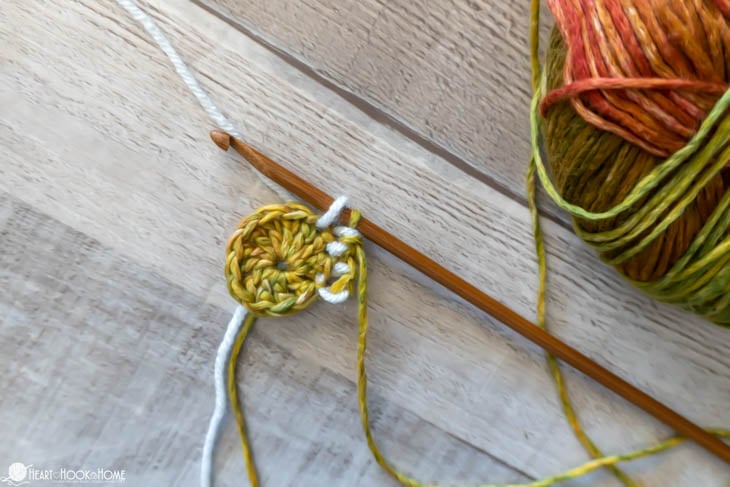
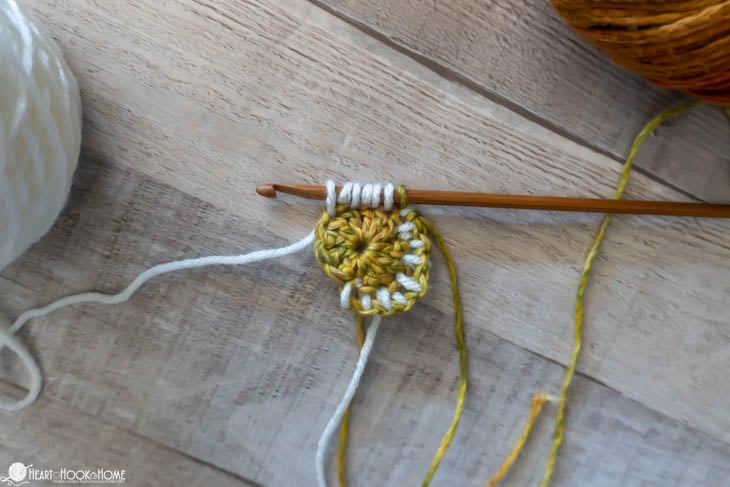
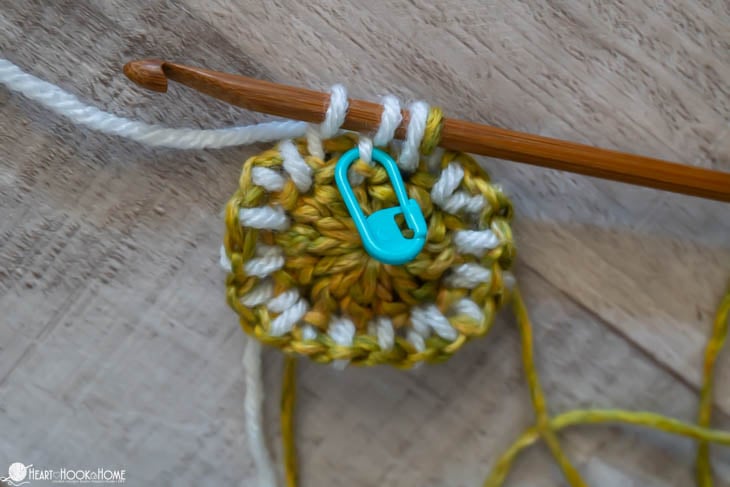
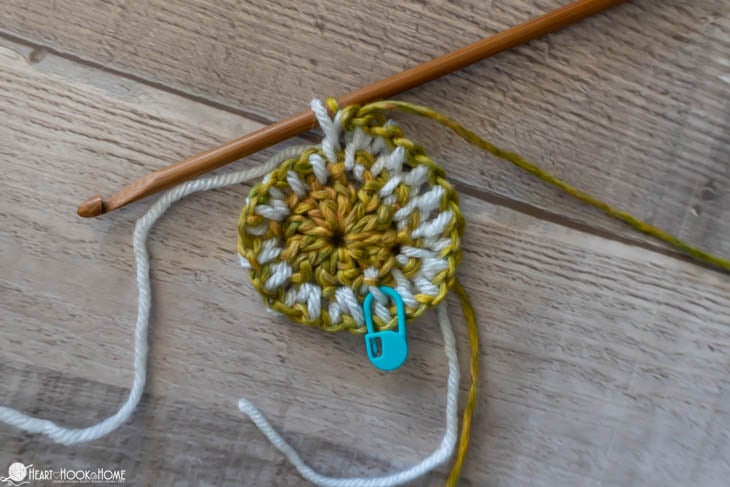
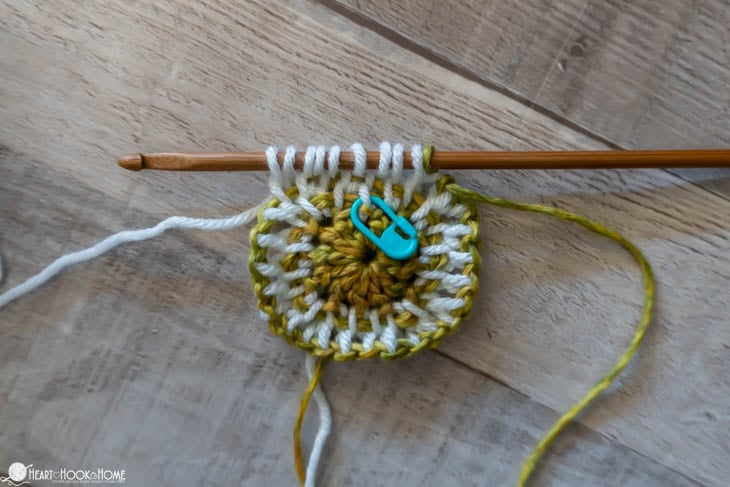
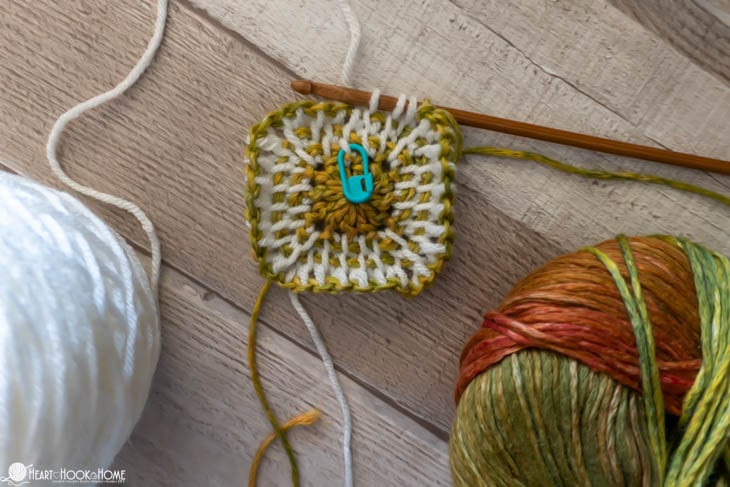
To start, make a magic circle using Color B. Chain one and make 12 double crochets in the circle. Pull tight. Join to the top of the first stitch made using Color A.
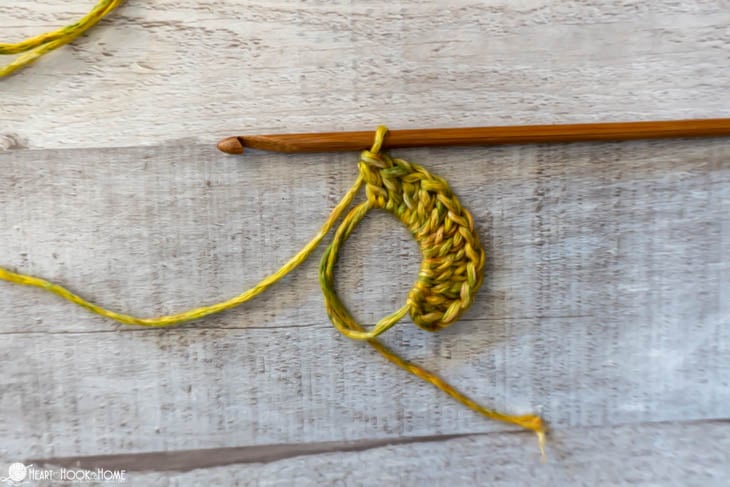
Remember that in Tunisian crochet the loop currently on the hook counts as stitch number one.
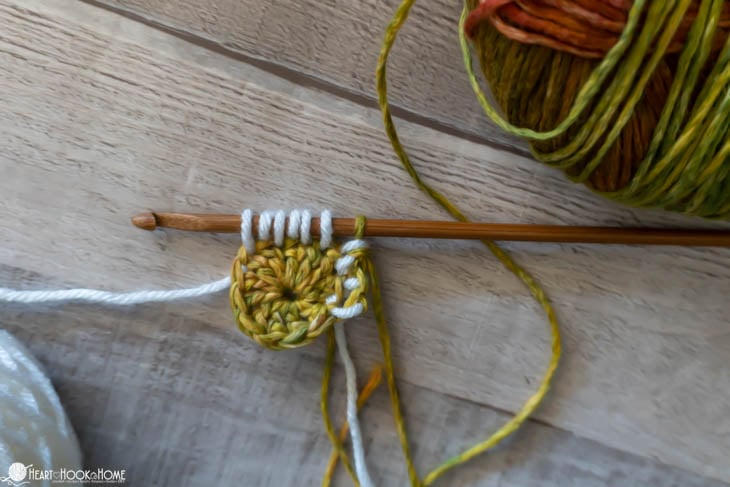
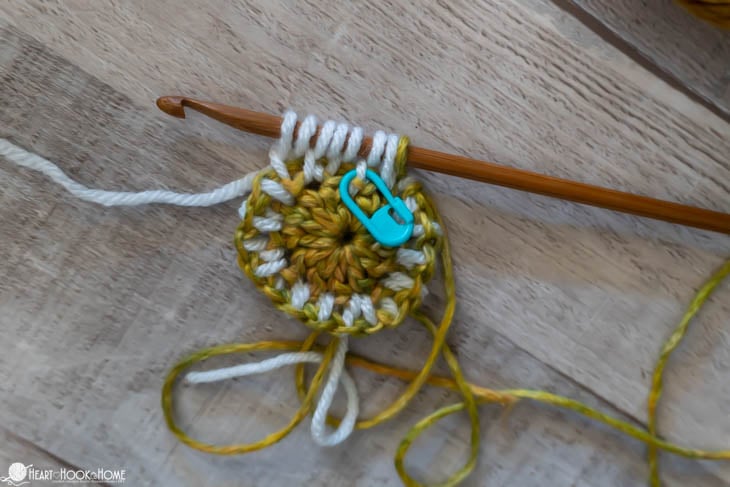
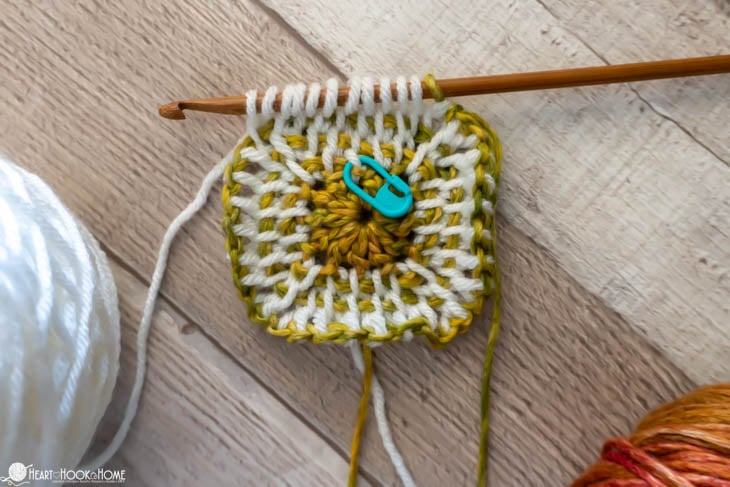
Round 1: YO pull up loop in next st, YO pull up loop in next st. Knock these sts off using the Backward Pass. (Side one made)
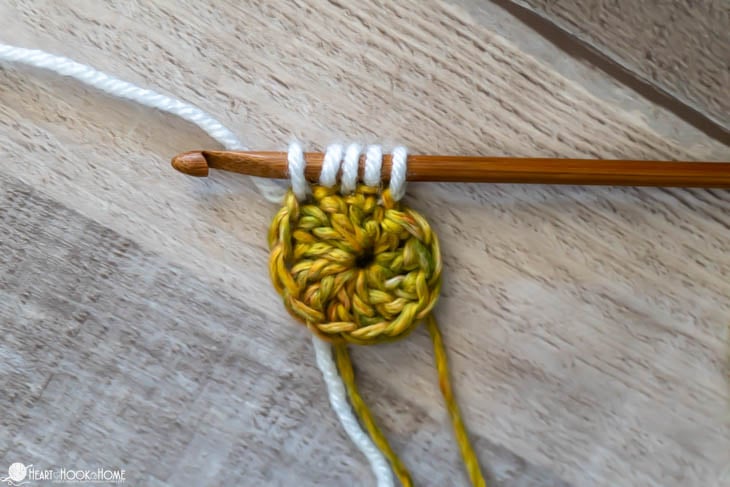
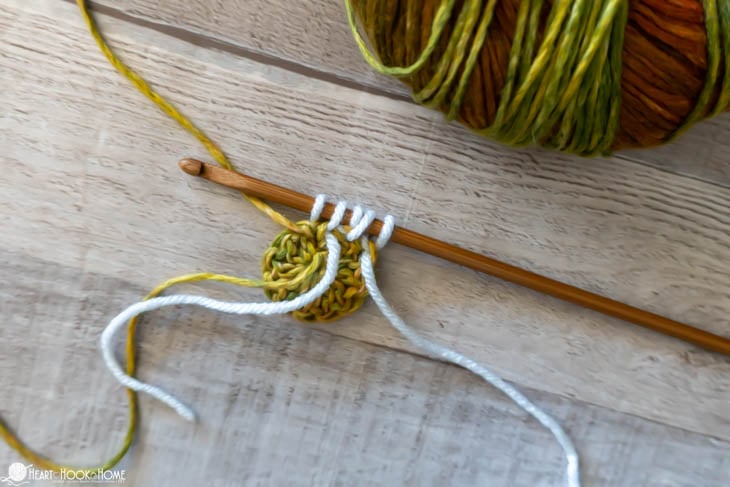
TSS in next st, YO, pull up loop in next st, YO pull up loop in next st. Knock these sts off using the Backward Pass. (side two made)
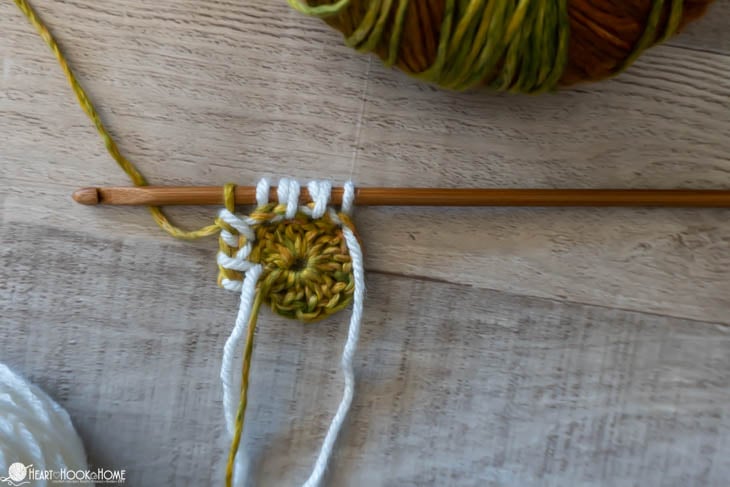
TSS in next st, YO, pull up loop in next st, YO pull up loop in next st. Knock these sts off using the Backward Pass. (side three made)
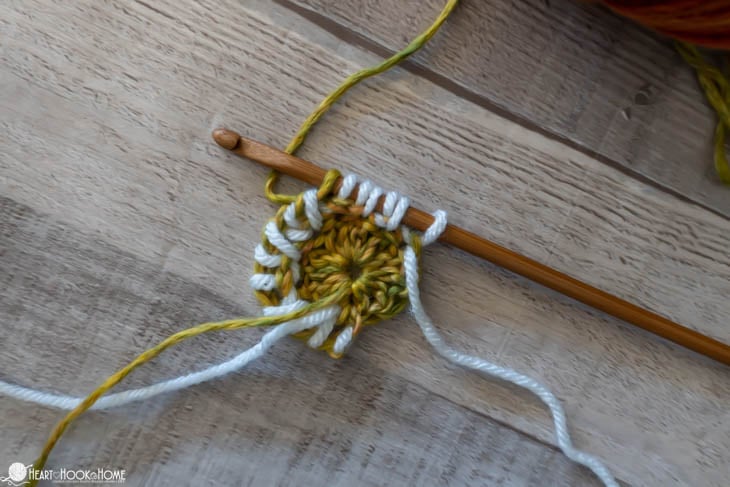
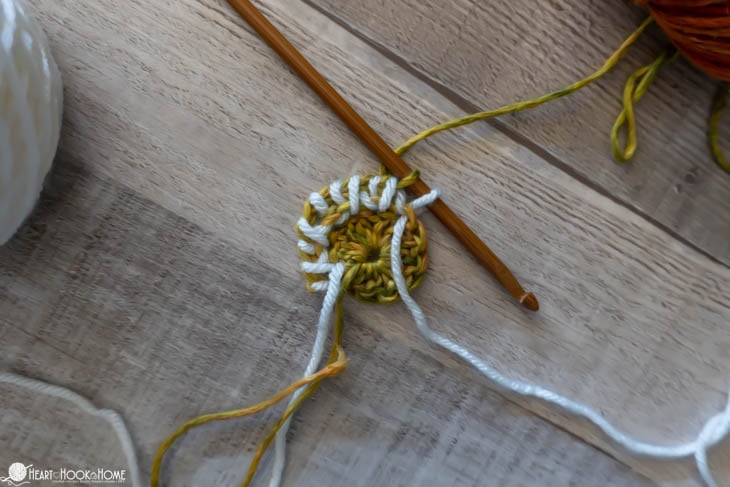
TSS in next st, YO, pull up loop in next st, YO pull up loop in next st. Knock these sts off using the Backward Pass. (fourth side made)
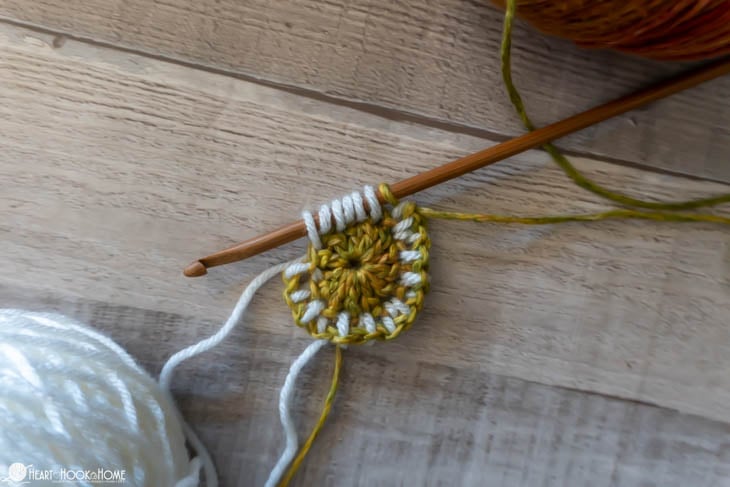
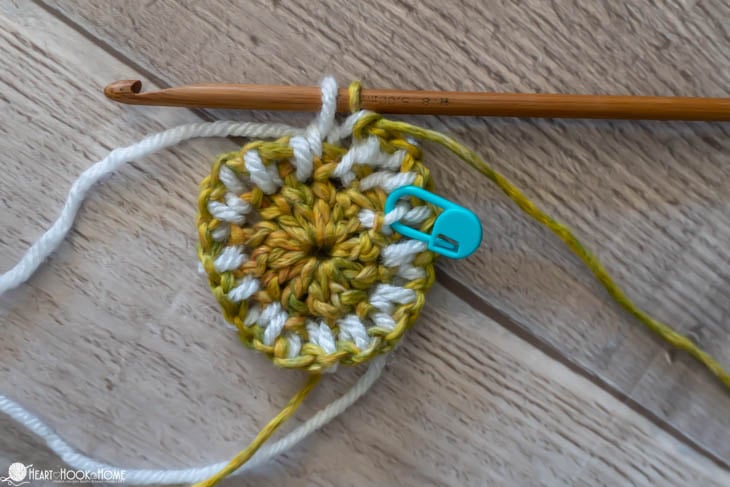
At the end of Round one you should have 20 white loops.
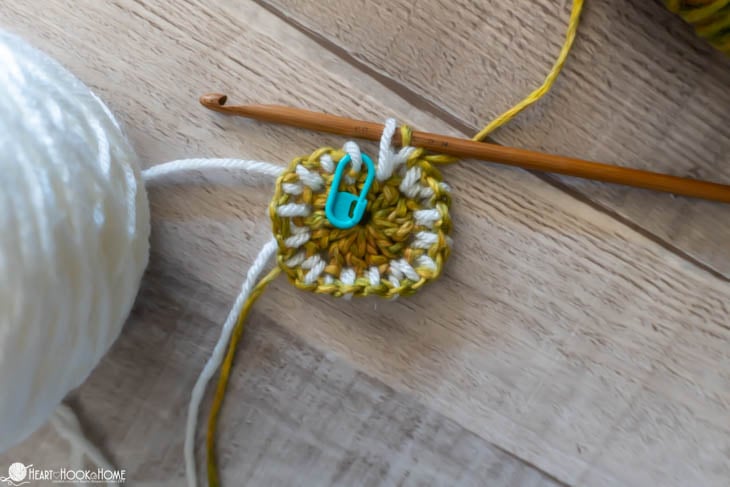
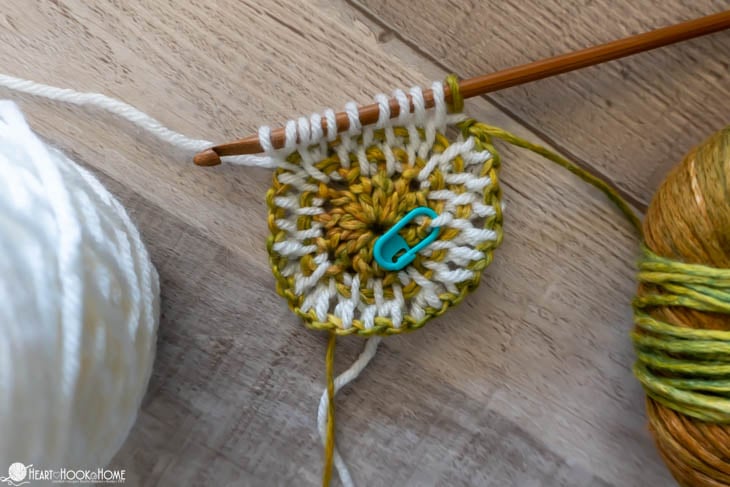
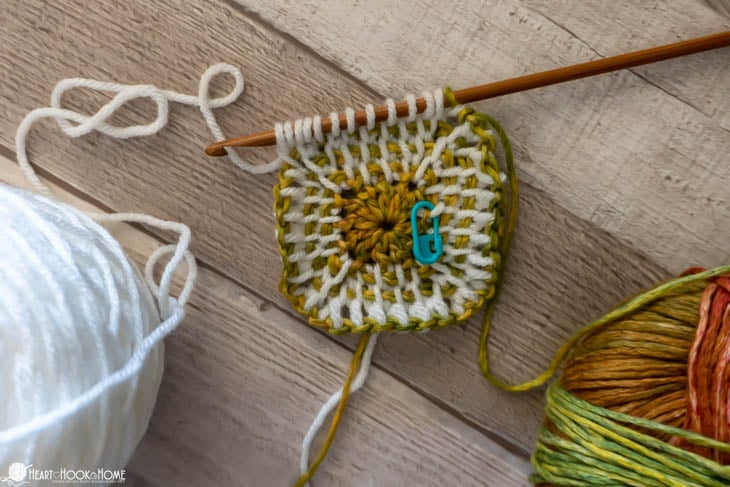
*before you go any further mark the first stitch of round 1 with a stitch marker.
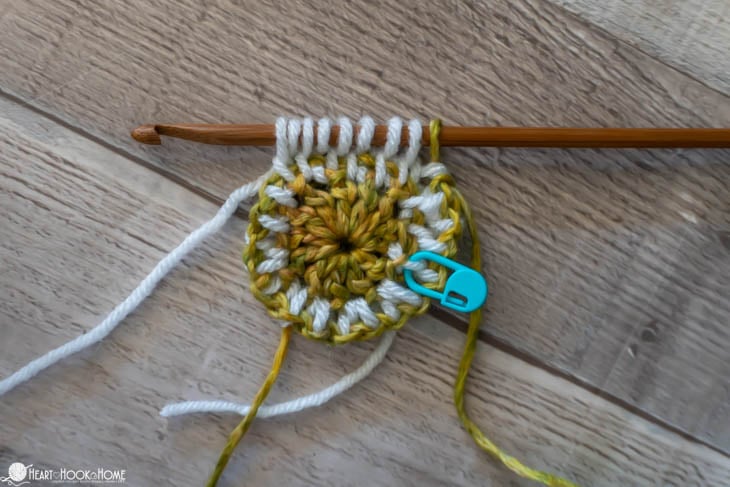
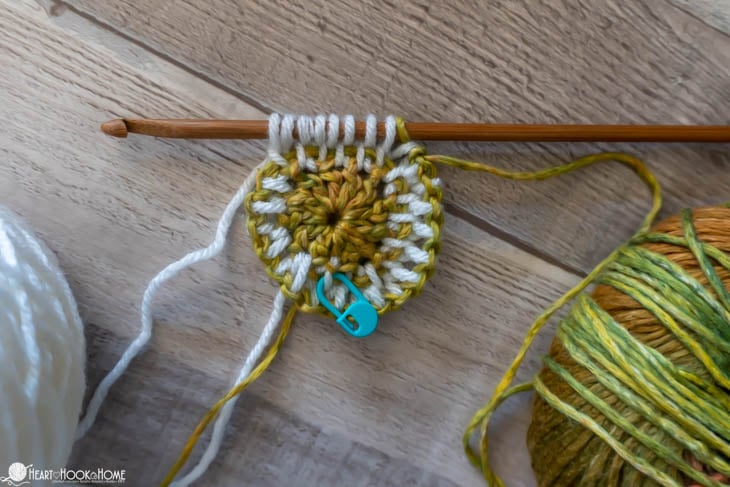
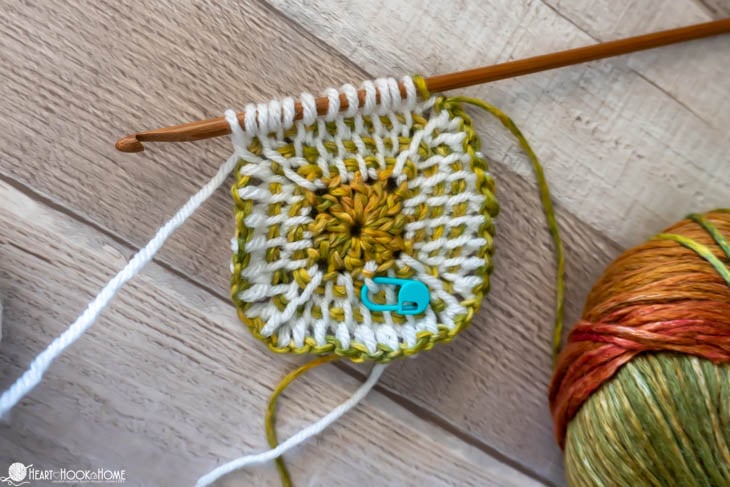
Round 2: TSS in next 2 sts, YO, TSS, YO, * TSS in next 4 sts, YO, TSS, YO * repeat between * * two more times, TSS in final 2 sts. (28)
Wanna save this for later?
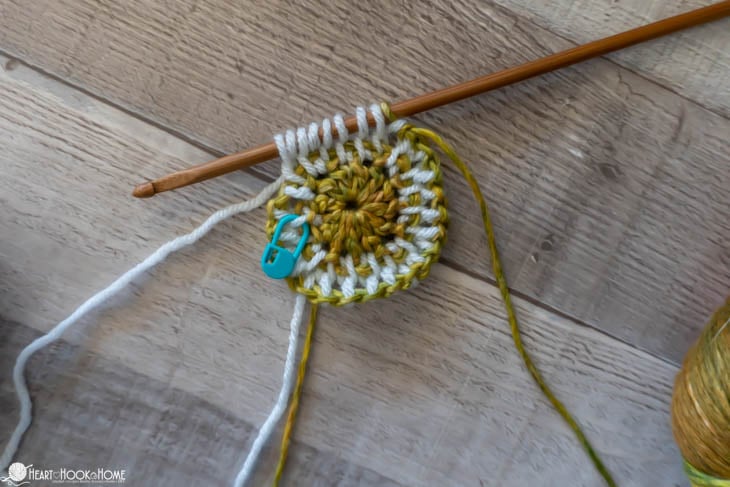
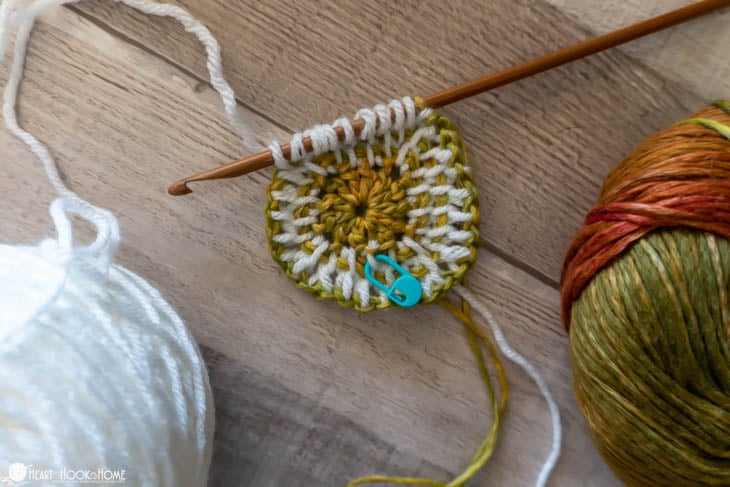
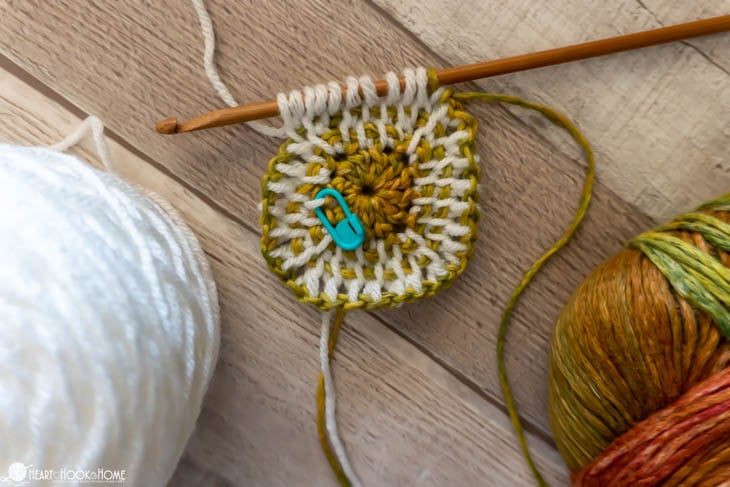
Round 3: TSS in next 3 sts, YO, TSS, YO, * TSS in next 6 sts, YO, TSS, YO * repeat between * * two more times, TSS in final 3 sts. (36)
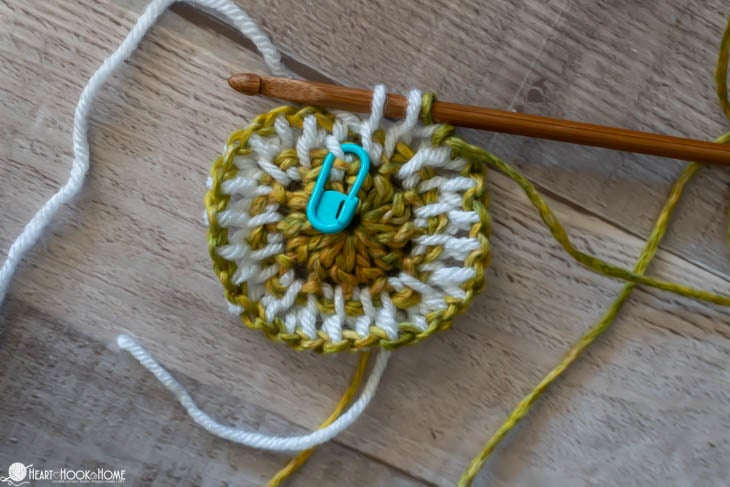
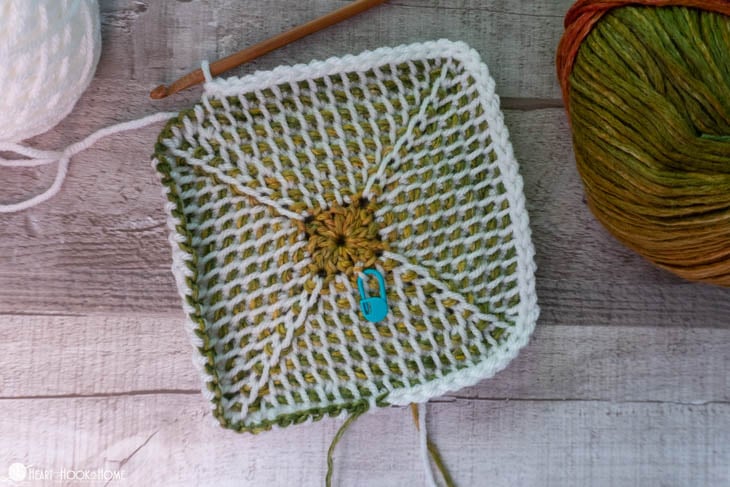
Round 4: TSS in next 4 sts, YO, TSS, YO, * TSS in next 8 sts, YO, TSS, YO * repeat between * * two more times, TSS in final 4 sts. (44)
Round 5: TSS in next 5 sts, YO, TSS, YO, * TSS in next 10 sts, YO, TSS, YO * repeat between * * two more times, TSS in final 5 sts. (52)
Round 6: TSS in next 6 sts, YO, TSS, YO, * TSS in next 12 sts, YO, TSS, YO * repeat between * * two more times, TSS in final 6 sts. (60)
Round 7: TSS in next 7 sts, YO, TSS, YO, * TSS in next 14 sts, YO, TSS, YO * repeat between * * two more times, TSS in final 7 sts. (68)
Round 8: TSS in next 8 sts, YO, TSS, YO, * TSS in next 16 sts, YO, TSS, YO * repeat between * * two more times, TSS in final 8 sts. (76)
When ready to fasten off, pull through final loop of Backward Pass yarn.
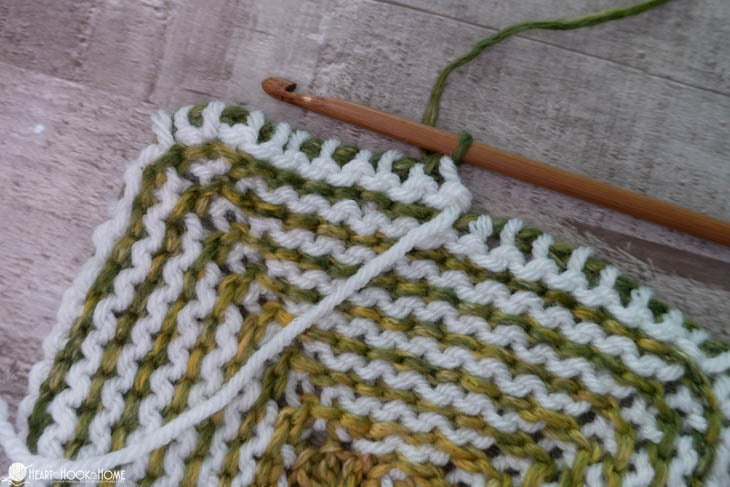
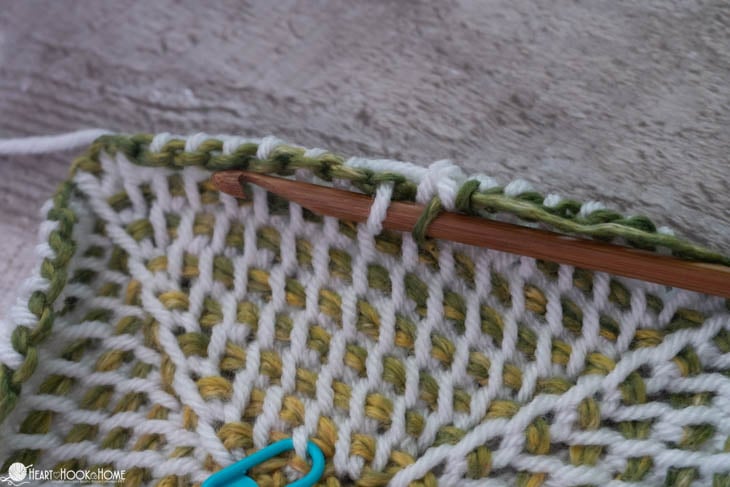
Looking at “right side” and using Color A, Tslst in each st around.
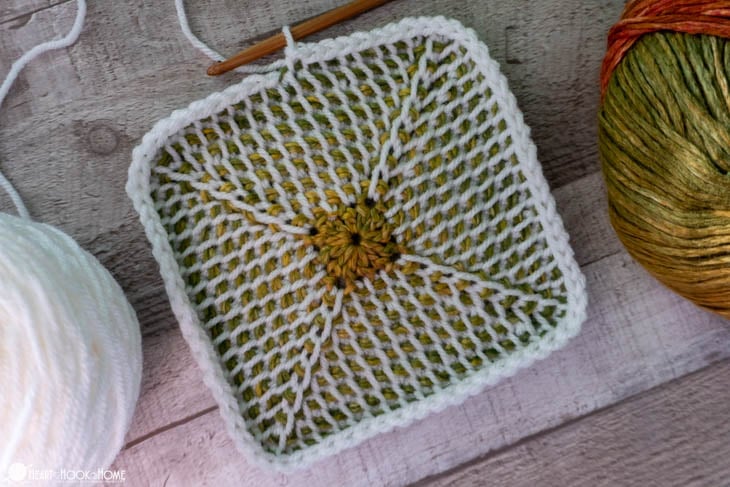
Fasten off using Invisible Join. Weave in all ends.
That’s it! I hope you love this new technique for making Granny Squares and hat you’ll share your finished project with me when you finish. Please tag @HeartHookHome across all social media.
More Tunisian Crochet patterns and tutorials:
Tunisian Hot Pad Free Crochet Pattern
Olivia Sweater: Free Tunisian Crochet Pattern
How to Fix a Dropped Stitch in a Round of Tunisian Crochet


